Design Guides: Best Computers For Graphics Design In this project, we will use a simple TV remote to make a simple home automation system. This TV remote will control all the appliances connected to the microcontroller board.
How to Use a TV Remote to Make Home Automation System?
Home Automation systems that are already available in the market, are very costly. We can use an Arduino board to connect different home appliances and control them using a TV remote. This will be very low in cost and an efficient way to automate the house. Now let us move a step ahead and start collecting information to start the project.
Step 1: Collecting the Components
The best approach to start any project is to make a list of components and going through a brief study of these components because no one will want to stick in the middle of a project just because of a missing component. A list of components that we are going to use in this project is given below:
Step 2: Studying the Components
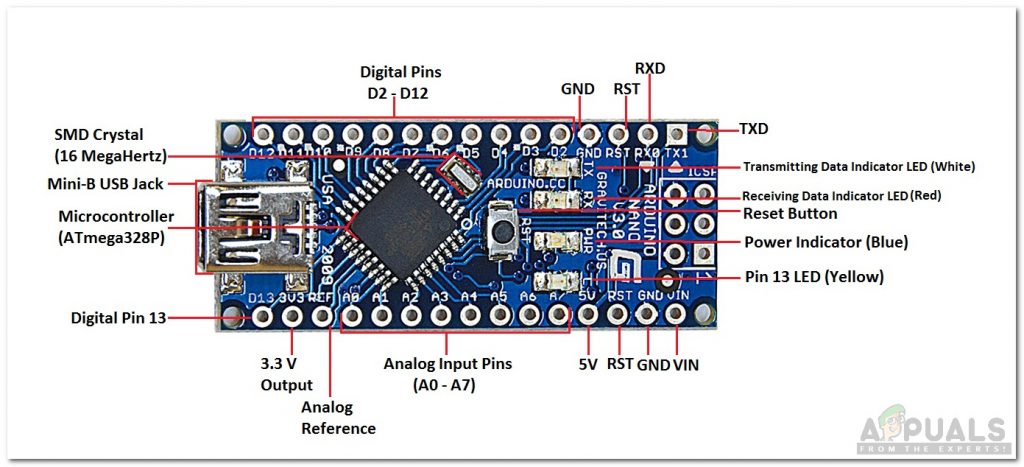
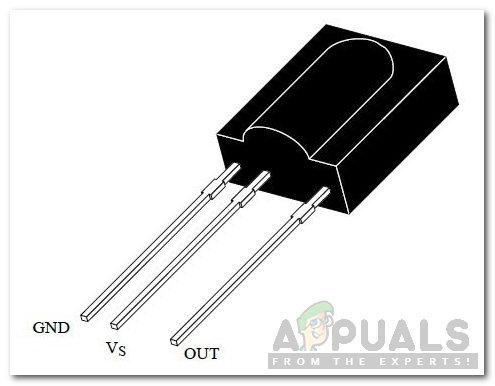
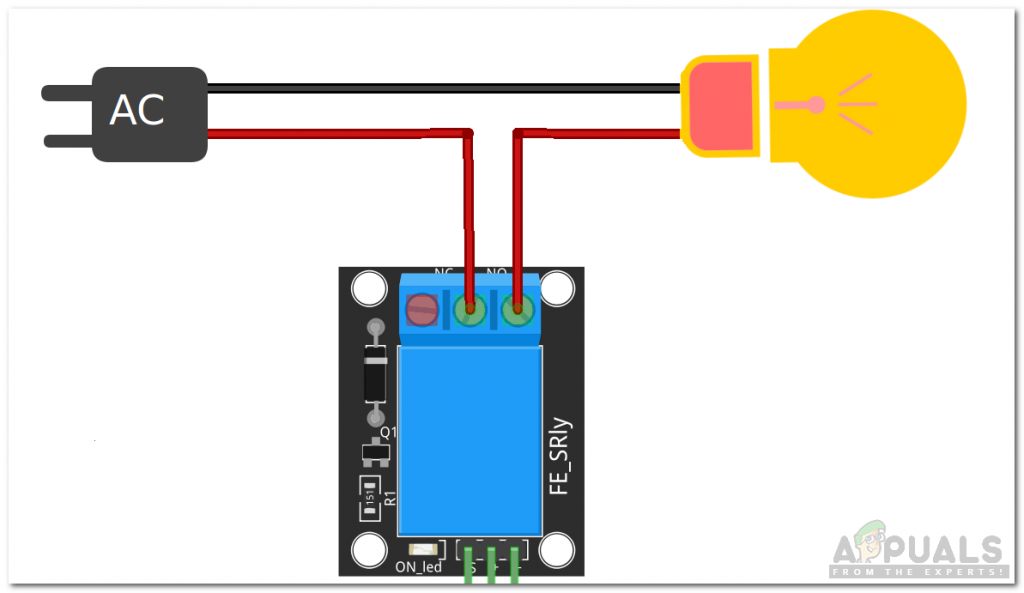
Now as we know what components we are going to use, let us study them briefly to make a better understanding of how our circuit works. Arduino Nano is a microcontroller board that carries out various operations in different circuits. It requires a C Code that tells the board what tasks to perform and how. It has 13 digital I/O pins which mean that we can operate 13 different devices. If you want to control more than 13 devices, use Arduino Mega. TSOP 1738 is an IR module for Remote Controles. It has a carrier frequency of 38kHz. It consists of a photodetector that detects the signal and then demodulates it. Its output is directly used by Arduino or any other microcontroller board. A relay module is a switching device. It works in two modes, Normally Open (NO) and Normally Closed (NC). In NO mode, the circuit is always broken unless you send a HIGH signal to the relay through Arduino. NC mode wors the other way around, The circuit is always complete unless you switch on the relay module. Make sure you connect the positive wire of your Electrical Appliance to the relay module in the way shown below. A standard TV remote control has a power button and all the numerical keys on it. These numerical keys will be used for the switching of the electrical appliances.
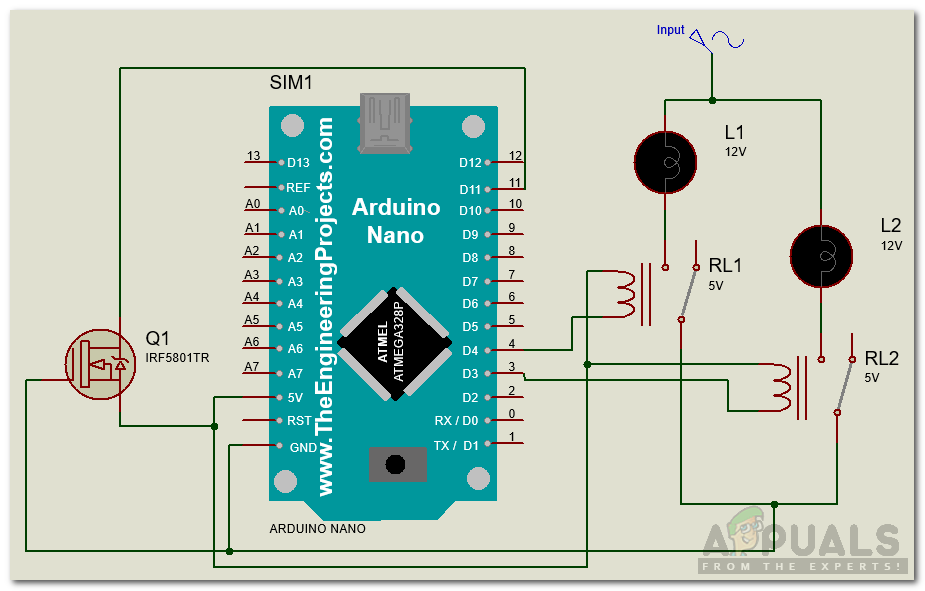
Step 3: Making the Circuit
Now as we know how all the components work, let us move ahead and start making the circuit.
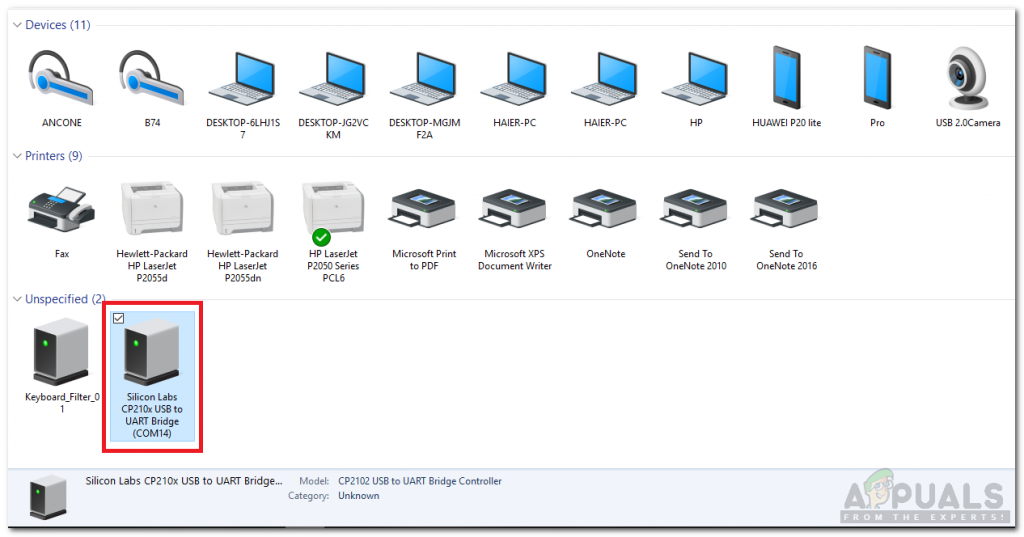
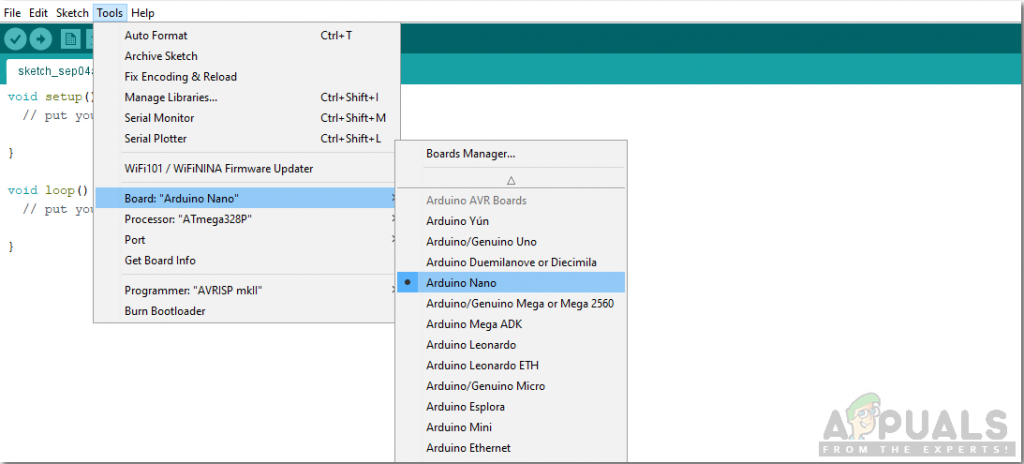
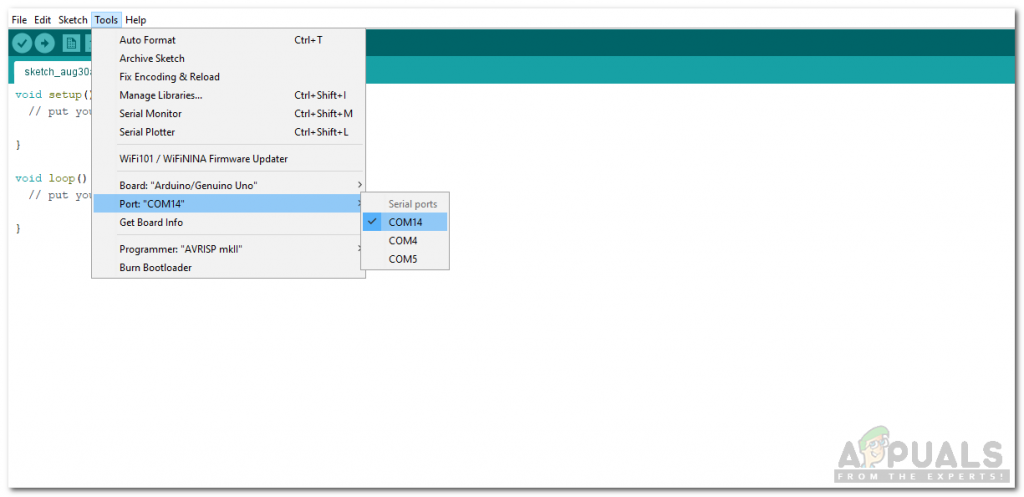
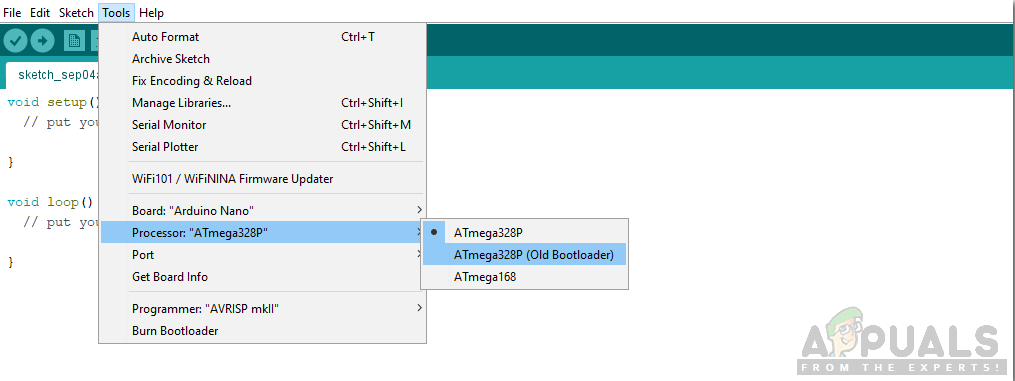
Step 4: Getting Started with Arduino
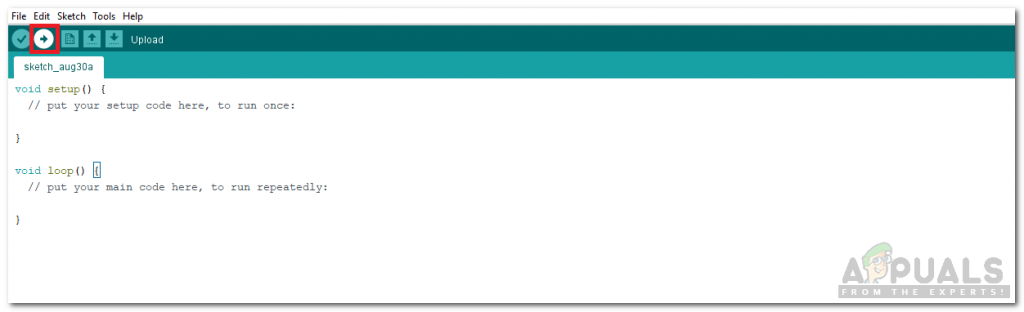
If you haven’t worked on Arduino IDE before, don’t worry because a step by step to set up Arduino IDE is shown below. Click on the download button to get the code.
Step 5: Code
The code is very easy to understand but still, it is briefly described below.
- void setup() is a function in which we initialize the INPUT or OUTPUT pins. This function also sets the baud rate by using Serial.begin() command. Baud Rate is the communication speed of the microcontroller.
- void loop() is a function which runs repeatedly in a loop. In this loop, we write a code that tells the microcontroller board what tasks to carry out and how.
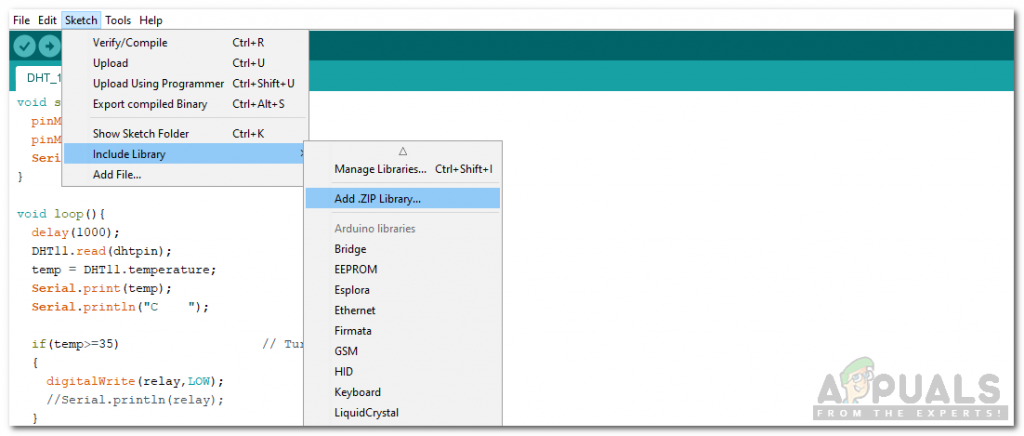
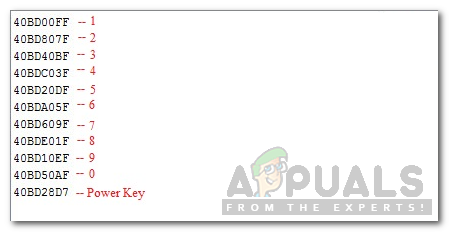
- When we send data from the TV remote, Arduino needs to decode this data. For this, we have included a special library #include <IRremote.h>. A function in this library will be used to decode the data of each key, sent from the remote. The above code is reading the values sent from the remote and decoding it to its corresponding HEX value. This code is taken from the examples of the IRremote library in Arduino IDE. This code is also attached in the download link by the name test.ino provided above. The output of this function, when all the numeric keys are pressed, will be:
- In the code.ino attached in the above download link, pins of Arduino that will be used are initialized. In the void loop() function, when a button on the remote is pressed, the initially False condition is turned to True and the respective relay is switched on. If the same button is pressed again, It will toggle the boolean condition and switch the relay off. The power button will turn all the Relays on or off. This was the whole procedure to make a simple Home Automation System controlled by a TV remote control. Now, you can connect relay modules according to the number of your appliances and enjoy your own Smart Home Automation System.
How To Make Smart Home Automation System Using ESP32 Module?How To Design Voice Activated Home Automation?Using Hogar Controls: For Smart Home AutomationHow To Control Electrical Appliances At Home Using Arduino And 4 Relay Module?