This has brought to the problem of installing driver applications to manage the driver options. One such complaint is the updating of Realtek audio drivers which then installs the application to manage it. This application might not function properly in some systems. On tenforums.com, a user complained that: “I don’t want the Realtek audio drivers as it completely messes with my audio and also doesn’t correctly switch when I plug in headphones for example. It also doesn’t allow for the ‘speaker fill’ enhancement to be used when playing stereo content through surround sound. Windows itself does a far better job as opposed to Realtek. Every time I uninstall Realtek it automatically gets reinstalled. Sorry Microsoft, you don’t know best.” There have also been several complaints from Reddit users. Realtek drivers are sound drivers for your PC. The Realtek Audio Manager is supplied by Realtek and it allows you to manage your connection and improve sound stability and sound quality. Your motherboard may have an on-board sound built into it because of which you have the Realtek audio manager installed on your computer. However, it looks like Realtek Audio Manager doesn’t seem to work very well in Windows 10, thus generating a lot of complaints. It seems that every time windows finds that your Realtek drivers are not up to date, it updates them and gives you the Realtek Audio Manager application. Uninstalling the application from the uninstaller will just create a loop because doing that also uninstalls the latest sound drivers. For some people, the Realtek sound manager can be annoying and not actually work for them. If it unappealing to you, here is our guide on how to get rid of it and still have your soundcard working.
Removing Realtek Sound Manager
Method 1: Prevent Automatic Installation, Reinstall windows manually and Change the bit rate settings
The idea is to disable automatic installations and delete the already updated drivers. We will then install new drivers manually. Since the system is denied from making changes to the driver, it will now not be able to install Realtek Audio Manager.
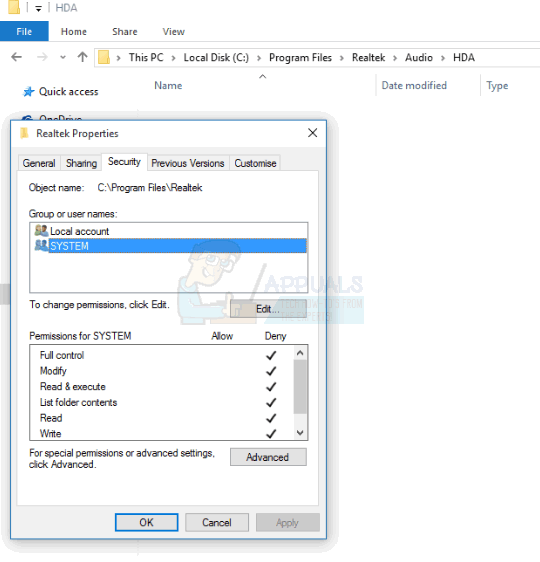
Method 2: Uninstall Realtek Audio Manager, install new drivers and deny the system the permissions to the Realtek system folder
This method will reinstall the drivers back to the drivers that were installed before Realtek Audio manager was installed on your PC. On every restart/reboot Windows would try to install the driver, but fail because folder access was denied. It will instead re-install the Microsoft driver and continue with the boot (this information can be seen from the Event Logs). This might slightly extend the boot time.
Method 3: Roll back drivers
Rolling back your driver will install the driver that you were using before the Realtek Audio Manager got installed. Simply:
Windows 10 remembers this action and no longer tries to reinstall the driver.
Fix: Realtek Audio Manager won’t Open or Cannot find Realtek Audio ManagerHow to Stop Windows from Automatically Installing Outdated DriversFix: Realtek Drivers Causing Crackling Audio in Windows 11Windows 10 November Update Block Placed On Systems With Old Realtek Bluetooth…
