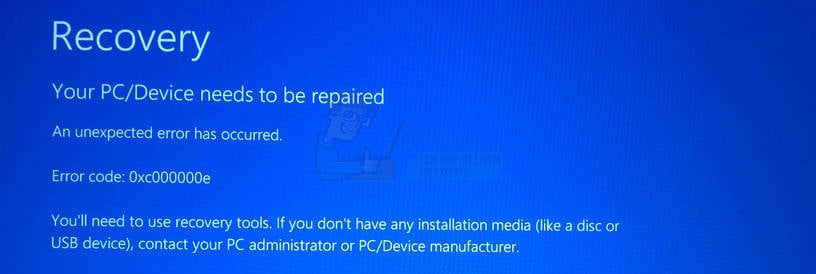
You will get this error when trying to boot your device, and you will be presented with a black screen that gives you instructions on how to repair your computer using an installation disk or a recovery drive. Unfortunately, having that recovery drive is the only way you will solve this issue, so you should get your hands on one before starting. If you don’t have it, it’s fairly easy to create one using Rufus or Windows Media Creation tool from any other PC or a Laptop.
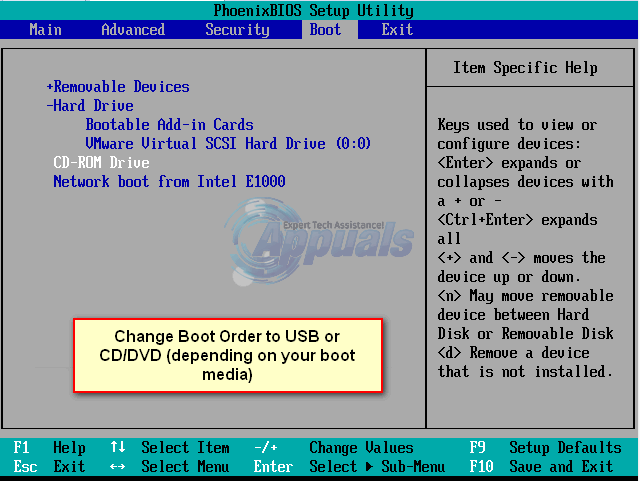
You will also need to boot into your BIOS to change the boot order and make your PC boot from the recovery drive instead of your hard drive. To do that, use the following steps:
Method 1: Rebuild the Boot Configuration Data
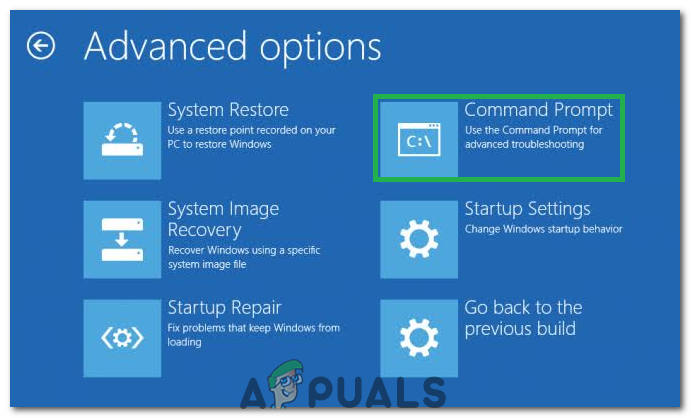
To do this, you will need to boot your computer from the recovery drive. If you’ve configured your BIOS with the steps above, you can do that by pressing any key once the prompt appears on your display. Once the computer is booted from the recovery drive, use the following steps to rebuild the BCD:
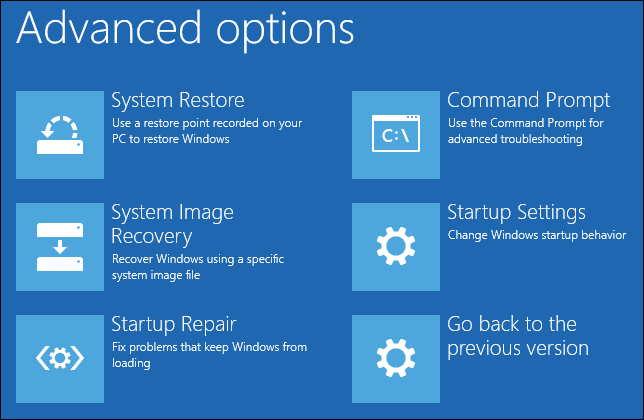
Method 2: Repair your OS with the recovery drive
This method will also repair your OS with the command prompt of the recovery drive, and you should be able to boot into Windows without facing the issue again. Boot from the recovery drive, and follow the instructions below. The only downside to these solutions is that they require a recovery drive, patience, and strong nerves. However, if you follow them as they’re described, you should fix the error you’ve been getting, and continue using your device like before.
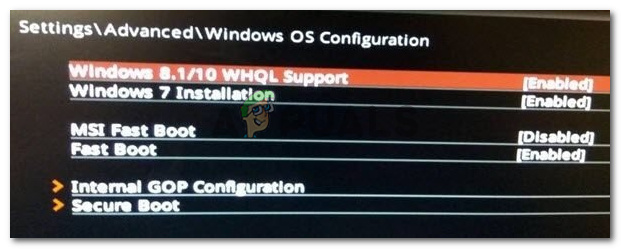
Method 3: Enable Windows 10 WHQL Support In BIOS
The Windows 10 WHQL Support setting exists in some of the OEMs. It has two basic functions: checks for signed drivers during the boot process and allows you to enable UEFI support. If you are using Windows 10, you need to enable it and then your computer can boot normally. However, if it is not selected, your computer may boot into error 0xc000000e. So, you can access BIOS to see whether the Windows 10 WHQL Support setting is enabled. If not, enable it to have a try. You should note that the Windows 10 WHQL Support setting is not supported in all computers. If your computer doesn’t have it, you can go to check whether the UEFI support is enabled on your computer. If not, you can enable it to see whether the error code 0xc000000e disappears. In order to enable it: If Windows 10 boot error 0xc000000e still appears after enabling the Windows 10 WHQL Support setting or UEFI support, you may need to reset the BIOS/UEFI configuration on your computer.
Method 4: Rebuild BCD via Easy Recovery Essentials
Easy Recovery Essentials is a one-click automated system repair feature that incorporates full repair and reconstruction of the BCD to resolve the “0xc000000e” error, even in cases where Windows won’t boot as a result of the error. The automated boot repair component of EasyRE will address all BCD-related issues, fixing the BCD, or recreating it from scratch using the correct encoding and path for the partition that is refusing to load properly. It will also mark the disk as online to ensure that it works correctly. Easy Recovery Essentials is guaranteed to fix the “0xc000000e” error automatically using its built-in Automated Repair option. EasyRE is currently available for Windows XP, Vista, 7, 8, 10 and it can be downloaded and created on any PC.
Method 5: Reset BIOS/UEFI Configuration
Some users said that their error 0xc000000e issue is solved by resetting the BIOS/UEFI configuration. So, you can consider trying this method to see whether this issue can be solved.
Step 1. Open BIOS Menu
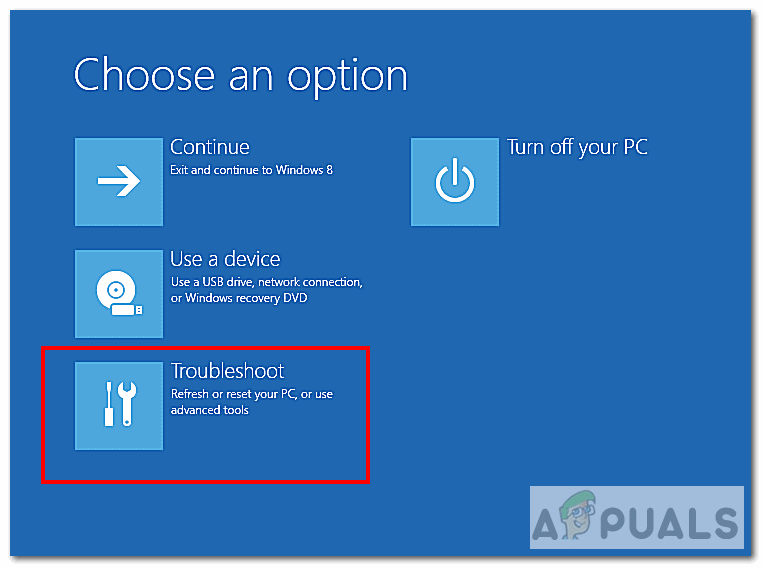
To reset BIOS to default settings, you need to access the BIOS menu and find the Default Settings option first. Windows 10 users can access advanced startup options Windows 10 and get into the BIOS menu. You can click Start -> Power, press and hold the Shift key, and click Restart button to reboot Windows into Windows Recovery Environment. Then click Troubleshoot -> Advanced Options -> UEFI Firmware Settings, and click Restart to enter into the BIOS settings screen. Alternatively, you can also restart your computer normally and press the required key in the startup screen to boot into the BIOS settings window. The hotkey is varied from different computer manufacturers, and it could be F12, Del, Esc, F8, F2, etc.
Step 2. Find the Setup Defaults Option
The name and location of the “Setup Defaults” option may be different from various computers. It generally calls like: Load Default, Load Setup Defaults, Load Default Settings, Load BIOS Defaults, Load Optimal Defaults, etc. Use the arrow keys on the computer keyboard to find the BIOS setup default option in the BIOS settings screen. You may find it in one of the BIOS tabs.
Step 3. Reset BIOS
After you find the Load Setup Defaults option, you can select it and press the Enter button to start resetting the BIOS to factory default settings in Windows 10. At last, you can press F10 to save and exit BIOS. Your computer will automatically reboot. If you need to change BIOS settings again in the future, you can follow the same instructions to access BIOS again to change it.
Method 6: Mark Boot Disk As Online
It is possible in some cases, that the disk that you have connected to the computer or the USB that you are trying to boot from has been marked as offline by the computer. Some computers tend to prevent extra applications, hardware, and other things from being able to run as soon as the computer starts because it allows for more convenient and fast startup experience. Therefore, in this step, we will be marking the Disk as online. You still need to use a bootable USB medium to do this job. We will show you a step-by-step guide here:
Method 7: Check your data cables, BIOS and drivers
Unplug all HDD data cables, and then plug them again. Revert to the previous drivers and BIOS settings if they were changed, or use “Restore factory settings” option in the BIOS. Make sure to write down all current BIOS settings that were previously selected, just in case it is required to switch back. If the error is caused by a change of the SATA disk controller’s mode in the BIOS or firmware, the fix can be as simple as entering the BIOS and toggling the SATA controller’s “mode” setting. The exact instructions differ from one manufacturer to the other, but the options will resemble what is shown in the screenshots below. To check the boot order, follow these steps:
Method 8: Boot Windows In Safe Mode
If above solutions didn’t fix the problem, then Start Windows into safe mode. This will start your PC with minimum system requirements, will not load startup programs, add-ons etc. And allow performing troubleshooting steps to fix Boot Error 0xc000000e: Before you enter the safe mode, you need to enter the Windows Recovery Environment (winRE). To do this, you will repeatedly turn your device OFF, then ON: Now that you are in the Windows Recovery Environment, you will follow these steps to take you to safe mode: Note: If you need to exit safe mode, simply restart your device, or:
Method 9: Check your disk with CHKDSK utility
If the hard drive has its file integrity compromised, it is possible to use built-in Windows CHKDSK utility to scan the disk and fix the file system errors.
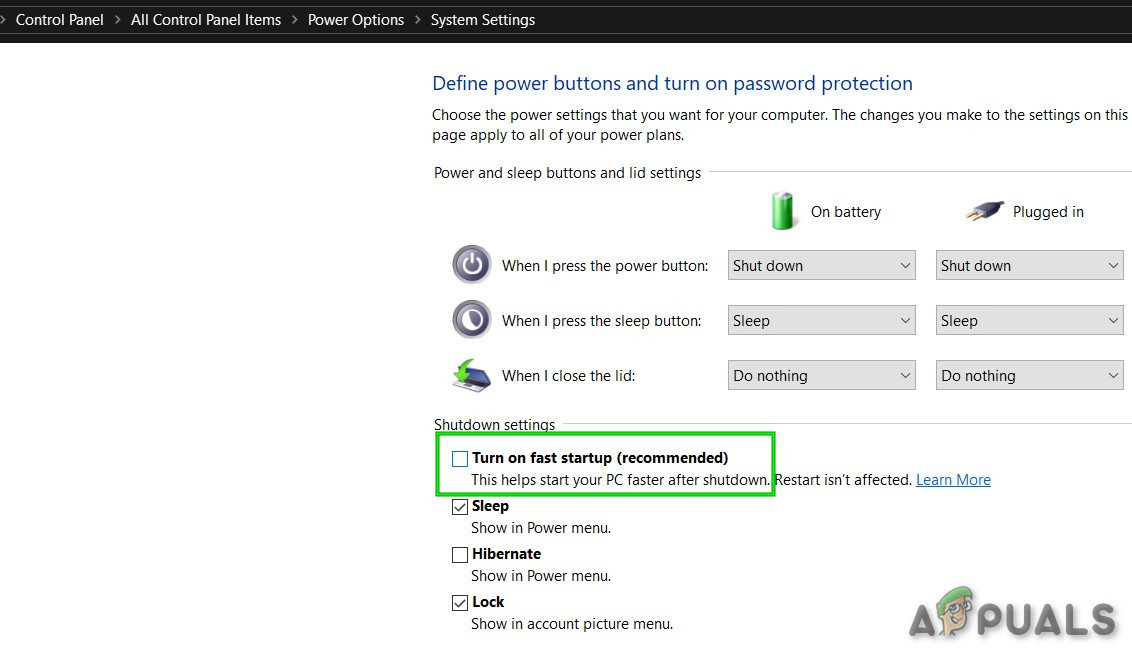
Method 10: Disable fast startup Feature
If your computer has been set up to use the Fast Startup feature, you might be getting this error message on your screen because of doing so. The Fast Startup feature is known to malfunction with some operating systems and hardware combinations. Basically, when enabled, the feature automatically sends some launch configurations to be stored in your RAM to allow for a faster startup as indicated by its name but this configuration data can sometimes be corrupted which can lead to this error on your computer. Therefore, in this step, we will be disabling it completely. For that:
Method 11: Repair Corrupted System Files
It also possible in some situations that certain system files might have been corrupted due to a storage failure or due to some other reason. Therefore, in this step, we will be performing a complete repair of the corrupted system files and then we will check to see if doing so fixes this issue. For that:
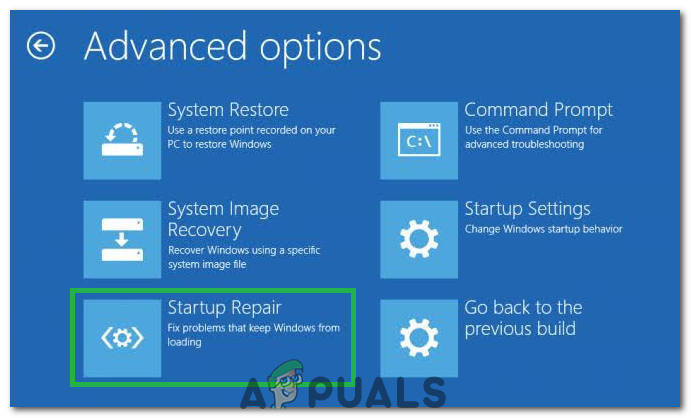
Method 12: Run Windows Startup Repair
Startup Repair is capable of diagnosing and fixing the found issues. For example, it can automatically scan system files, registry settings, configuration settings, etc. and try to fix the problem on its own. Startup Repair is especially useful when your computer is unbootable. Since your computer fails to boot, Windows can boot into WinRE automatically. While, if it doesn’t appear, you can interrupt the boot process three times in a row, and then the WinRE screen appears. Alternatively, if you have a bootable USB medium, you can also set your computer to boot from it and go to Repair your computer to enter WinRE. After you have successfully booted into the Windows Recovery Environment, click on the “Troubleshoot” option, and from there, select the “Advanced Options” screen. Inside the advanced options, select the “Startup Repair” button to successfully initiate the Startup Repairing process. Windows will begin to diagnose your computer automatically. When the process ends, your computer will restart automatically. You can wait to see whether it can boot successfully. Workaround: Make sure no additional devices are plugged in before jumping into the command line or Startup Repair, it’s best to try another restart with the fewest number of devices and external drives plugged into the computer. This will make sure that nothing that was recently added to the computer isn’t causing this issue. It would be best to unplug any recent USB drives, CDs, DVDs etc. This includes a memory card reader too. Make sure that all external drives and USB keys or USB jump drives have been disconnected, then try again.
Fix: Windows 11 Won’t Boot After Enabling Secure BootHow to Fix Boot Error 0xc0000098 on Windows 7/8 and 10Fix: “The Selected Boot Device Failed” Error on Windows?Fix: Windows Does not Boot after the Windows Hypervisor Platform is Enabled