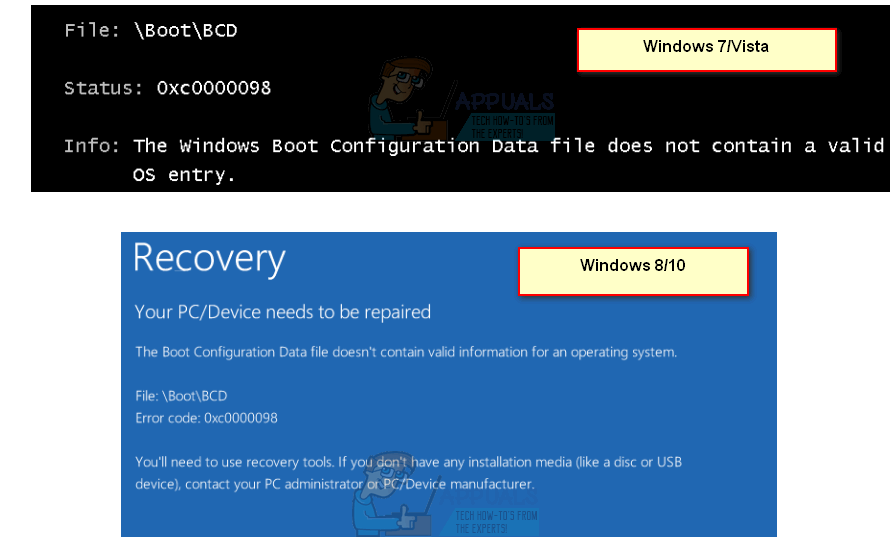
This is an issue that hit a lot of users, from Windows Vista up until Windows 10, and it can be frustrating for someone who doesn’t really see what is actually happening. No users are excluded, and you won’t be able to use your device with Windows until you solve the problem Fortunately, there is a solution that solves this issue and fixes the corrupted BCD file. After it, Windows will boot just fine and you’ll be able to continue using your system again. Keep in mind though, that you will need to use a Windows recovery drive, whether it’s an installation USB or a CD/DVD, you will need it, so get your hands on one before you start.
How to BOOT into BIOS to change Boot Order
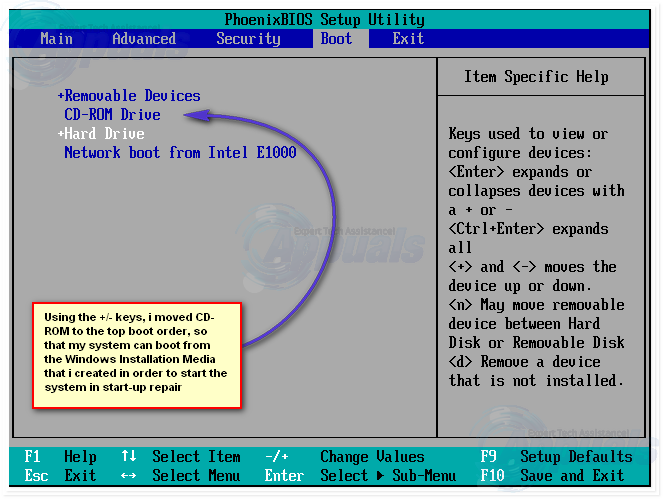
Before you proceed with the instructions given in this article, it is important that you read this para regarding changing bios and booting from usb or discs. Restart your computer. Enter your computer’s BIOS (or UEFI) settings as soon as it starts up. The key that you need to press to enter these settings depends on the manufacturer of your computer’s motherboard and can be anything from Esc, Delete or F2 to F8, F10 or F12. This is displayed on the post screen, and the manual that was supplied with your system. A quick google search asking “how to enter bios” followed by model number will also list results. Navigate to the Boot. You must know how to boot and change boot order since this will be needed to perform the solutions below.
Rebuild and repair the Master Boot Record, Boot Sector and Boot Configuration Data (Windows 7/8 and 10)
This step will require you to use the recovery drive mentioned earlier, so we will start there. If you do not have access to the recovery media, checkout this guide on bootable media using rufus (Windows 8 and 10) and for Windows 7/Vista see steps (here)
Method 2: Use Startup Repair
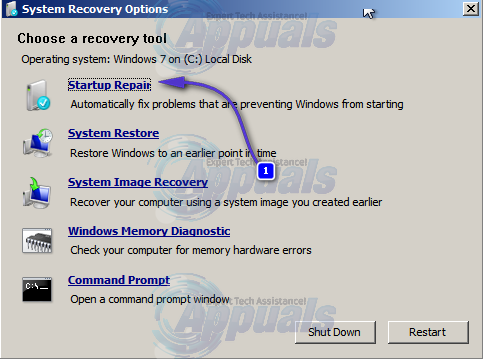
Another method that requires a Windows recovery drive, this will use the built-in tools to repair the Boot Configuration Data file.
Wait for the tool to scan your installation. If Startup Repair finds an error, it will attempt to fix it if possible, which should prevent the 0xc0000098 error from appearing again. You can also view detailed Startup Repair steps with pictures.
Method 3: Run the System File Checker utility to scan your system
The System File Checker (sfc) tool is used to automatically scan the system files of your computer, and try to repair them if needed. Replace C:\ with the letter of the drive where Windows is installed, and C:\Windows\ with the folder where Windows is.
Method 4: Run the CHKDSK utility
If the previous methods failed, you can try the CHKDSK utility, also a built-in tool that checks your disk and fixes file system errors. Replace C: with the letter of the drive where you have installed Windows. Even though Windows 10 has been out for over a year now, Microsoft still hasn’t managed to iron out all imperfections, and some hardware problems are manifested in a much worse manner than they should be. This is one of them, and even though it is advisable to check your hardware after you’ve fixed your system, by following the steps in the aforementioned method you should be able to boot into Windows again.
Fix: Windows 11 Won’t Boot After Enabling Secure BootFix: Dual Boot Windows 10 and Windows 11 Not WorkingHow to Create a Dual Boot for Windows and UbuntuTroubleshoot This PC Can’t Run Windows 11: TPM 2.0 and Secure Boot


