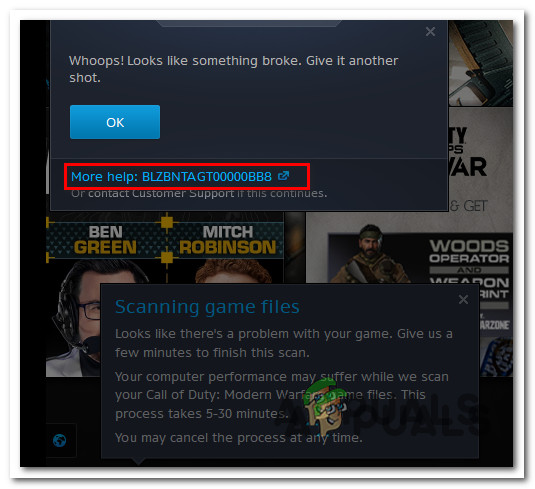
We’ve investigated this issue thoroughly and realized that there are actually several potential causes that might be responsible for this problem. Here’s a list of potential culprits that you should look for when experiencing this issue with the Battle.Net application: Now that we went over every potential cause that might ultimately prevent you from installing, updating, or launching a game through Battle.Net, let’s get to the actual fixes that other affected users have successfully used to resolve the BLZBNTAGT00000BB8 error code.
1. Delete everything except the data folder (COD titles ONLY)
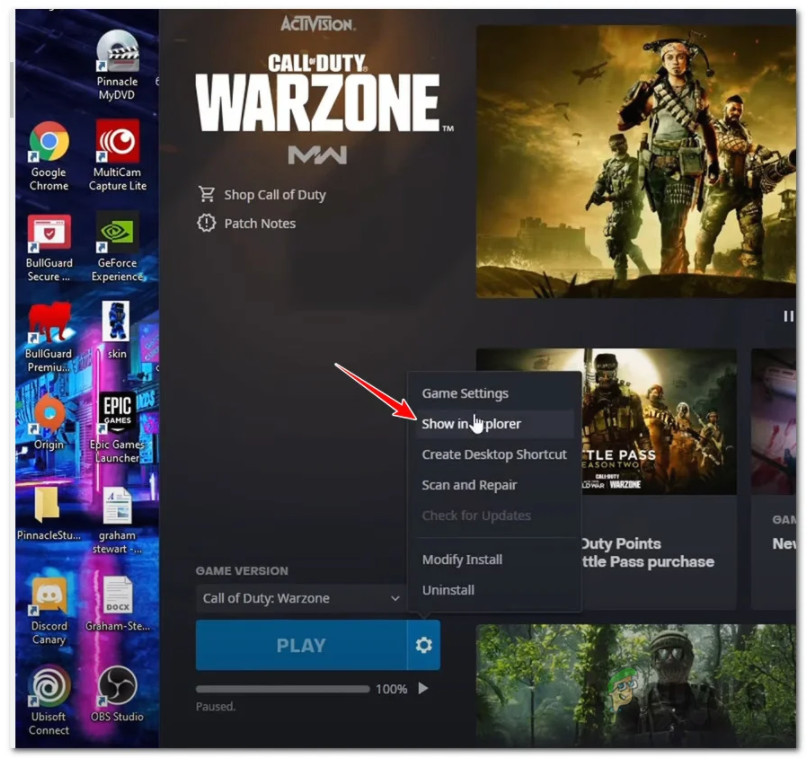
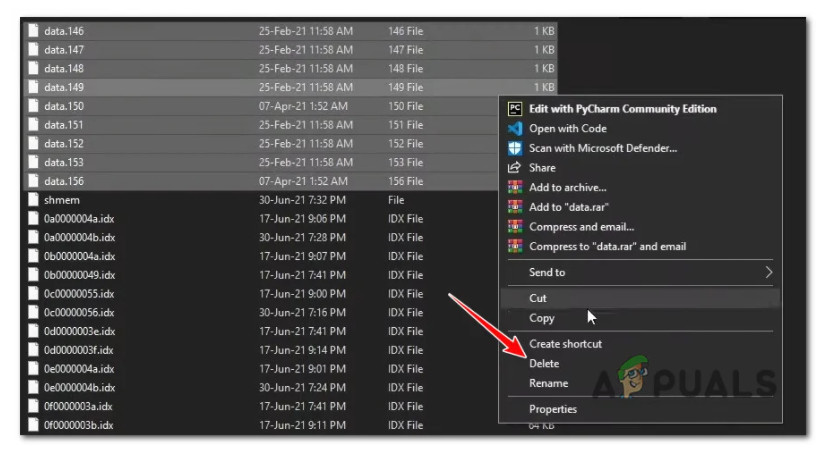
If you’re experiencing this issue with a Call of Duty Modern Warfare title, the first thing you should do is deploy a fix that’s been circulating online. It involves selectively deleting a series of game files with the purpose of forcing Battle.Net to trigger an integrity check and re-download the missing files. This method will save you from having to re-download the Call of Duty game – this is a big deal if you are using an ISP that limits the monthly bandwidth that is available to you. The instructions below will guide you through the process of deleting a series of lightweight COD files in order to force the integrity check without prompting the game launcher to re-download the entire game. Follow the instructions below for step-by-step instructions on enforcing this fix on PC: Note: The instructions below should work on every recent Windows version. If this method didn’t fix the issue in your case or you’re not experiencing the BLZBNTAGT00000BB8 error with a COD title, move down to the next potential fix below.
2. Update / Uninstall 3rd party security suite (if applicable)
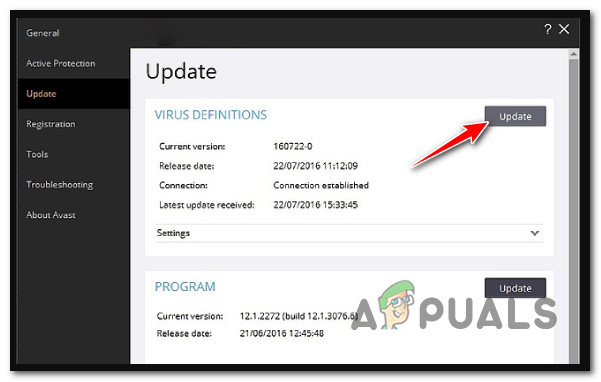
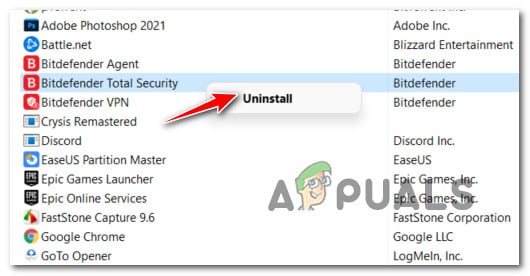
As it turns out, this BLZBNTAGT00000BB8 error code can also be caused by a false positive triggered by your 3rd party antivirus suite. Note: If you’re using Windows Security, skip this method and move directly to the next method below. There are several different 3rd party suites that are most commonly singled out for causing this problem – Comodo Antivirus and Avast are the most common. If you’re using a 3rd party antivirus and you suspect that it might be responsible for causing this problem, you should start by ensuring that you’re allowing your AV to use the latest available virus signatures. In case you have conditioned the installation of newly available virus signatures, access your AV settings and install any pending AV update that is currently available. Every AV interface is different, but you should be able to right-click on your AV suite icon inside the taskbar menu and choose Update / Update now. If this is not available, access the main interface and look for an option to install the latest available virus definitions. Once you’ve ensured that you installed the latest available virus signatures, reboot your PC and see if the Battle.Net BLZBNTAGT00000BB8 error is fixed once the next startup is complete. If the same kind of issue persists, chances are the false positive is still not patched with the latest virus definition. In this case (if the 3rd party AV is to blame), the only viable solution is to simply uninstall the problematic tool to get rid of the interference. Here’s what you need to do in this case: If the same kind of issue is still occurring, move down to the next potential fix below.
3. Ensure that your Internet connection is optimal
According to a few affected users, this problem is also sometimes associated with an unreliable wireless connection that is preventing the Battle.net launcher from downloading the required files. If this scenario is applicable and you’re experiencing this issue, there are a few connection optimization steps that you can deploy to fix the problem:
If possible, the most effective way to fix this connection problem is to plug your computer directly into your modem / router (instead of using a wireless connection)Turn down every other program that is eating away at your Internet bandwidth. Start by targeting download programs and P2P programs like uTorrent or BitTorrent if you use those.Avoid using cellular phones satellite or WiMAX internet connections since they are unstable and known to cause a lot of different connection issues with Battle.Net’s launcher.
Once you’ve applied these recommendations, attempt to install, update or launch the problematic game once again and see if the BLZBNTAGT00000BB8 error is now fixed. If the problem is still not fixed, move down to the next potential fix below.
4. Deploy a DNS flush
If the network optimization steps featured in the method above didn’t allow you to fix the problem, that doesn’t mean the issue isn’t related to a network element. It can be just as easily a problem facilitated by a bad DNS (Domain Name System) range that inhibits the connection between your local Battle.Net installation and the download server. Several affected users that we’re dealing with the same kind of problem have reported that they finally managed to fix the issue by opening an elevated Command Prompt window and running a command that’s capable of clearing the DNS cache. Note: This method was confirmed to be effective on both Windows 10 and Windows 11 computers that we’re dealing with the BLZBNTAGT00000BB8 error. Here is some step by step instructions that will allow you to clear your current DNS cache: If the problem is still not resolved even after you flushed your DNS cache, move down to the next potential fix below.
5. Disable any potential interfering proxies / VPNs
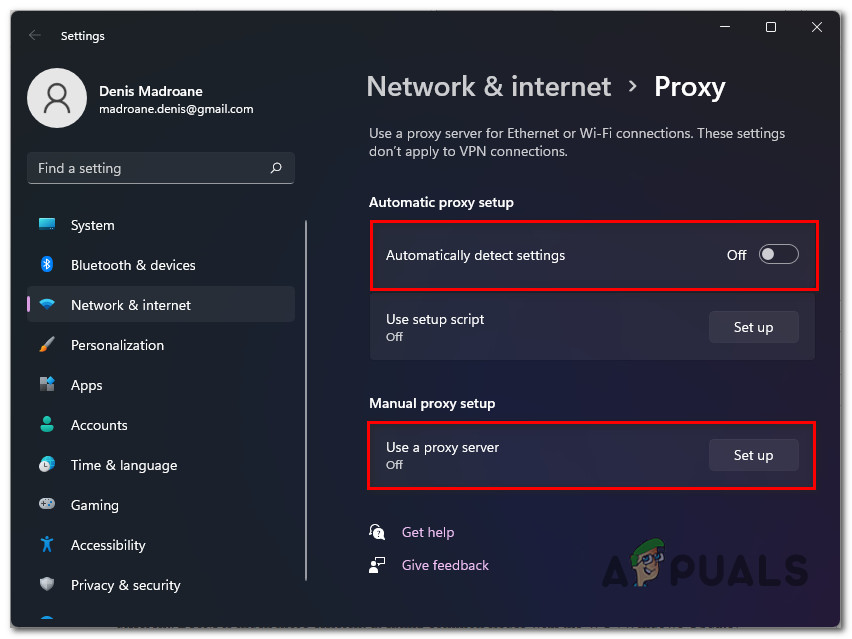
Keep in mind that another reason why you might be seeing this type of problem is an instance where the login module on Battle.Net (the one that needs to validate every new download) is being inhibited by a proxy or VPN software. If this scenario is applicable, you really don’t have any available fixes that will allow you to whitelist Battle.Net. The only thing you can do really is disabling the proxy or VPN interference. This particular fix was confirmed by several users that we’re all dealing with this problem. Of course, the procedure of doing so will be different depending on if you’re using a proxy or a VPN (natively or via a standalone program). There are actually 3 scenarios that we’ve covered below: Depending on the scenario that is applicable in your case, follow one of the three sub-guides featured below:
Disable a Proxy server
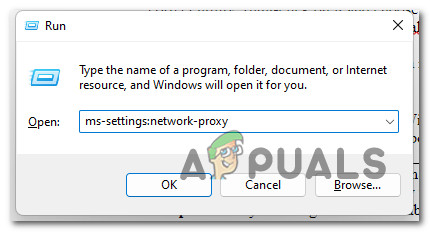
If you’re using a proxy server, all yu need to do is access the Proxy tab of the Settings menu and ensure that the use of a proxy server on this Windows installation is disabled. Note: The instructions below should work for both Windows 10 and Windows 11 computers. Here’s what you need to do: If the problem is still not fixed, move down to Method 6 below.
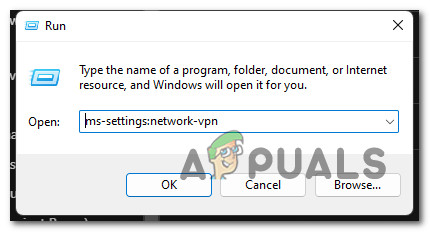
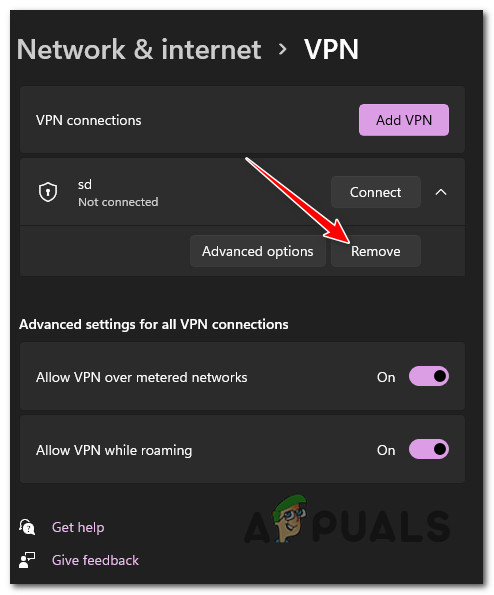
Disable a native VPN connection
If you’re using a VPN connection that is configured natively (via the VPN connection tab), you will need to disable the VPN connection by accessing the Network & internet connection menu. Note: If you’re using a standalone VPN app, follow the sub guide below (5.3) for the correct steps on disabling the VPN interference. Here’s what you need to do to disable a native VPN connection: If you’re still experiencing the BLZBNTAGT00000BB8 error when attempting to install or update a Blizzard or Activision game, move down to the next potential fix below.
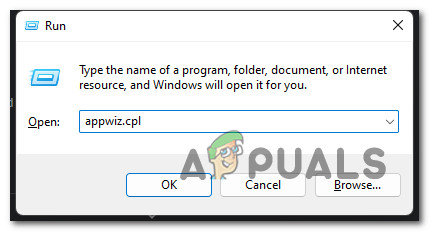
Uninstall the 3rd party VPN app
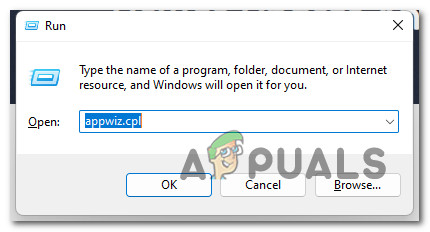
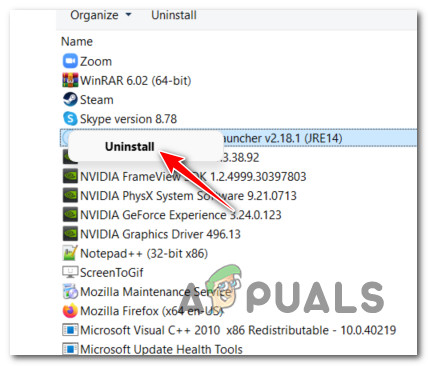
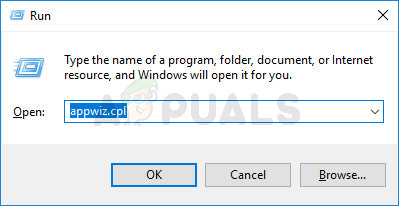
If you’re using a standalone VPN app, you will need to get rid of it by using the Programs and Features menu. Note: Keep in mind that just disabling it won’t do the job since the same kind of interference will likely linger around passively. Follow the instructions below to uninstall the standalone VPN app that you’re currently using: If you still end up seeing this error code when attempting to install or update a game via Battle.Net, move down to the next potential fix below.
6. Reinstall the problematic game
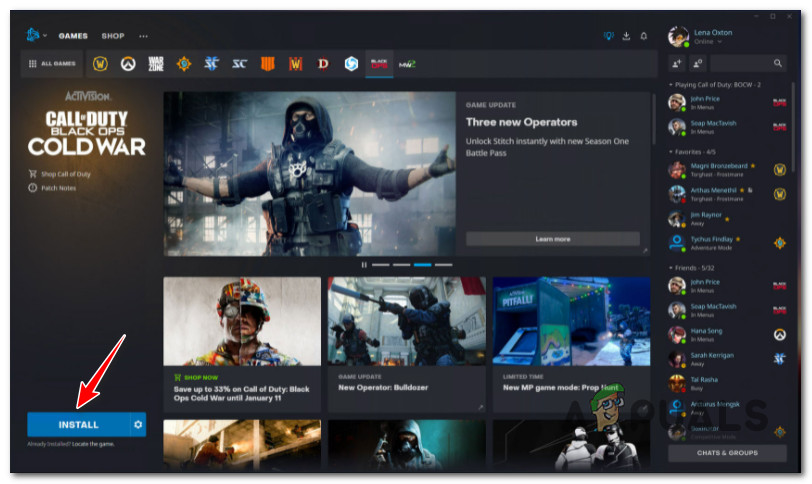
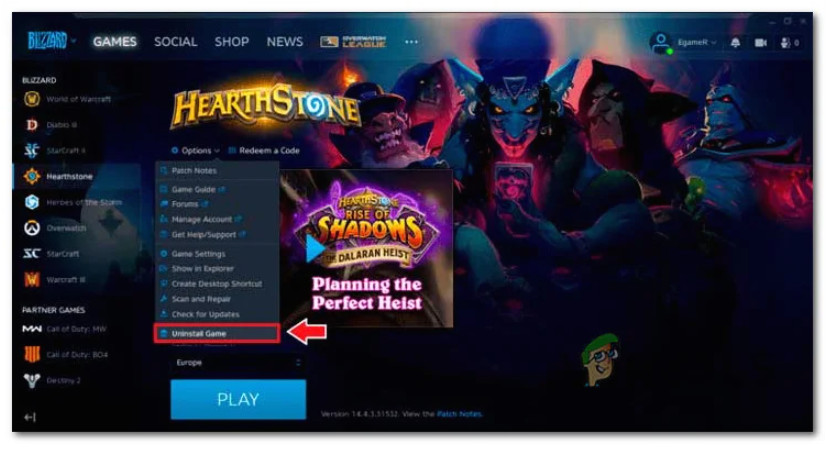
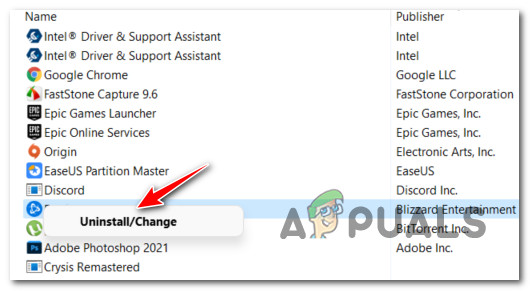
If you’ve come this far without a viable fix, the next thing you should do is troubleshoot against a potential issue having to do with game data corruption. A good start would be to attempt to uninstall the game via Battle.Net’s interface before trying to clean install it again. To do this directly from the interface of Battle.Net, select the game that’s triggering the BLZBNTAGT00000BB8 error and then click on the gear icon (near the blue Update or Install button). From the context menu that just appeared, click on Uninstall. Follow the remaining prompts to complete the uninstallation, then reboot your PC. After your PC boots back up, open the Battle.Net once again and install the game once again. There will be situations where you won’t be able to uninstall the game conventionally (directly using Battle.Net). In this case, follow the instructions below to uninstall the game manually and clear any remnant files that might be interfering with the next installation attempt: If the problem is still not fixed, move down to the next potential fix below.
7. Reinstall Battle.net after clearing remnant files
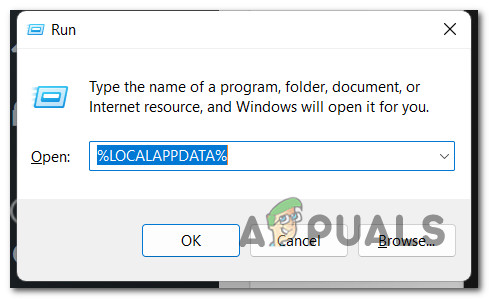
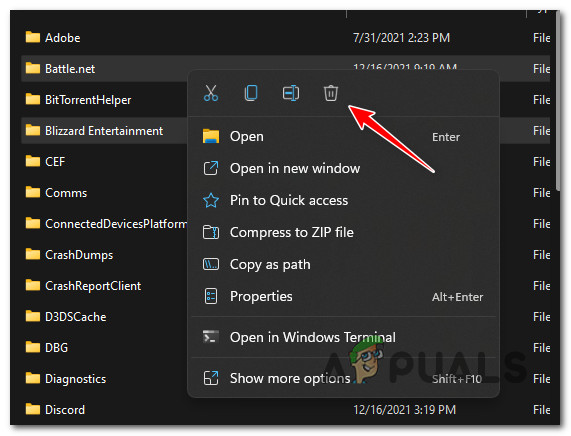
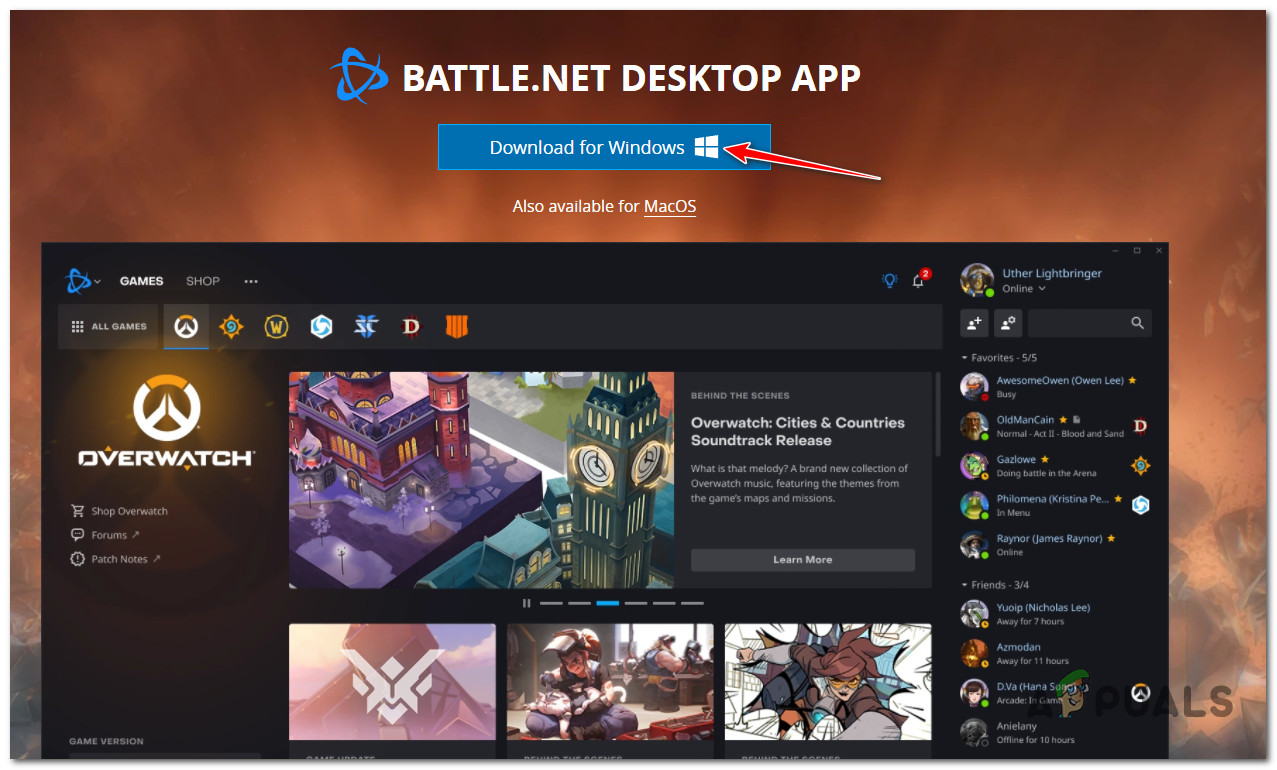
If the method above was not effective in your case, one final culprit that is most likely responsible is some type of corruption that is affecting the current installation of Battle.Net. Chances are the problem is not caused by a direct application file that’s affected by corruption, rather by a temporary file that is currently located in one of the various cache folders that Battle.Net uses. Several affected users have confirmed that they finally managed to fix the issue after reinstalling Battle.net after clearing out any remnant files that are likely responsible for the problem. Follow the instructions below to reinstall Battle.Net after clearing the remnant files:
How to Fix Error World of Warcraft error blzbntagt00000bb8How to Fix “Error Code: BLZBNTBTS00000011” On Battle.net?How to Fix “Error Code: BLZBNTBNA0000000C” On Battle.net?How to Fix “Error Code: BLZBNTBGS8000001C” on Battle.Net?
