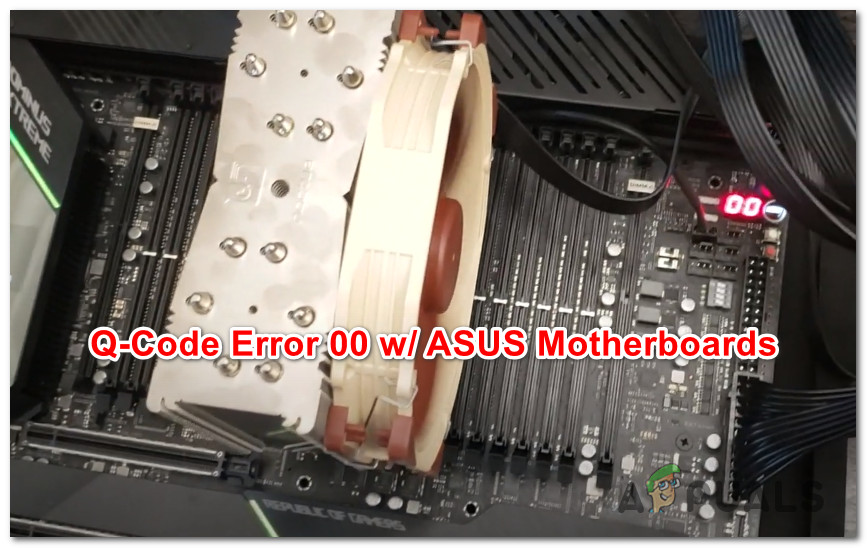
As it turns out, there are several different causes that might be causing this error code. To make things easier for you, we made a list with all the potential culprit:
Method 1: Resetting the CMOS Battery (if applicable)
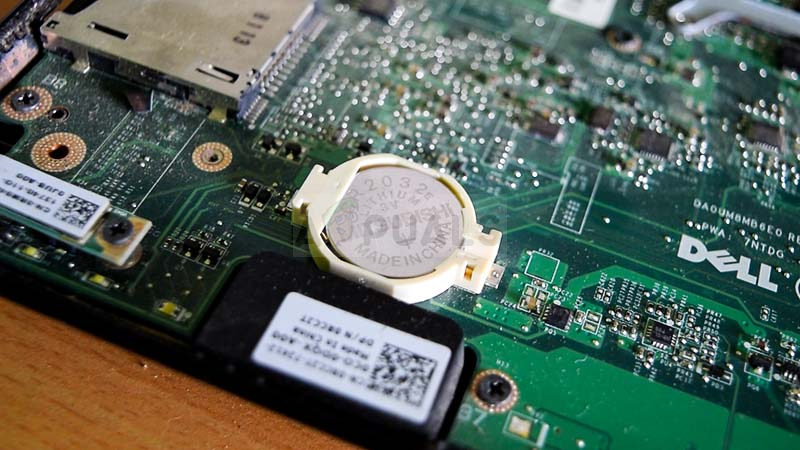
As it turns out, one of the most common reasons that might be causing the 00 Q error code is an inconsistency that’s perpetuated by the CMOS (Complementary Metal-Oxide Semiconductor) battery. In most cases, this particular ASUS Q error is caused by some type of corrupted data that’s preserved in-between startups and needs to be cleared. If this scenario looks like it could be applicable, you can fix the problem by opening your PC case and temporarily removing the CMOS battery in order to clear any information that might be causing this error at every startup attempt. In case you don’t know how to clear the CMOS battery by yourself, follow the instructions below for step by step instructions: Note: The instructions below are mostly applicable to desktop PCs. Although it’s possible to remove the CMOS battery on your laptop, this most likely involves breaking apart the whole thing which is considerably more complicated than just removing the case. In case the same problem is still occurring, move down to the next potential fix below.
Method 2: Resetting BIOS / UEFI Settings (if applicable)
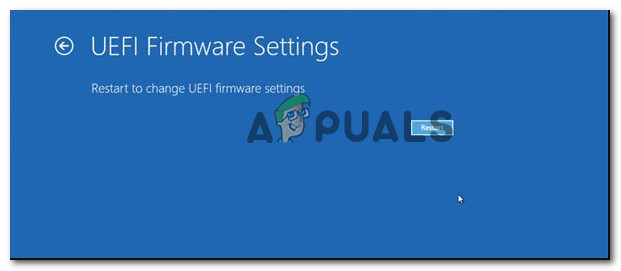
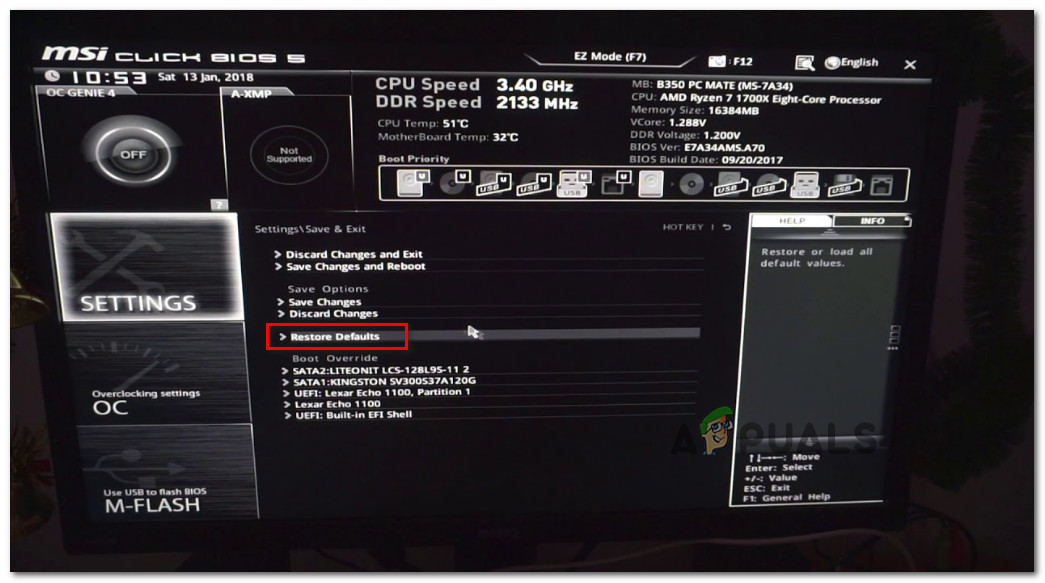
If removing the CMOS battery didn’t fix the problem and you have access to your BIOS or UEFI, you might be able to fix the problem by resetting your UEFI (Unified Extensible Firmware Interface) or BIOS (Basic Input / Output System) settings. If this problem is indeed related to a UEFI or BIOS setting, resetting everything back to their default values will fix the issue (as confirmed by a lot of affected users). IMPORTANT: You can only follow the instructions below if you get a signal to your monitor and you are able to access your BIOS or UEFI settings. But keep in mind that depending on the low-level type of software that you’re using, the instructions for resetting those settings will be different. To treat both potential scenarios, follow one of the sub-guides below:
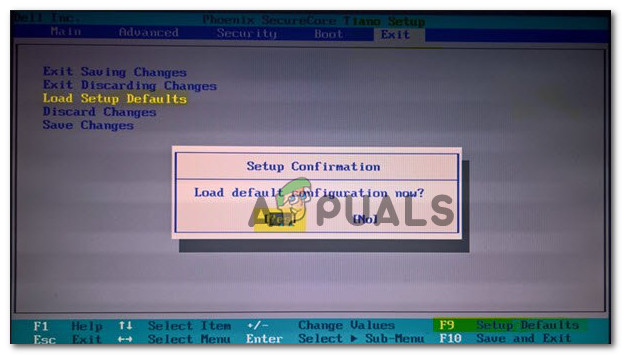
A. Resetting the UEFI Settings to Factory
B. Resetting BIOS Settings to Factory
In case the same problem is still not resolved, move down to the next potential fix below.
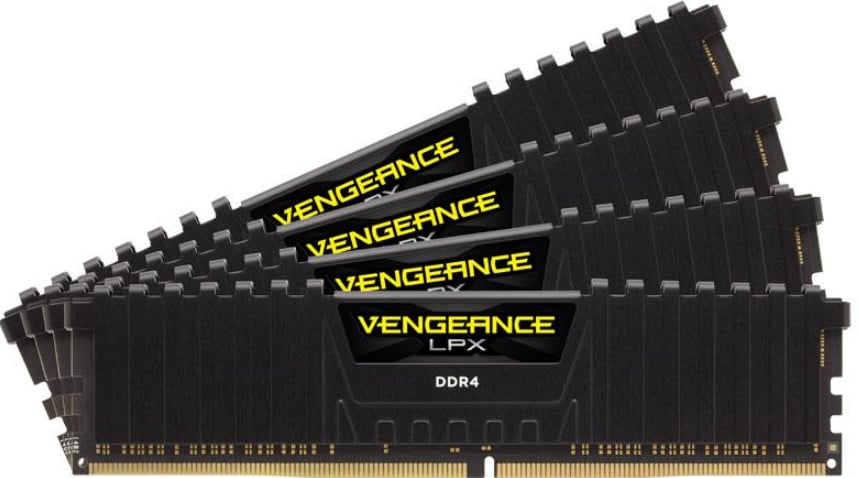
Method 3: Swapping your RAM Sticks
As it turns out, some affected users have managed to fix the problem simply by swapping up their RAM sticks with each other before booting the computer again. This method was confirmed to be effective for a lot of affected users – All they did was they powered off their computer and opened the PC case to change the slots in which their dual channel RAM sticks were inserted. Once you swap the RAM sticks slots, boot your computer normally and see if the problem is now resolved. If the same problem is still occurring, move down to the next potential fix below.
Method 4: Removing Overclocked Frequencies
If you’re currently overclocking your the frequencies and/or voltages of your RAM, CPU, or GPU, that might be the main cause of this error code. Most likely, you’re seeing this motherboard error code due to general system instability. In case this scenario looks like it could be applicable and you’re seeing this error after overclocking certain components on your PC configuration, go ahead and revert back to the default values before booting up again and see if the problem is fixed.
Advanced Motherboard Buying Guide – How to Buy A Motherboard For A Gaming PCHow to Fix MSI Motherboard Error 99Fix: Secure Boot Violation Error on Asus SystemsFix: ASUS Smart Gesture not working