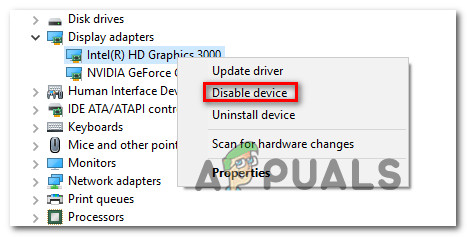
In some cases, the users are not even able to see the card under the Display Adapters entry in the Device Manager. This usually refers to a restriction imposed by the BIOS configuration. However, that’s not supposed to occur all the time hence we will proceed towards the detailed guide illustrated below to get rid of this problem.
Method 1: Monitor Graphics Card Inside the System
Before we move on to diagnosing the problem through software workarounds, you should first check if the graphics card is inserted correctly inside its slot. Press it firmly and make sure all the pins are inserted firmly. If you have a laptop, just perform the power cycle as explained below: After performing the above steps, restart your system, enable the graphics card in the same way we disabled it, and check whether it is being detected accurately or not.
Method 2: Verify GeForce Installation
GeForce Experience allows you to capture and share videos, screenshots, and live streams with friends. It also keeps your drivers up to date and optimizes your game settings and it proves to be a super essential companion to your GeForce® graphics card. The issue under discussion might exist because of two installations of GeForce Experience
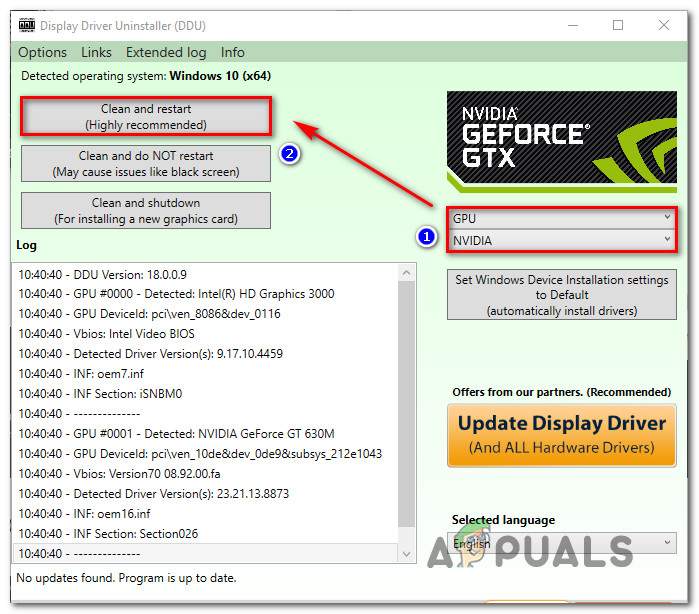
Method 3: Deleting Current Drivers using DDU
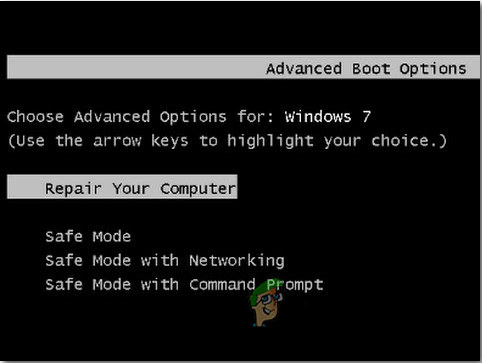
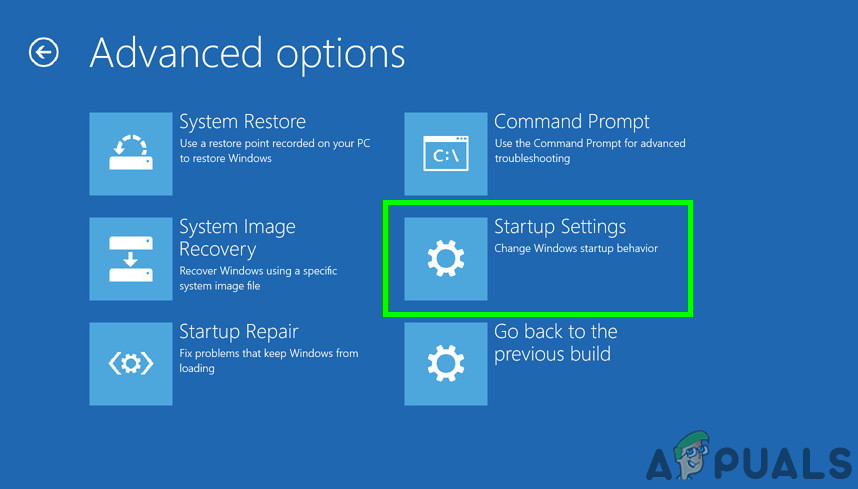
Performing a clean re-installation of graphics drivers have proved beneficial for most of the users. Therefore, our aim is to boot the system into Safe Mode so it can load with basic drivers and minimal settings and uninstall the drivers from there. Before you proceed to the steps below, make sure you download DDU from here and copy it to an External Drive, or you can save it on your Desktop before you boot into Safe Mode.
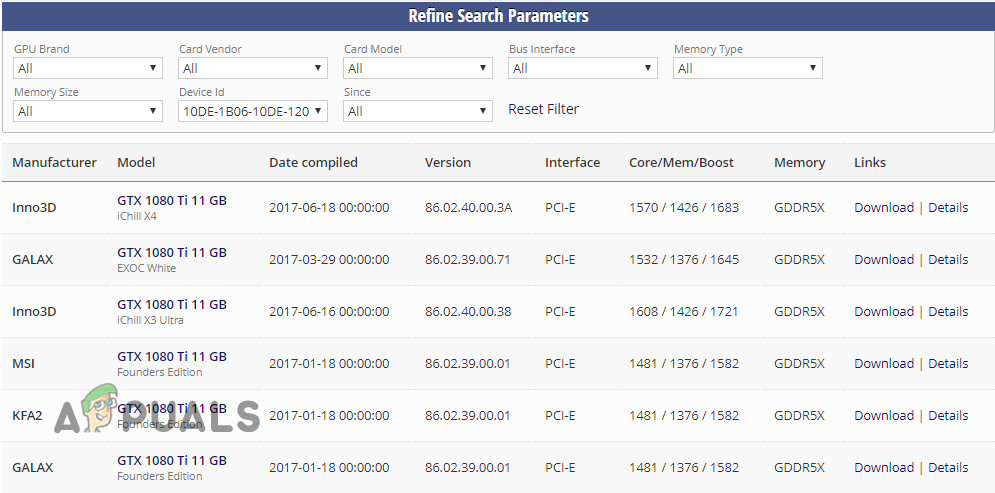
Method 4: Flash your GPU BIOS
Nowadays manufacturers release updates for graphics cards that tweak some stability issues and fix current issues like incorrect model number etc, therefore, we have to upgrade to a custom BIOS in order to overclock a normally voltage-locked card. There were numerous reports that upgrading the BIOS of the GPU solved the problem instantly, therefore, we’ve illustrated a simple process below to upgrade your GPU bios for both NVIDIA and AMD cards:
For AMD users:
After downloading the AMD flashing tool extract it into its own folder. It doesn’t matter in which folder you extract it to, just make sure you keep all the related files with the ATiWinflash.exe file.
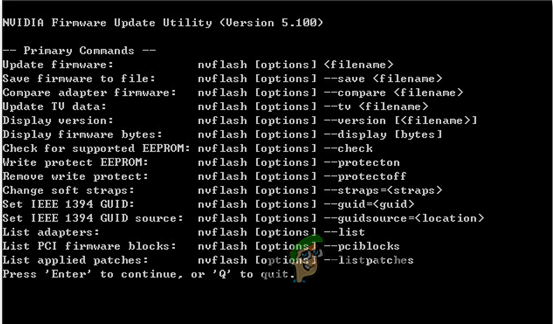
For Nvidia Users:
Flashing the BIOS of your Nvidia card is quite simple. Just make sure you downloaded the tool listed above for Nvidia users. (replace yourfilenamehere with the actual filename of your BIOS) and let the tool update your GPU bios so that you can observe the correct model number on your screen.
Bonus Workaround:
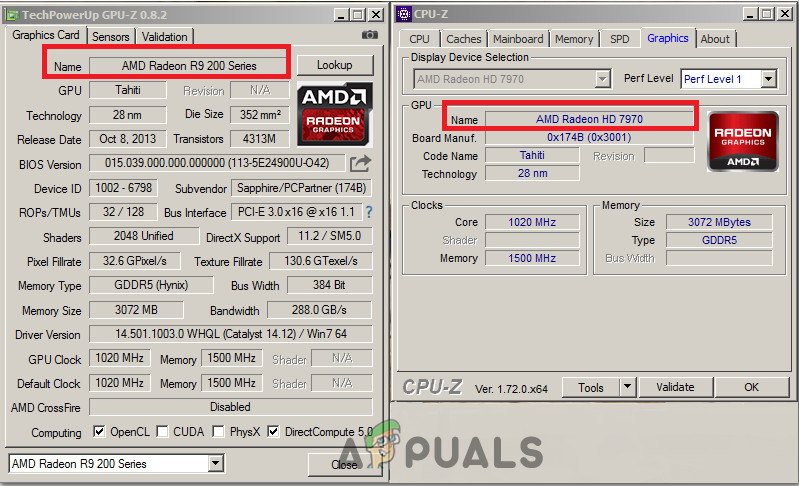
In some cases, the Graphics card that you are using might be fake, therefore, in order to verify its authenticity, note down the exact make and model of your Graphics card and check online for its normal speeds. Now, download the software from here and run the executable to install it. After installing, check to see if your card is original or not. If it isn’t original and just a custom BIOS has been flashed on it, return it to the place where you bought it and get a new one. If the problem persists after performing the steps indexed above, it’s always a good idea to test the graphics card on a different computer before confirming that the card is damaged.
How to Get Your Citizen One Loan Number When Received a Wrong Number on the…Google Pixel 5 Photos Leaks: The Phone Model Shows “5s” Which May Indicate a…NVIDIA Ampere A100 250W TDP GPU On PCIe 4.0 Made For AI, Data Science, And…NVIDIA Next Gen Ampere-Based GPU, Memory Size, Complex Cooling Of Founder’s…