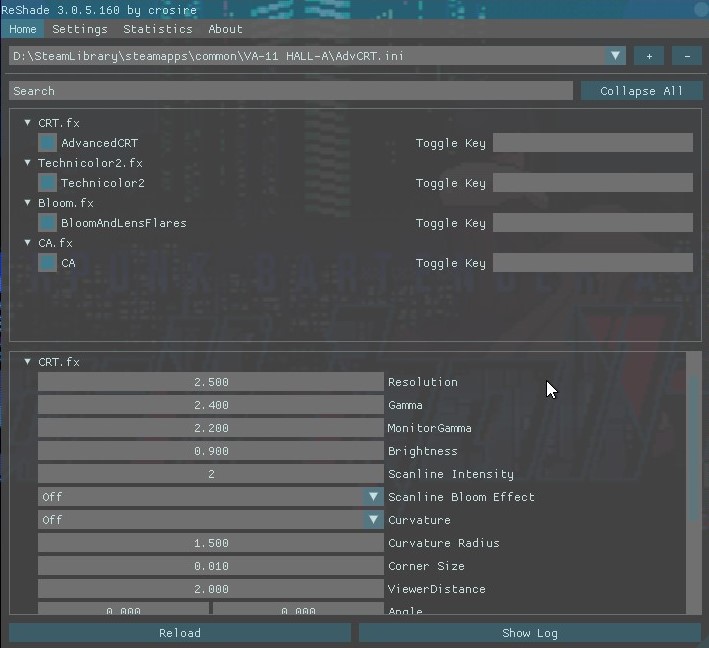
In this Appual’s guide, we’ll be going through the basics of installing and configuring ReShade, a popular shader add-on for DirectX games that has a smaller performance impact than ENB series – thus, ReShade can be used even on older computers for minimal performance impact, whereas ENB typically hooks into the game’s scripts itself, and can chop your framerates in half (though if your computer can handle it, ENB can be much prettier than SweetFX / ReShade – we’ll leave ENB tutorials for another day).
Requirements:
ReShade (Optional) Additional shader packs:
MassFXShaders by IoxaReShade 2.0 Shaders ported to ReShade 3.0
How to use SweetFX with ReShade 3.0
If for some reason you want to combine SweetFX with ReShade, you can follow this installation procedure. The only thing to be aware of is that you will not be able to configure SweetFX in real-time through the ReShade GUI inside the game – you need adapt all config variables from a SweetFX config format to the ReShade .ini file.
Notes About Performance:
ReShade can be used with either minimal performance impact (a few frames loss at most) if you’re only using some color enhancement shaders, or it can absolutely cut your framerate more than half if you’re enabling all the advanced shading techniques. Its generally best practice to play with different things to find the sweet spot, but here is a general idea of what shaders should cost you in terms of FPS (this is accumulative, by the way – per effect).
Brightness and color correction shaders should generally cost about 1% of your FPS.Post-processing filters like SMAA / FXAA should cost between 2% – 5%.Sharpening and softening filters should cost about 2% – 5% depending on effect type.
Advanced shaders like depth of field and bloom can cost up to 20%, but this depends on your GPU type and the DOF / bloom techniques being used. The most expensive shaders will be the various ambient occlusion shaders (MXAO, HBAO, SSAO, etc) which can cost between 30% to 50% of your framerate, but again this depends on your GPU type and the specific shader technique being utilized. Its really best to try the different shaders that do the same things, to see which versions run best on your PC. For example, its generally agreed that:
Vibrance > ColorfulnessLumaSharp > Adaptive SharpenFXAA > SMAA
You can also forego some of these effects if you have a great monitor, for example you can skip using Vibrance shaders by just upping Digital Vibrance in your Nvidia / Catalyst panels. Also, some monitors can do a lot of what ReShade does – for example, monitors that allow Sharpening to be increased through the monitor’s native settings. It’s better to use that with zero performance impact, than using sharpening techniques in ReShade, if your monitor supports it.
General Tips on Applying Shaders
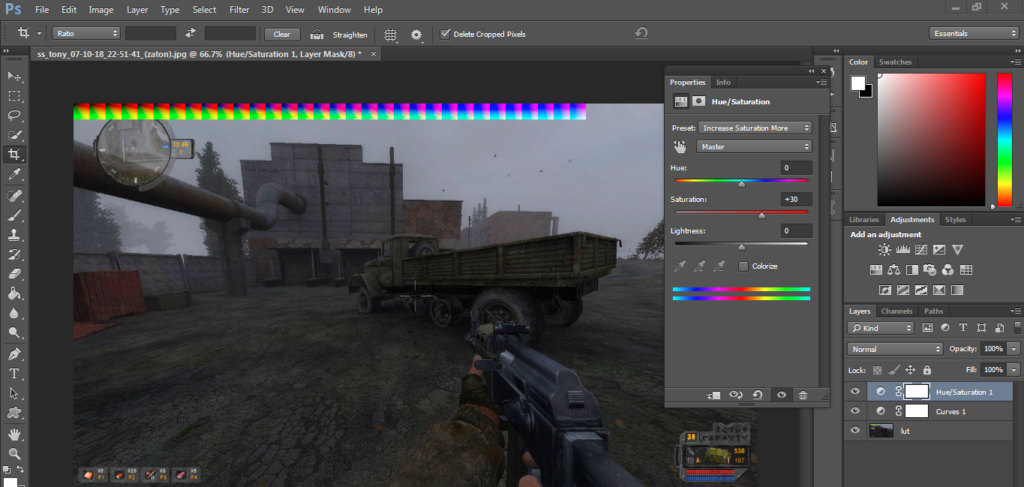
LUT – Stands for “Look Up Table”, and basically contains color correction information from an outside source, which will be a .PNG image. This is one of the best methods of applying color correction to your game with zero performance impact, it just requires some initial setup. You need to grab the blank Lut.PNG from your ReShade textures folder, and then take some in-game screenshots of your gameplay.
Now using a program like GIMP or PhotoShop, merge your gameplay screenshots and the LUT.PNG onto a single layer, and start adjusting the color curves of the screenshots. Only make color edits, do not apply any post-processing, LUT is only used for color correction. Basically, you are adjusting the colors of the screenshots so that LUT will apply these colors in-game! Think of it like Photoshopping your gameplay in real-time. Now export your work as LUT.PNG, copy it over the original blank LUT.PNG inside your ‘textures’ folder in your game directory, and enable LUT.fx in ReShade. Your game should now appear exactly as you edited the colors to appear in your photo editing program. This is absolutely the best way to apply color correction to your absolute liking with zero performance impact and no additional color-correction shaders. LumaSharpen – It’s a good idea to set this to an intensity of 1.0, a pattern of ‘Normal’, and then adjust the clamp with debug on so that it will sharpen as much as possible, without creating any white highlights. You can use a clamp of around 0.2 for this. Film Grain – For a nice subtle effect, you can set the Signal to Noise ratio around 16 (so it will only apply to shadows), the intensity to 1.0, and the variance to however visible you want the film grade to be – try starting at a variance of 0.5 and adjust from there to your liking. Bloom and Lens Flare – Your options for bloom will typically be Magic Bloom or Ambient Light – its best used in older games that have really ancient-looking Bloom effects, so you can disable the Bloom setting in those games and then apply it through ReShade. Depth of Field – There’s quite a few DOF techniques available in ReShade, so you generally want to find the one that works best for you, but also be aware that DOF can be weird in some games. It gets applied to the entire screen, so it may blur for example some parts of the GUI or game menus. Generally, Matso DOF or Advanced DOF are the best DOF techniques to use, and then you adjust the near/far blur curves and the blur amount, so that the shader won’t have any effect unless the in-game object is very close to the game camera. Depth of Field effect requires that ReShade be able to access the game’s depth-buffer, and this is generally not possible in multiplayer games (like Battlefield), because people can hypothetically write wallhacks and stuff like that if they have access to the game engine’s depth-buffer. HQ4X – This can be used to smooth some grainy or pixelated games. The settings are up to you, since it depends a lot on the type of smoothing you need. MXAO – This is the most intense version of ambient occlusion and will bring your computer to its knees in terms of framerate impact. If your computer can handle MXAO (and the game you’re working with doesn’t freak out and look weird with MXAO being applied), the best way to tweak it is via the black and white debug view, so you can see exactly what you’re tweaking. Also use Indirect Lighting (SSIL) in combination for best effect. Surface Blur – This is really more for changing the art style of the game, like if you want the textures to appear more like oil paintings (like in DOTA 2). UI Mask – This is for when you’re using depth-effects like MXAO and DOF, and the effect is being applied to the game’s UI and making it look weird. You can take a screenshot of your gameplay (with UI / HUD visible), then open the screenshot inside a photo editing program, and erase everything except the HUD / UI and make it a transparent PNG. Now when you point UI Mask to this .png file, it will apply the depth-effects to everything in the game except the bits you didn’t erase in the PNG.
Fortnite Building Guide For BeginnersThe Cheat Engine (Complete Guide) for BeginnersOverclocking: A Beginners GuideHow to get Started with Web Development on Android


