The method below will require you to get quite technical in each step, but it will give you a higher degree of control over your Outlook data. Oh, and it’s completely free. When you’re ready, follow the guide below to migrate your Outlook data to a new PC.
How to manually move Outlook data to a new PC
This steps below will cover all the necessary chores needed to efficiently move Outlook data to a new computer. This method will take some time, but it’s infinitely better than using Windows Easy Transfer (which will corrupt your Outlook profile). Since the entire procedure is quite tedious, we have decided to split it into several steps. The guide below will work on Outlook, 2010, Outlook 2013 and Outlook 2016. It will work on computers running Windows 7, Windows 8 and Windows 10. While the steps are similar to older versions of Outlook, the exact paths that we’ll access will vary. Keep in mind that accounts can’t be moved with this method since they are stored in the registry. You’ll need to recreate them on the new computer (we’ll show you how). With this in mind, here’s what you need to do:
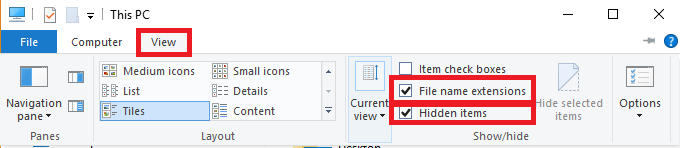
Step 1: Show hidden files, folders and extensions
The first thing we need to do is fetch the files from the old computer. But things are a little more complicated than that since the necessary files are stored in a hidden folder in the Windows directory. Here’s a quick guide on how to show hidden files and enable extensions in Windows:
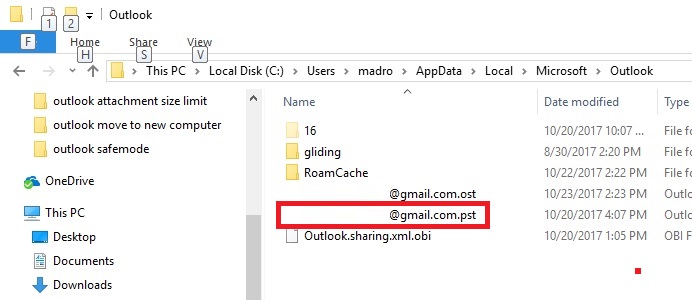
Step 2: Fetching the necessary files from the old computer
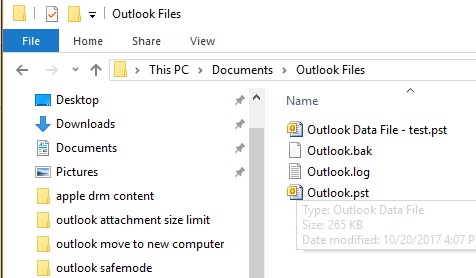
Now that the extensions and hidden folders are visible, it’s time to start fetching the required Outlook files. The data we are going to extract will contain all your Outlook emails, calendar, and contacts. If you’re using Outlook 2010, the data will be available in two distinct PST files. Outlook 2013 uses an OST file to store Calendar, Contacts, and tasks. Without further ado, here’s what you need to do:
Step 3: Migrating the files to the new computer
Now it’s time to move the files previously fetched to the new computer. Start by plugging the storage device in your new computer. Alternatively, use a cloud service to cross them over to the new machine. If you haven’t installed Outlook on the new machine, now is the time to do it. Once you got that going, follow the steps below:
Step 4: Creating a new profile on the new computer
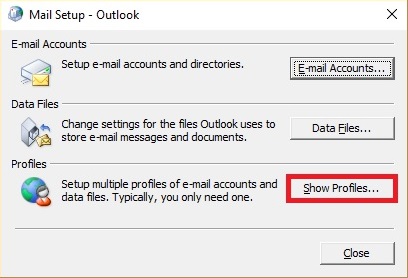
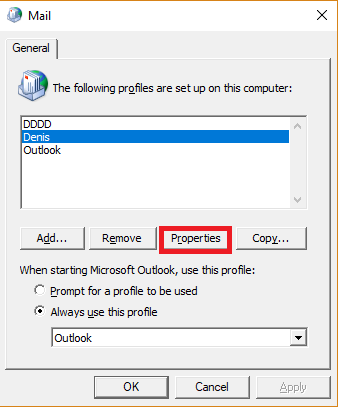
Once the PST file is placed on your new machine, it’s time to create a new profile that will be used to restore your old Outlook data. Here’s what you need to do:
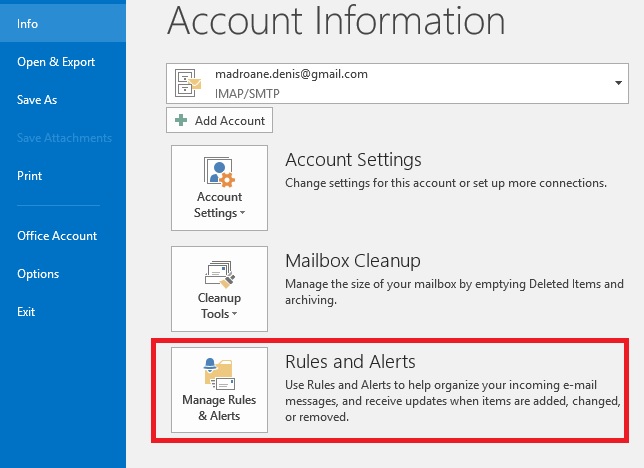
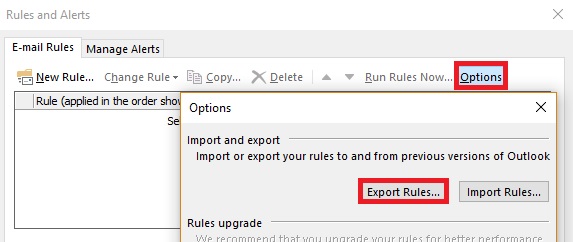
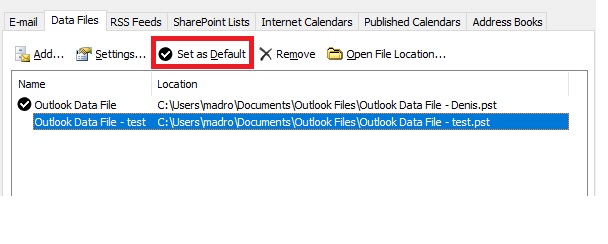
Step 5: Linking the PST file to the new profile
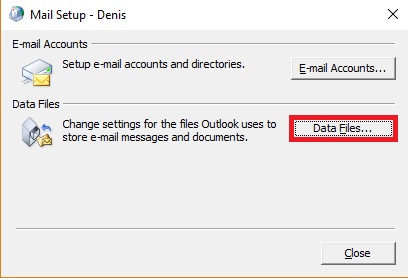
Once the new profile is created, we need to make the necessary arrangements so that the PST file we previously fetched gets recognized. Here’s how:
How to Fix Links Not Opening on Outlook 2016 and Earlier VersionsFix: Cannot Add or Use Internet Calendar in Outlook 2010 and Older VersionsHow to Restore Your iPhone (All Versions) Without UpdatingMicrosoft Releases Windows 10 1909 Generic Product Keys For All Supported…