The main difference between the DFU and Recovery mode rests in iBoot. While DFU mode bypasses the iBoot, Recovery mode uses it during upgrading or restoring your iPhone. That’s why you can use DFU mode even for downgrading your current firmware. While your iPhone, iPad, or iPod Touch is in DFU mode, its screen will remain entirely black. And, this is the indicator that shows you if you are doing it right or not.
What You Need To Know Before Performing DFU Mode Restore
When you restore your iPhone in DFU mode, your computer deletes and reloads every bit of code that controls the hardware and software of your iPhone. And, there is a chance for something to go wrong. If your iPhone’s hardware is damaged in any way, especially if it has a water damage, a DFU restore may break your device. A usable iPhone with a minor problem may become entirely unusable if a DFU mode fails due to a water damage. If you haven’t remembered, I will repeat it. A DFU restore DELETES all the data from your iDevice. So, before performing it, I highly recommend you to backup your data. You can do it even without using a computer. Check the following article for more details How to Backup an iPhone Without Wi-Fi or a Computer. Now let’s dive into the procedure for putting your iPhone into DFU Mode.
How to Put an iPhone into DFU Mode
Step # 1 Launch iTunes
Launch iTunes on your PC or Mac. And, make sure it is updated to the latest version.
Step # 2 Connect iDevice
Plug your iPhone, iPad, or iPod Touch into your computer. (It doesn’t matter if your iDevice is on or off) If you have an iPhone 8 / 8 Plus or iPhone X, please follow the steps explained in the following article How To Start iPhone X in DFU Mode. If you have an iPhone 7 or older, iPad, or iPod Touch, continue with the Step # 3.
Step # 3 Press Keys
iPhone 6S or below: Press and hold the Wake / Sleep (Power) button and the Home button together. iPhone 7 or 7 Plus: Press and hold the Wake / Sleep (Power) button and the Volume down button together.
Step # 4 Release Keys
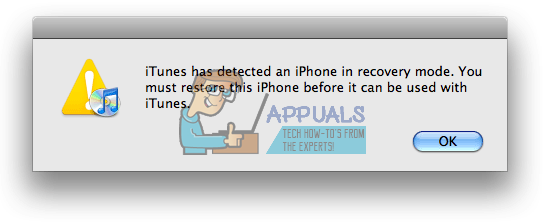
After exactly 8 seconds, release the Wake / Sleep button. But, continue holding the Home button (iPhone 6s or below) OR, the Volume down button (iPhone 7 or iPhone 7 Plus) until your iTunes pops up a message telling you that it has detected an iPhone in recovery mode.
Step # 5 Release Keys .2
Release the Home button or Volume down button. Your iPhone’s screen should remain black if you have successfully entered DFU mode. If it is not black, repeat the process from the beginning. In general, I hold down the buttons and release the Home button just before I think the Apple logo would appear. If you continue holding both buttons down and you see the Apple logo on your screen, you are keeping them down for too long. DFU mode requires a bit of practice and timing to get right. So, if you don’t succeed at the first try, don’t be afraid to try and try again.
Final Words
If I could choose, I would always pick a DFU restore over the recovery mode or regular restore. Some iFolks would say it’s overkill, but if an iDevice has a problem that can be solved with a restore, a DFU restore have the best chances of fixing it. I hope this article clarifies some of the misinformation about how to put your iPhone into DFU mode that you might have. I encourage you to embrace your inner teach personality and share if you have any questions in the comment section below.
How To Start iPhone X in DFU ModeHow to Put Your Saved Games to Steam CloudSony to Follow in Microsoft’s Footsteps and Put Ads in Free-To-Play PlayStation…How to Put Google Calendar on Desktop in Windows 10?