In the Mail app, things are not as simple as selecting and deleting the contact (like many other applications) as the Mail app generates the list from the received/sent email messages or the People app. You can try the undermentioned solutions to delete AutoComplete in Windows 10 Mail app but before that, it will be a good idea to create a system restore point and backup the Contacts of the Microsoft People app.
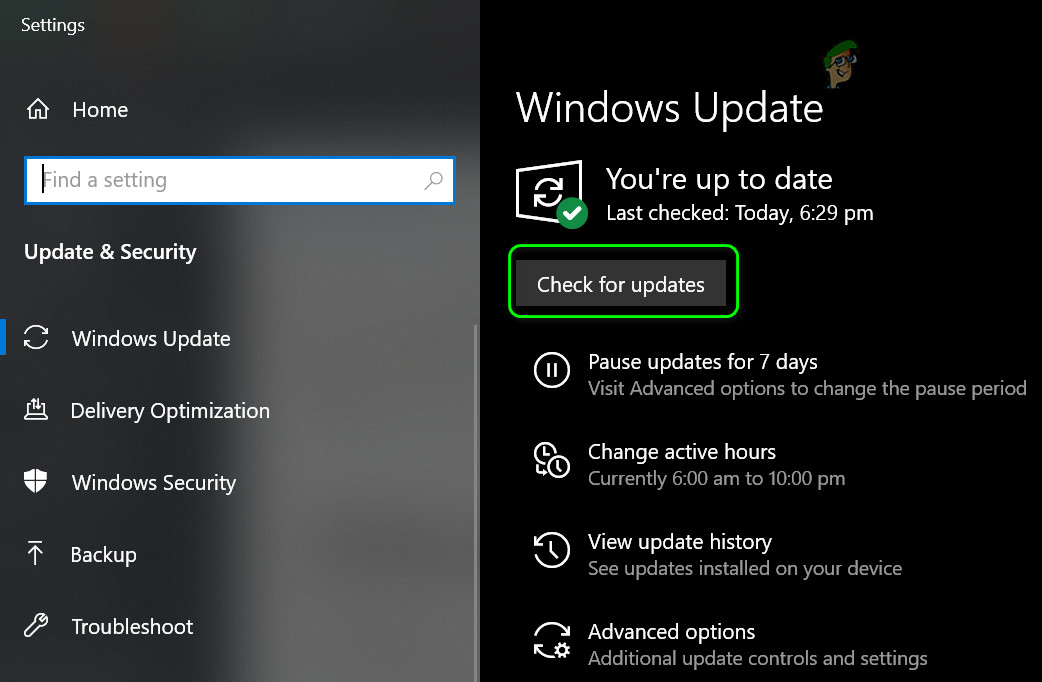
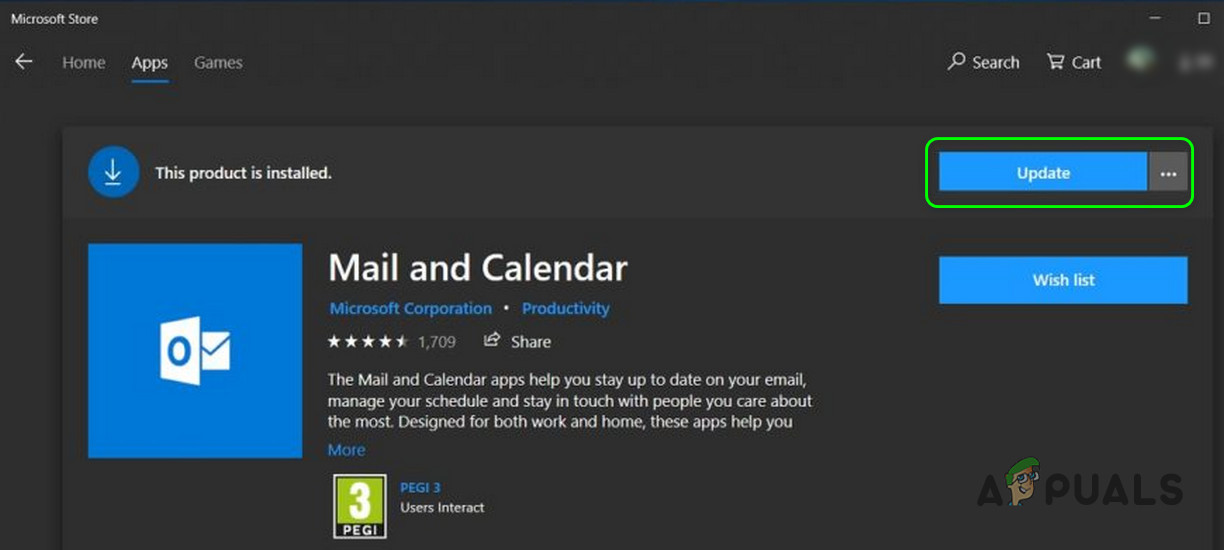
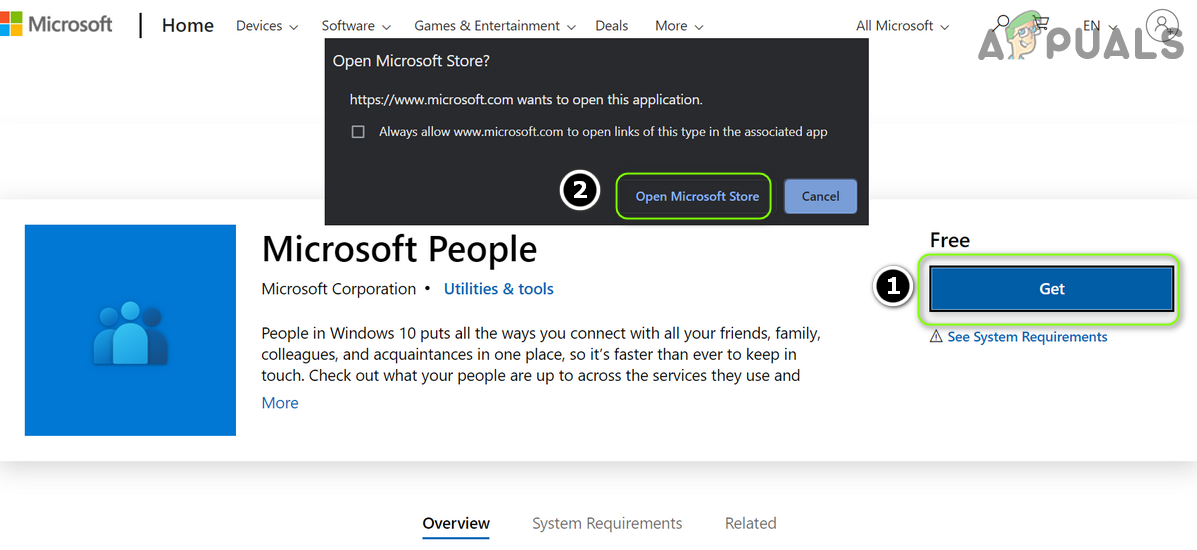
Solution 1: Update the Windows, Mail App, and People App of Your System
The auto-complete list issue may arise if the Windows, Mail app, and People app of your system are outdated as it can create incompatibility between the OS modules. In this case, updating the Windows, Mail app and People app may solve the problem.
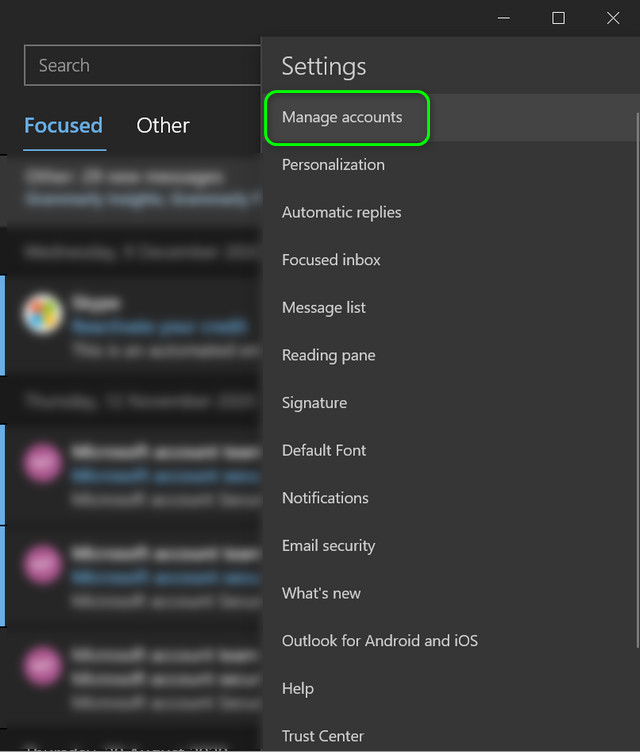
Solution 2: Remove and Read the Problematic Account to the Mail App
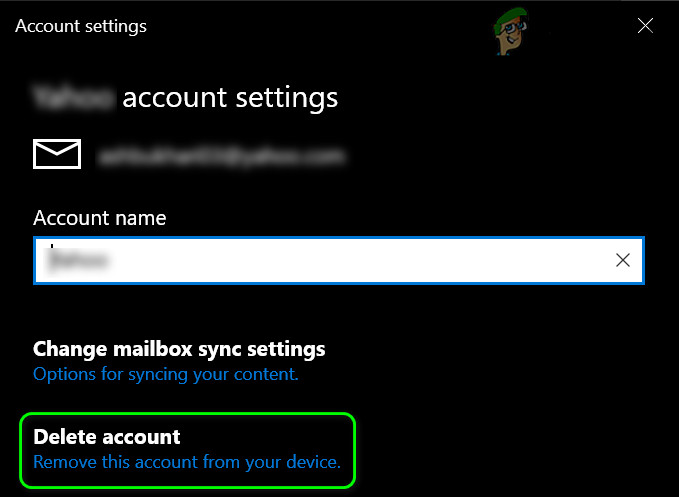
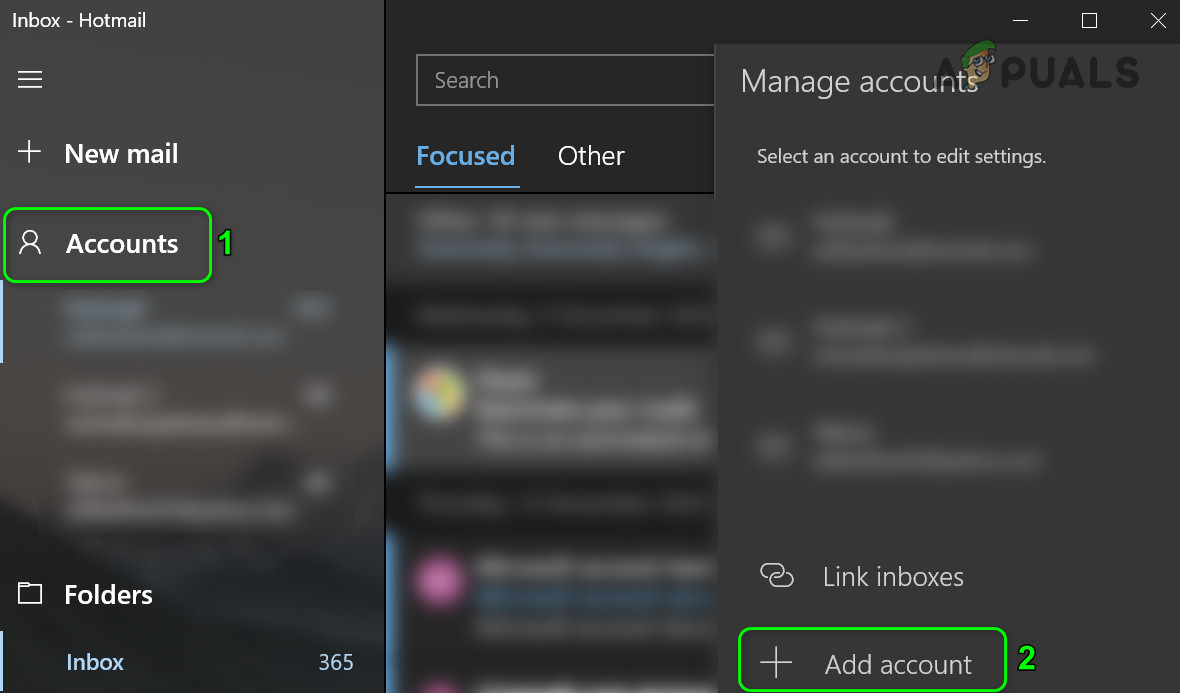
The issue could be a result of a communication glitch between the email account server and your PC. In this case, removing the problematic email account and then adding it back to the Mail app may solve the problem. But before removing the account, make sure you have the credentials available.
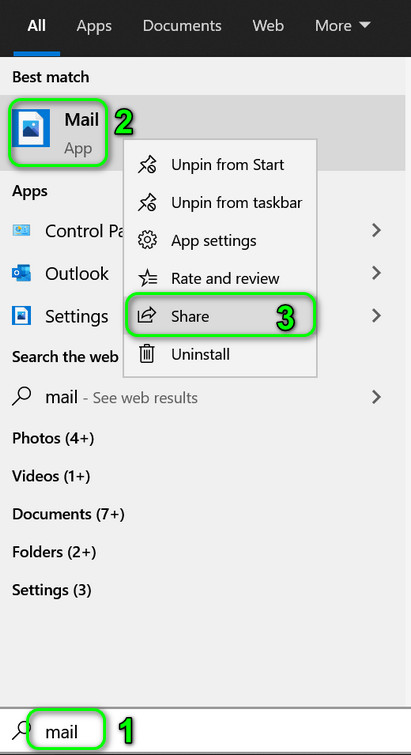
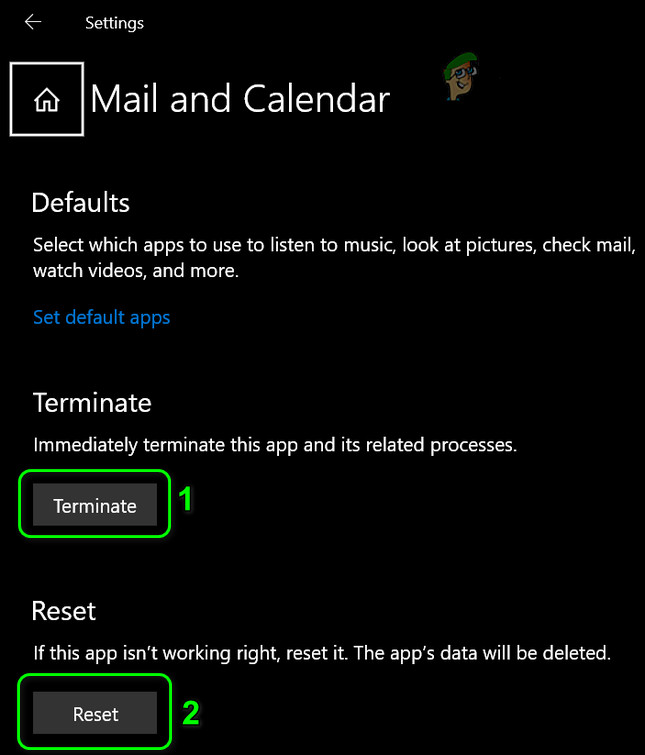
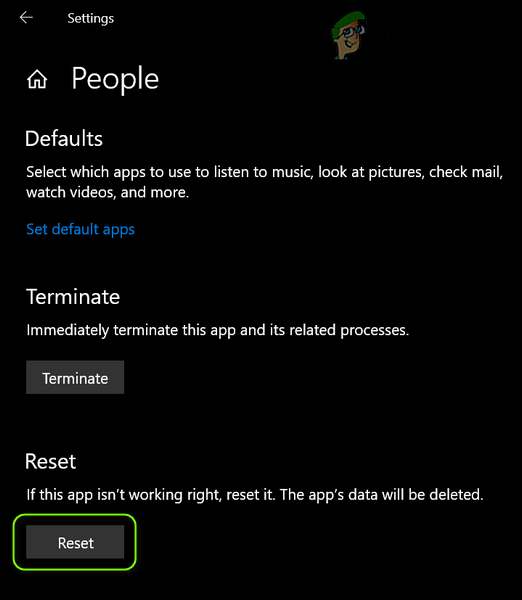
Solution 3: Reset or Reinstall the Mail App
The addresses in the auto-complete list may keep popping up if the installation of the Mail app is corrupt. In this context, resetting or reinstalling the Mail app may solve the problem. But before proceeding, make sure that you have the credentials of the accounts (added to the Mail app) are available.
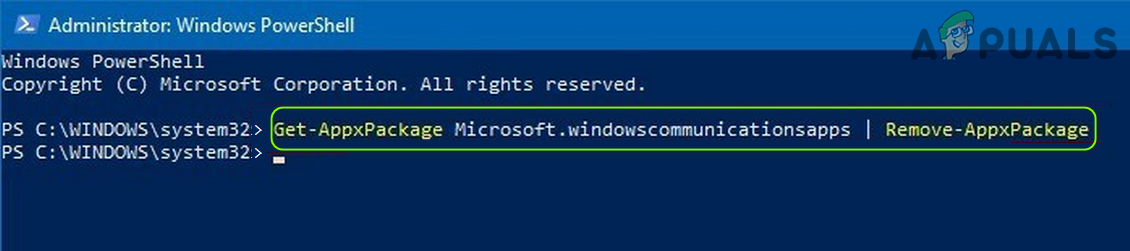
Reset the Mail and Microsoft People Apps
Reinstall the Mail App
Solution 4: Use the Web Portal of the Email Provider
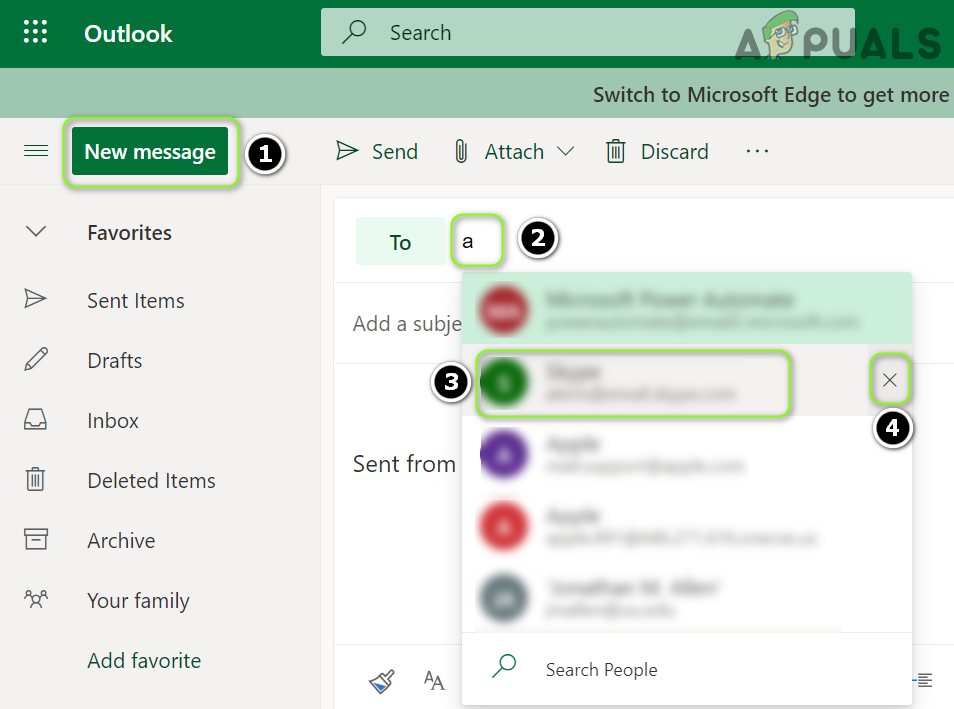
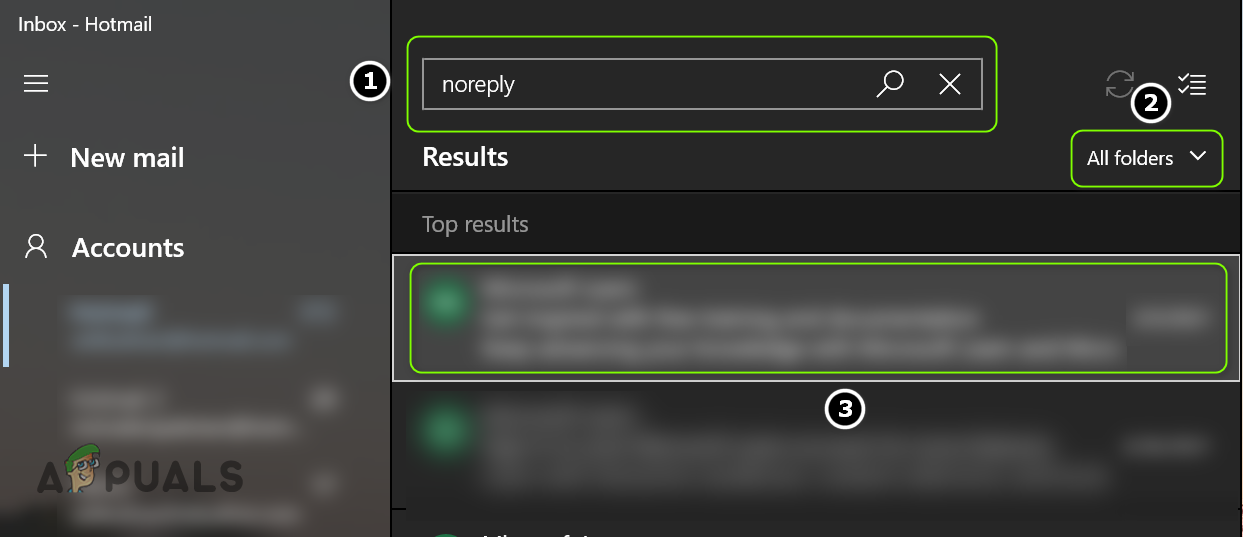
The auto-complete entry shown by the Mail app may have been collected from the email provider’s server and is not available locally. In this scenario, deleting the auto-complete entry from the web portal of the email provider may solve the problem. For illustration, we will discuss the process for Outlook.com. Make sure Windows mail is closed, then proceed.
Solution 5: Find and Delete the Problematic Email in Your System’s Files
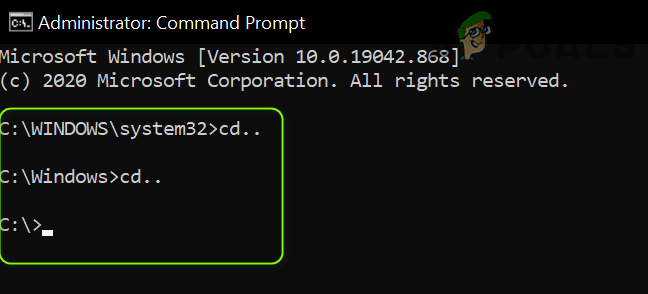
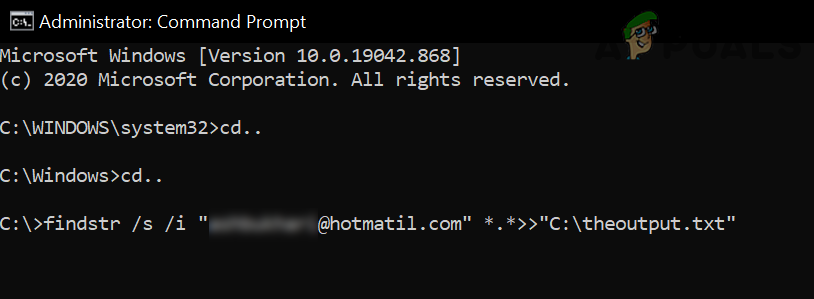
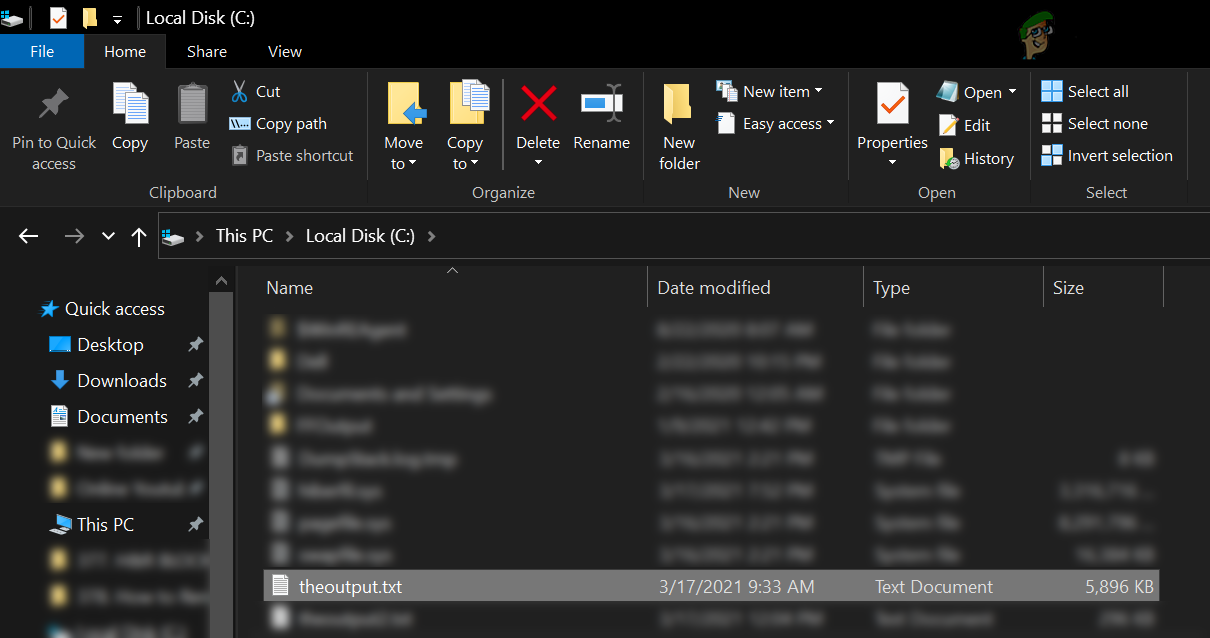
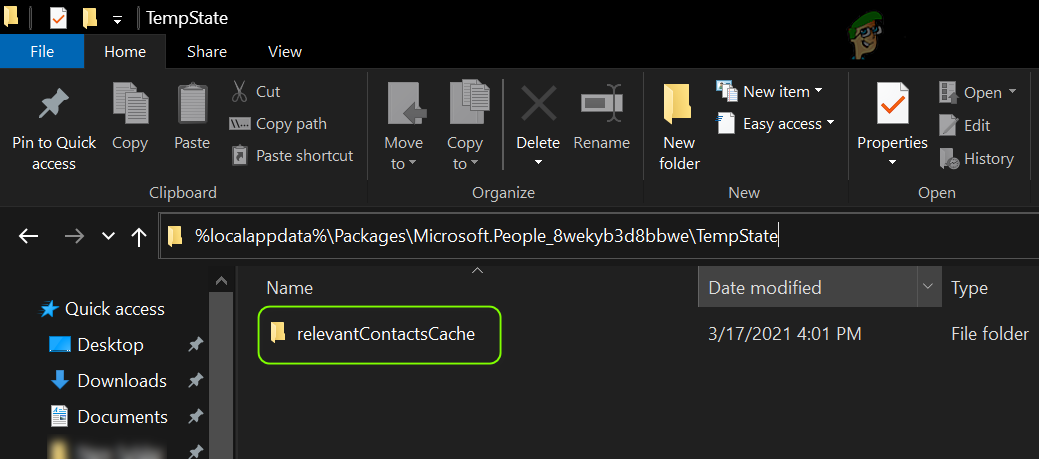
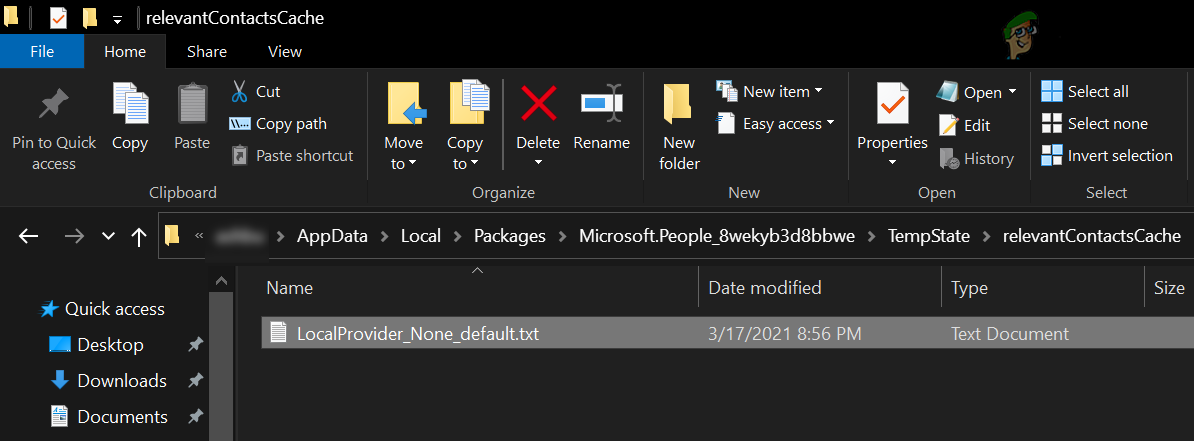
The cached database that is generating the auto-complete is buried down the OS modules and is not accessible (at least easily) to the end-user. In this case, deleting the entries relating to the problematic email address may solve the problem. But before proceeding, it is strongly recommended that you create a restore point of your system as the outcome of the suggested action may cause different issues for different users. Some users have reported that the problematic entry was located in the LocalProvider_None_default.txt and deleting it from the mentioned file solved their problem.
Solution 6: Delete the Problematic Email Messages
Microsoft, in an attempt to help its users, added the auto-complete feature to the Mail app, which drives the list values from the email addresses mentioned in the To, From, CC, BCC, etc., fields of all the email messages in all the folder. If the issue is persistent even after trying the above-mentioned solutions, then the tedious task of deleting all the email messages which contain the problematic or bad address may do the trick for you. To stop the bogus/spam email addresses in the Mail auto-complete list, make the habit of deleting all the bogus/spam emails.
Solution 7: Create a New Windows User Account
The auto-complete issue may arise if the Windows user profile of your system is corrupt. In this case, creating a new Windows user account may solve the problem. If the issue persists, then you may try another email client till the issue is resolved.
Fix: Error Code 0x8019019a when setting up Yahoo Mail in Windows 10 Mail AppHow to Add or Remove All Apps List in Start Menu on Windows 10?How to Change your e-mail settings in Windows Live MailHow to Remove the Recently Added List from Start Menu?