Note: This issue is different from the E_FAIL (0x80004005) error at every virtual machine startup. One of the most common causes that will cause this type of behaviour is a missing driver (VBoxDrv.inf). It’s possible that due to some permission issues, the installation of this crucial driver doesn’t complete during the initial installation. In this case, you can fix the problem by installing the VBoxDrv.inf manually. Another potential cause that might spawn this particular error is a Registry inconsistency that points to the wrong driver directory. If this scenario is applicable, you can fix the issue swiftly by doing a registry check and adjusting the ImagePath string in case the directory is wrong. If you started encountering the issue the very first time you tried to launch the VM, it’s likely that you’re seeing the error due to the fact that the VirtualBox VM doesn’t have enough RAM to work with. In this case, you can fix the issue swiftly by accessing the VM Settings and adjusting the allocated RAM. There are a plethora of problems associated with the usage of the Default Paravirtualization option. It’s possible that it’s not supported by the OS you are trying to emulate. To fix the issue in this case, you will need to access your virtual machine settings and change the Paravirtualization from Default to KVM. If you’re using an older PC configuration, it’s possible that hardware virtualization is disabled by default. In case your machine is unable to substitute this technology, an error might get thrown at every virtual machine startup. To fix the problem, simply access your UEFI / BIOS settings and ensure that Virtualization is allowed. There are a lot of issues associated with VirtualBox version 5.2.6. If you’re still using it, chances are you’re suffering from the same glitch that caused the problem from thousands of users. The easiest way of fixing the issue, in this case, is to uninstall the current Virtualbox version and then install the latest stable build available.
1. Install the VBoxDRV.inf
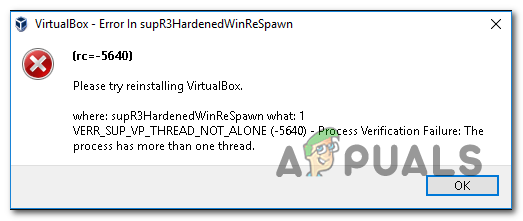
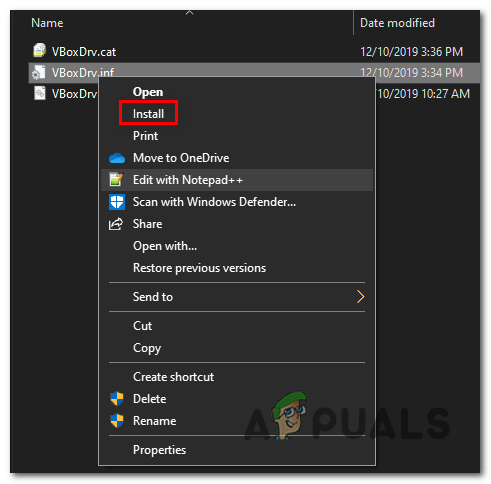
As it turns out, one of the most common causes that will cause the VirtualBox ‘Error in supR3HardenedWinReSpawn’ is a missing driver (VBoxDRV.inf). There is a chance that due to some permissions issue, the main VirtualBox application can install without this key driver. If this scenario is applicable, you will be unable to run any Virtualbox machine (created from scratch or imported from an older installation). Several affected users that were also struggling with this problem have confirmed that they were able to fix the problem by manually browsing to the location of the VBoxDRV.inf driver, doing the installation and then forcing the newly installed service to be started via an elevated Command Prompt. Here’s a quick guide on installing and starting the VBoxDrv service in order to fix the ‘Error in supR3HardenedWinReSpawn’ issue: In case you’re still encountering the same ‘Error in supR3HardenedWinReSpawn’ issue, move down to the next potential fix below.
2. Fix the directory problem
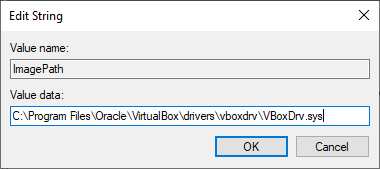
Another potential cause that might cause this particular problem is a directory problem facilitated by a Registry inconsistency facilitated by the VirtualBox driver. If this scenario is applicable, you should be able to fix the problem swiftly by doing a quick registry check to see if the driver path leads to the VBoxDrv.sys. In case the path is different, a small modification should ensure that you are able to start your virtual machines without encountering the ‘Error in supR3HardenedWinReSpawn’ issue again. Here’s a quick guide on investigating and fixing the directory problem related to the VBoxDrv.sys driver: If the same ‘Error in supR3HardenedWinReSpawn’ problem is still happening, move down to the next potential fix below.
3. Increase the allocated amount of RAM
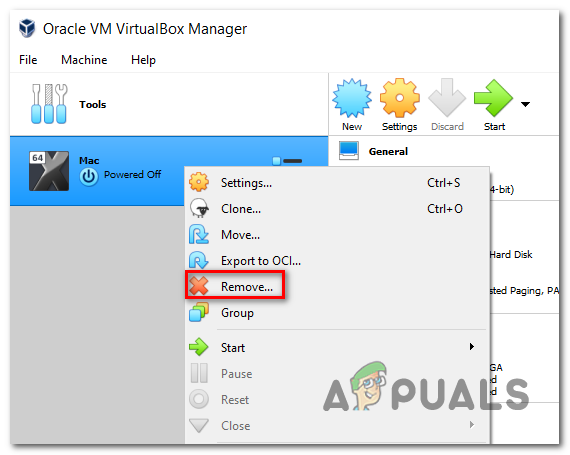
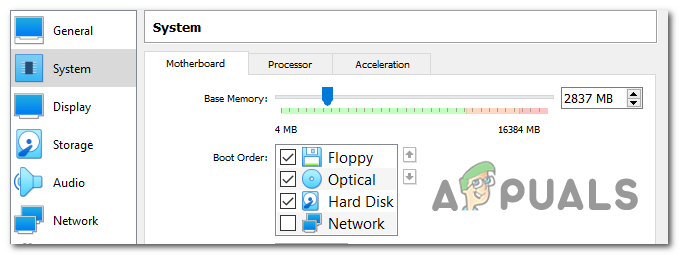
As it turns out, this particular problem can also occur due to insufficient RAM allocated to the Virtual machine that was previously created. The problem is, Virtualbox doesn’t do a good job of making it clear what exactly is the problem that’s making the virtual machine unusable. Even more, there are several different user reports claiming that dynamically adjusting the allocated RAM will not do the trick. To fix the issue if this scenario is applicable, you will need to remove the current virtual machine configuration altogether before creating one with the same image, but with increased allocated RAM. Here’s a quick guide through the whole thing: If the same issue returns, move down to the next potential fix below.
4. Adjust the Paravirtualization Interface
Another potential culprit that might facilitate the apparition of the ‘Error in supR3HardenedWinReSpawn’ issue is a ParaVirtualization technology that is not supported by the OS that is attempted to be emulated. Most frequently, this happens if the user leaves this option to the Default. Several affected users that were also struggling to resolve this problem have confirmed that the issue was entirely resolved and they were finally able to run their Vmware virtual machine after they changed the ParaVirtualization from Default to KVM. Here’s a quick guide on making the same change on your virtual machine configuration: If the same ‘Error in supR3HardenedWinReSpawn’ problem is persisting, move down to the next potential fix below.
5. Enable Virtualization in BIOS / UEFI
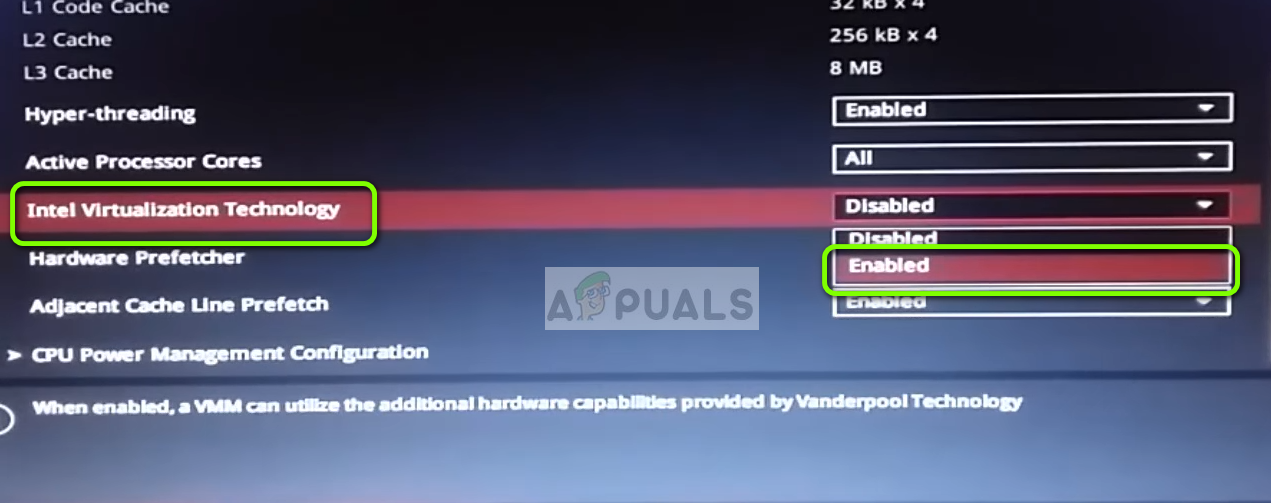
As it turns out, another potential reason that will cause this problem is virtualization being disabled from your BIOS or UEFI settings. While hardware virtualization is enabled by default on the vast majority of computer configurations, it’s possible that older PC rigs need to be adjusted manually. If this scenario is applicable, you should be able to fix the issue quite easily by accessing your BIOS or UEFI settings and re-enabling the proprietary virtualization technology. Here’s a quick guide on how to do this (whether you’re using BIOS or UEFI): In case you’re still seeing the ‘Error in supR3HardenedWinReSpawn’ initial message, move down to the final method below.
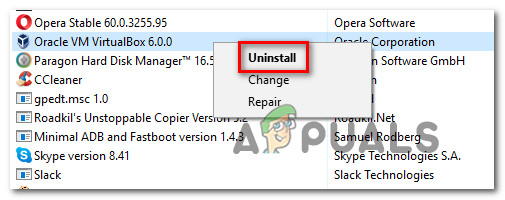
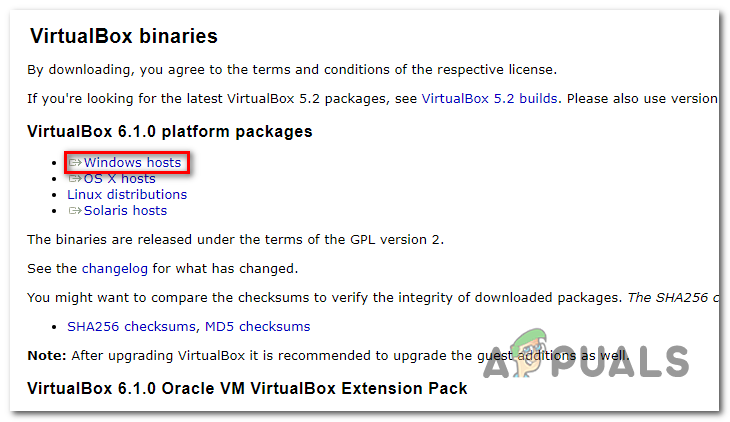
6. Install a newer version of Virtualbox
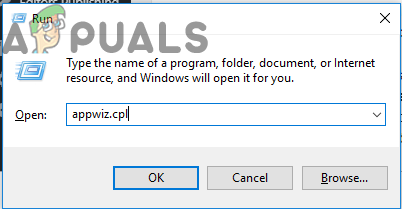
If you followed all the instructions above to no avail, chances are you’re encountering this problem due to a Virtualbox inconsitency that was resolved with newer versions. In most cases, this particular issue is reported with VirtualBox version 5.2.6. In case this scenario is applicable, you can fix the issue swiftly by uninstalling your current VirtualBox version and then installing the latest version from the official Virtualbox download page. Here’s a quick guide on how to do this:
FIX: Resolve Canon Printer Error C000How to Fix Git Error: You need to resolve your current index firstHow to Resolve the Possible Network Security Key Mismatch Error?Resolve Error Code 0x90010108 on Xbox One