Requirements:
First we will need to unlock the bootloader, unlocking the bootloader will cause all of the data on your phone to be wiped so i advise you to backup your data beforehand, go to Settings -> About phone and tap 7 times on the “build number“, then once it tells you that you are a developer, go back to the Settings menu -> Developer options and tap USB debugging and press ok, connect the phone to a PC and tick the box “always allow this computer”, once again in the developer options menu tick the “OEM unlocking“.
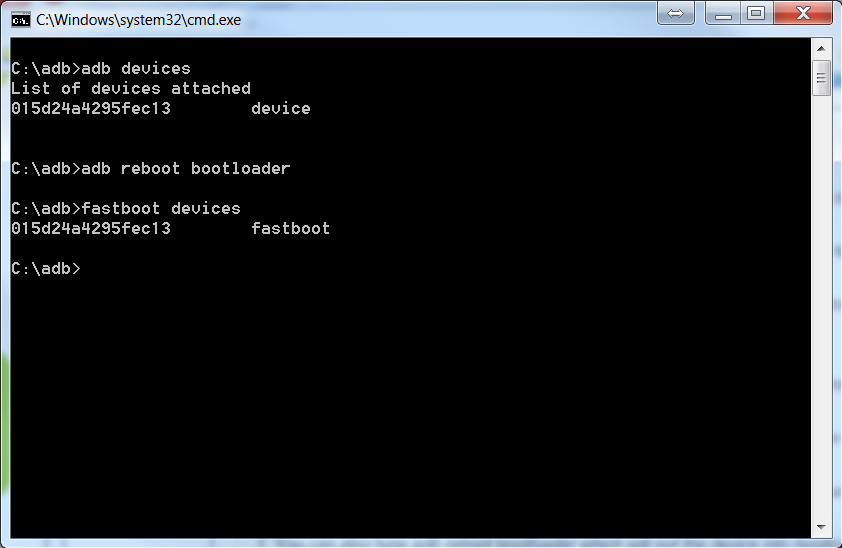
On your laptop you should install minimal fast boot and ADB, you can find it in this link. After you download it follow the installer’s instruction and create a shortcut on the desktop, open a command line at the desktop and type in “fastboot devices” if it is working properly you should see your phone, if it is not try searching for your phone’s drivers if it is not installed.
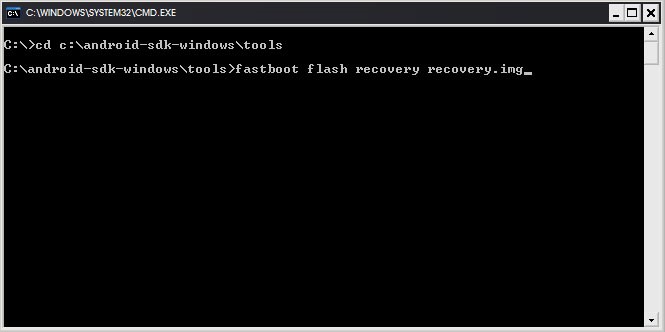
Now, type in “adb reboot-bootloader”, after the phone boots into the fastboot mode, type in “fastboot oem unlock”, a warning message will appear, ignore it and press the Vol UP button on your device. Wait for the device to restart. On the same command line, again type in “adb reboot-bootloader”, now download this file here, extract it to a folder and navigate to where you extracted it, you should see a file named recovery, and move the command line there, by typing in the command line ” cd “FOLDER PATH HERE” ” Once in that folder type in the command line “fastboot flash recovery recovery.img”, you now have a TWRP custom recovery, only one more step to rooting!
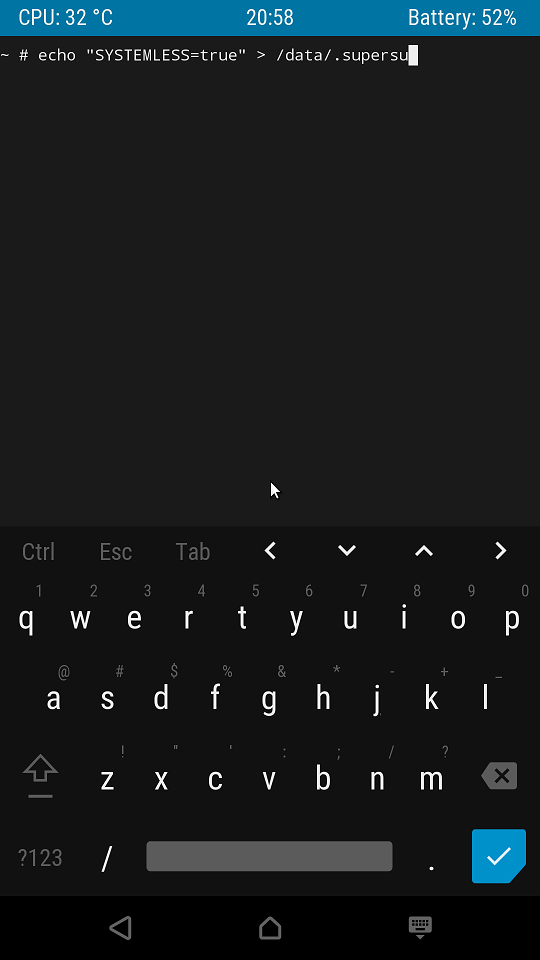
Now download this file here, and copy it to your phone’s internal memory, once done, reboot your phone into the custom recovery by pressing “VOL UP + Power button”, in TWRP go to Advanced -> Terminal and type in this code. “echo “SYSTEMLESS=true” > /data/.supersu”, now go to your advanced menu and hit file manager, check in your ./data folder for a “.superSU” file, if it exists go back to the main menu, press on install and locate your SuperSU file (the one you just copied to your phone) tick it and swipe to install.
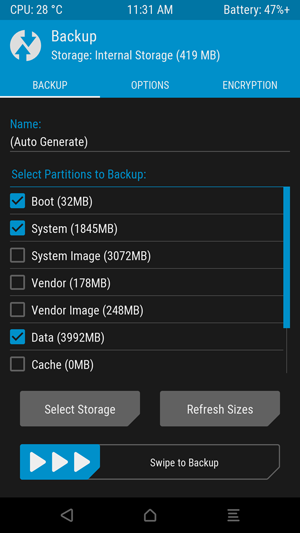
Before you reboot you can make a backup using TWRP’s backup, in case you do anything wrong. Just press on “backup” tick everything and swipe!
Once you’re done, you can reboot your phone and it is now rooted!
How to install TWRP and Root the Alcatel Ideal 4060AFix: root User’s Home Directory is /rootHow to Root Your Nexus Phone using CF-Auto-RootHow to Root Your Samsung Phone Using CF-Auto-Root