Unboxing the Philips Hue Starter Kit
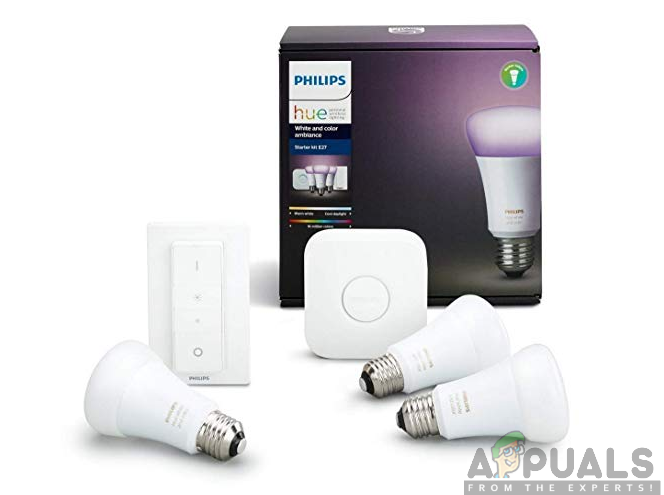
Now that you have purchased the Philips Hue Starter Kit, you will then need to unbox it and get it ready for the setup process. The Starter Kit comes with two or four white bulbs and the Philips Hue bridge. The bridge is a vital necessity as it will allow you to connect the light bulbs to the Wi-Fi connection through it. Once the bridge is connected, you can add up to 50 bulbs into the lighting system depending with your need for lights. Moreover, there are a variety of bulbs to choose from. This comes in various sizes and involves the white and color ambiance, and the white bulbs. Your choice, however, will come at a price since the white and color ambiance light bulbs are the most expensive type of lights from Philip Hue. The white bulbs on the other side are the least expensive type of lights provided by the company. Now once you have unboxed the box, you will find the Hue bridge a shown in the figure below. This is considered as the heart of the whole lighting system since it connects all light bulbs to the internet connection. At the back of the bridge, there are two ports, one for the power adapter and the other one for ethernet cable. In addition to this, there is a provided power adapter, ethernet cable, and smart light bulbs. You will now need to assemble the power adapter by sliding the plug down into its case. Once all these requirements are in place, you can now proceed to set up the Philips Hue lighting system.
Setting up the Philips Hue Lights
Now you will have to perform the hardware and software installation to set up the Philips Hue lighting system. After purchasing the Philips Hue Starter Kit, you have to follow the steps given below to get started and use the lighting system. The procedure includes the following:
Step 1: Power Up the Philips Hue Lights
First off, you will need to power up the lighting system. This involves the powering of light sources and turning on your wall switches. It is very simple to achieve this. All you have to do is to screw the new bulbs into the existing light fixtures then turn on the wall light switches. The bulbs will power on indicating that they are working properly and ready for pairing with the Hue bridge.
Step 2: Connect the Hue Bridge
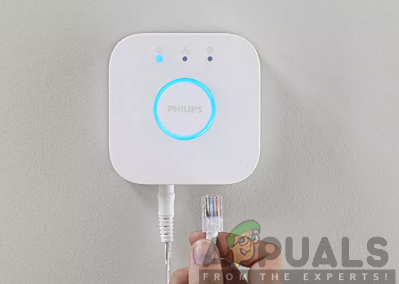
Next, you will need to plug in the Hue Bridge into a power source to power it up. Be sure to use the power adapter provided which is plugged into a power outlet and the other end plugged into the power port on the bridge. Furthermore, you will have to connect the Hue Bridge to your Wi-Fi router using the ethernet cable provided. Be sure to plug one end into the ethernet port on the back of your bridge and the other end into your Wi-Fi router’s ethernet port. The three lights will light up revealing to you that the connection is successful, therefore, ready for the next process.
Step 3: Download the Philips Hue app
Now that you are done with the hardware installation, software installation is the next move to make. This involves downloading the Philips Hue app into your mobile devices. This app will play a vital role in completing the setup process as well as performing other control functions. Most noteworthy, make sure that your mobile device is connected to the same Wi-Fi network as the Hue bridge to be able to find your light bulbs during the setup process. This companion app is available for both Android and iOS devices. Therefore, it is readily available for download and installation in the Google Play Store and the App Store as well. To download the app, be sure to follow the steps as outlined below:
For iOS users:
For Android Users:
Step 4: Set Up the Philips Hue Bridge
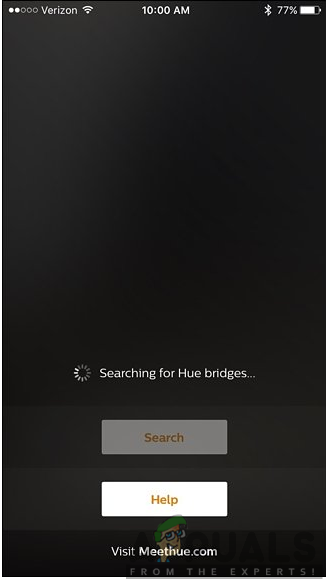
Now that you have the Philips Hue app installed in your mobile device, you will have to set up the Hue Bridge using the app. Therefore, be sure to follow the steps given below to set it up:
Step 5: Set Up the Philips Hue Bulb
After ensuring that the Hue Bridge is all set, you will now have to set up the light bulbs. This step is simple and pretty intuitive as you will be adding the smart light bulbs into the Philips Hue lighting system. Therefore, with the bridge being lit and running, be sure to follow the steps given below:
Philips Hue “LightGuide” Bulbs to Include Glow-Stick DesignUbisoft Overhauls Rainbow Six Siege Editions, Removes Starter EditionFix: Microsoft Word Starter 2010 cannot be opened. Try again or repair the…How to Get Pikachu as Your Starter Pokémon in Pokémon GO