However, before getting these benefits out of the new-to-you iDevice, you should set it up properly. Hopefully, the previous iDevice’s owner thoughtfully prepared the iPhone or iPad for you. I am thinking of clearing out all of his data and removing the personal information. That would be your ideal case. So, when you get the iPhone or iPad, it would be ready for you to enter your account and install all your favorite games, apps, music, etc. But, what if your iDevice’s previous owner didn’t get that job done for you. Would you be able to use your second-hand iPhone or iPad if it is still connected to its previous owner’s accounts? Well, this scenario happened to me when I get my new-to-me iPhone. It was literally dumped off untouched from its previous owner. I guess he believes me enough to leave all its personal data on the device. However, I have never thought of using any of his personal information (OK, except now). Anyways, before making the iDevice truly mine, I had to go through a couple of steps for setting it up. So, the answer to the question “Would you be able to use the iPhone or iPad?”, is YES you can, but only if you do the right set up. Otherwise, you may end up with a useless locked device. Do not worry, in this article you got all the steps you need to take to set up your used iPhone or iPad. So, let’s start.
Before You Start
You really don’t want to keep previous owner’s information on your iPhone or iPad. So, the first thing that you would need to do is to get that information out of your iDevice. Please keep in mind that all the apps installed on the new-to-you iPhone or iPad are tied up to the previous owner’s Apple account. So, they will no longer be available when you delete the old Apple ID from the device. If you really like some games or apps, take notes and remember that you will need to download or purchase (if they are paid apps) them again. All the good things in the world come with a price. And, if you are wondering whether to spend a couple of bucks on some great apps from the Apple App Store, I would definitely encourage you to do so. After you are done with the preparations, you can start setting up your iPhone.
Step 1: Turn off Find My iPhone, iCloud, and Photos
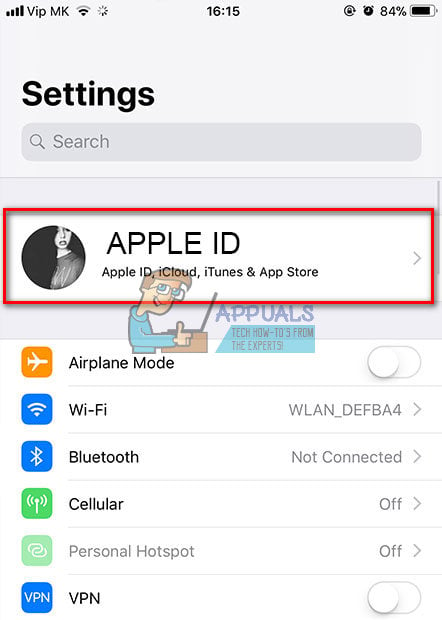
One of the crucial things when receiving a used iPhone or iPad is to remove the Apple ID from the iDevice. First, you need to check if there is an Apple ID connected to your iOS device. Here is how to do that. If your device runs iOS 11 or later
Go to Settings and check if there is an Apple ID at the top of the screen.
If your device runs iOS 10 or older
Search for the section iCloud inCheck if there is an Apple ID in this section.
If your device doesn’t have Apple ID connected to it, you are good to go. However, if your device is connected to its previous owner’s account, you will need to do the following. Check if Find My iPhone, iCloud, and Photos are activated. If they are on, contact the previous owner of the iDevice to disconnect your device from its Apple ID. The good news here is that he/she can do the disconnecting remotely. You can check the following part for more detailed information about the process.
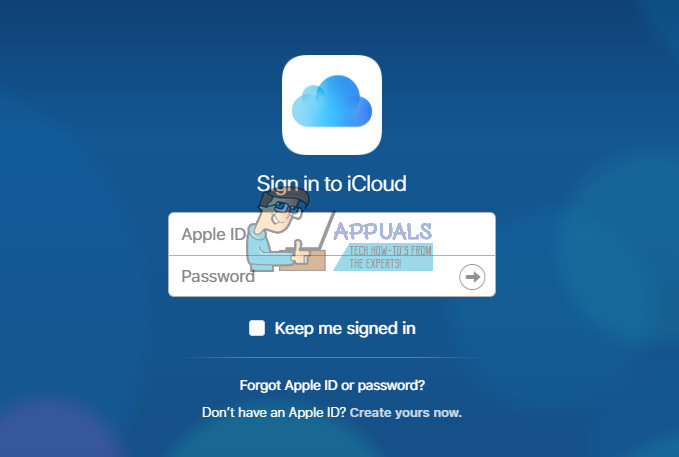
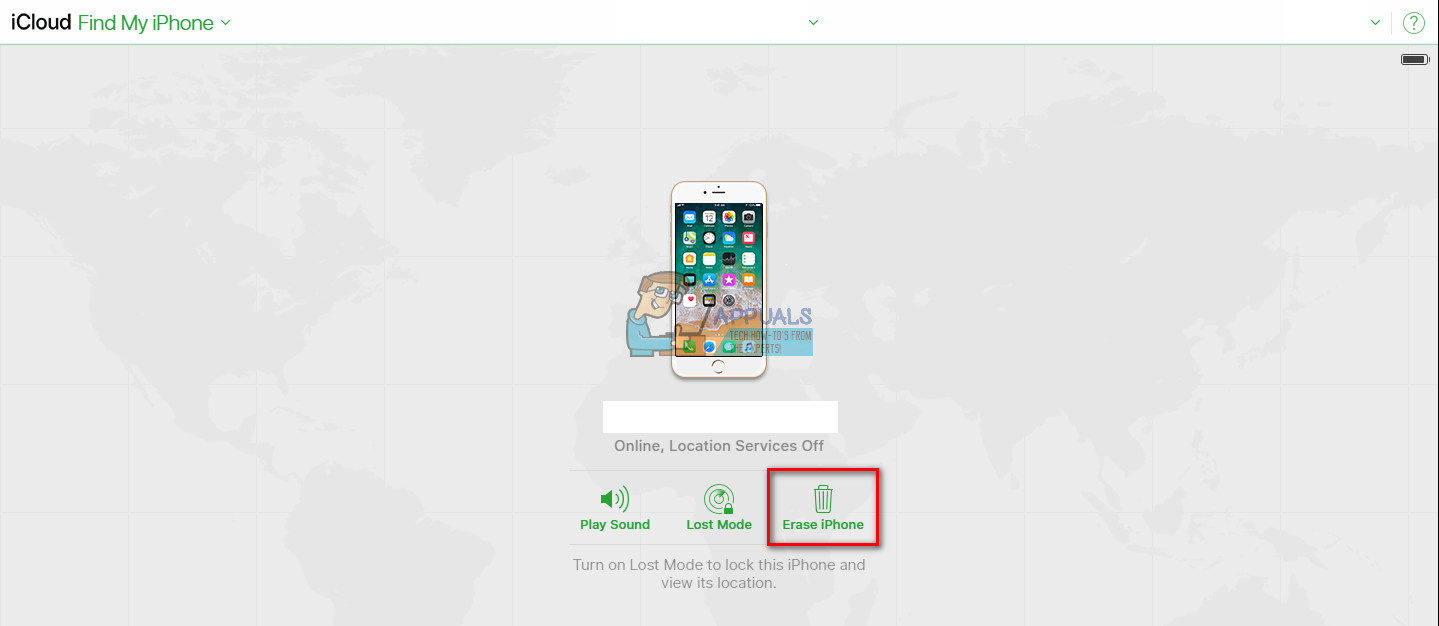
How to Remove iPhone or iPad from iCloud Remotely
The disconnecting process is pretty simple, here are the steps. If your iDevice’s previous owner used Apple Pay, he/she would need to remove your iOS device from that service too.
How to Disconnect Your iDevice from Apple Pay Remotely
If the person your device was owned before doesn’t know his/her Apple ID or password, he/she can contact Apple and do the recovery process. For more info about this process check the following links. Forgotten Apple ID: https://support.apple.com/en-us/HT201354 Forgotten Apple Password: https://support.apple.com/en-us/HT201487
The Worst Scenario Possible: What if You DO NOT know the Apple ID and Password and CAN NOT get in Touch With the Previous Owner?
Unluckily, right now there is NO way to remove an Apple ID from an iDevice if you DO NOT know the password of the account connected to that device. This is a security blockage put in place by Apple to help combat the theft. And, from the information that we have, there isn’t a legal way to pass this blockage. So, before restoring, erasing, or updating your iPhone make sure that its previous owner turned OFF both Find My iPhone and iCloud. Do NOT remove personal data from your iPhone if these features are ON and you can not get in touch with the previous owner of the device. Only after you turn them off, you can delete all the personal data, apps, and other preferences that its previous owner used.
Step 2: Update Your iPhone to the Latest iOS
Another good practice is to update your new-to-you iPhone or iPad to the latest iOS before performing a full erase. Most iFolks do not care about their older iDevices when they get a new one. So, the chances are your used iDevice is running an outdated iOS version. At this point, you don’t have any personal data on it. So, you couldn’t lose anything. Go ahead and update the iPhone or iPad to the latest version of iOS. Apple makes the update process very easy and simple. You can do it right on your iDevice itself. You do not need a computer to finish the procedure. If for any reason, you want to perform the update on your computer, you can also do that using iTunes. But, I personally find it easier to perform directly on my iDevice. Note: Before starting the update process, make sure your iDevice has enough battery juice and is connected to a solid Wi-Fi network.
How to Update Your iDevice to the Latest iOS
Here are the steps you need to take in order to update your iDevice to the latest iOS version. When I received my iPhone, it was running on iOS 9.3.2. I updated it to the latest iOS 11 at that time, and I experienced a huge improvement in the speed and battery life, as well as many great new features. After you update your iDevice, you need to perform some actions to clear out all the previous owner information.
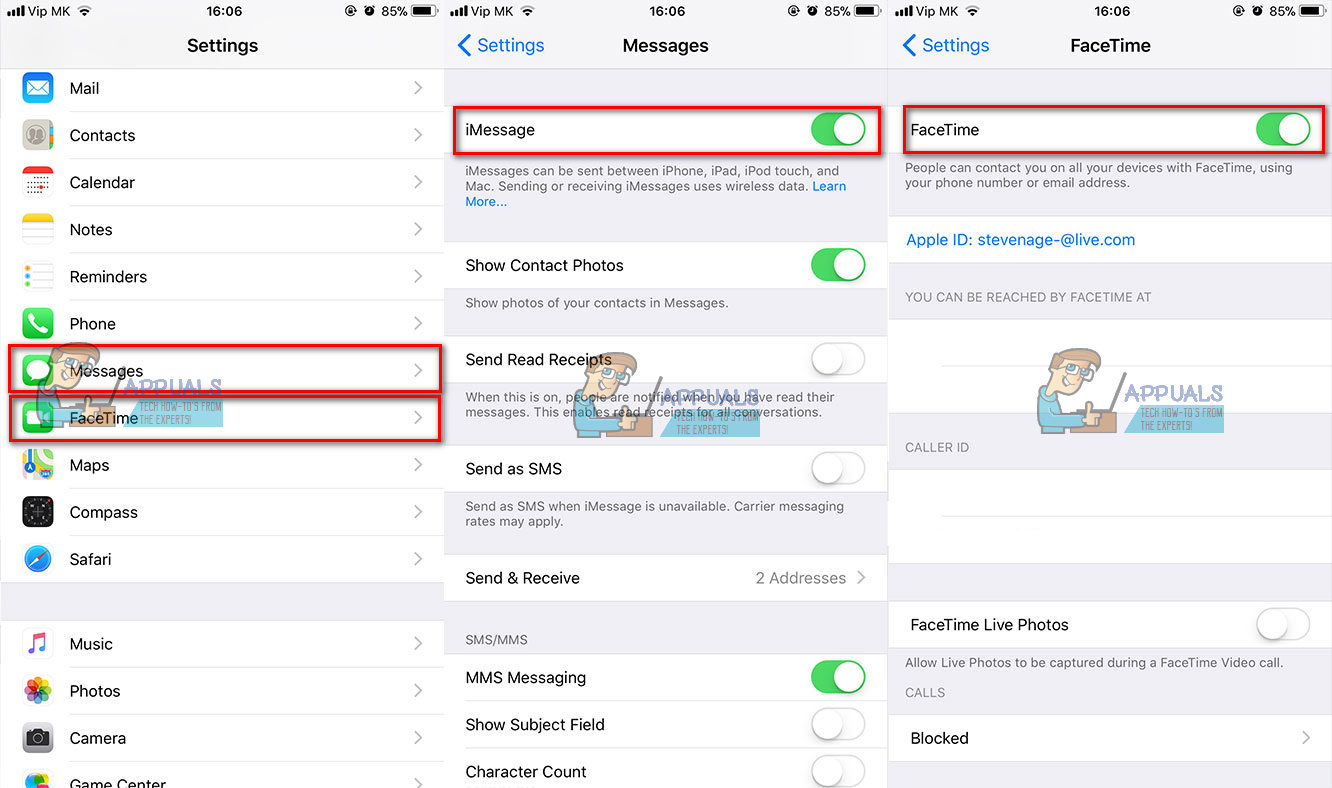
Step 3: Turn Off iMessage and Facetime
Another thing that you need to do before performing a full iDevice erase is manually turning off the iMessage and Facetime services. Of course, you must be sure that your iPhone or iPad is disassociated from the previous owner’s private info and text messages.
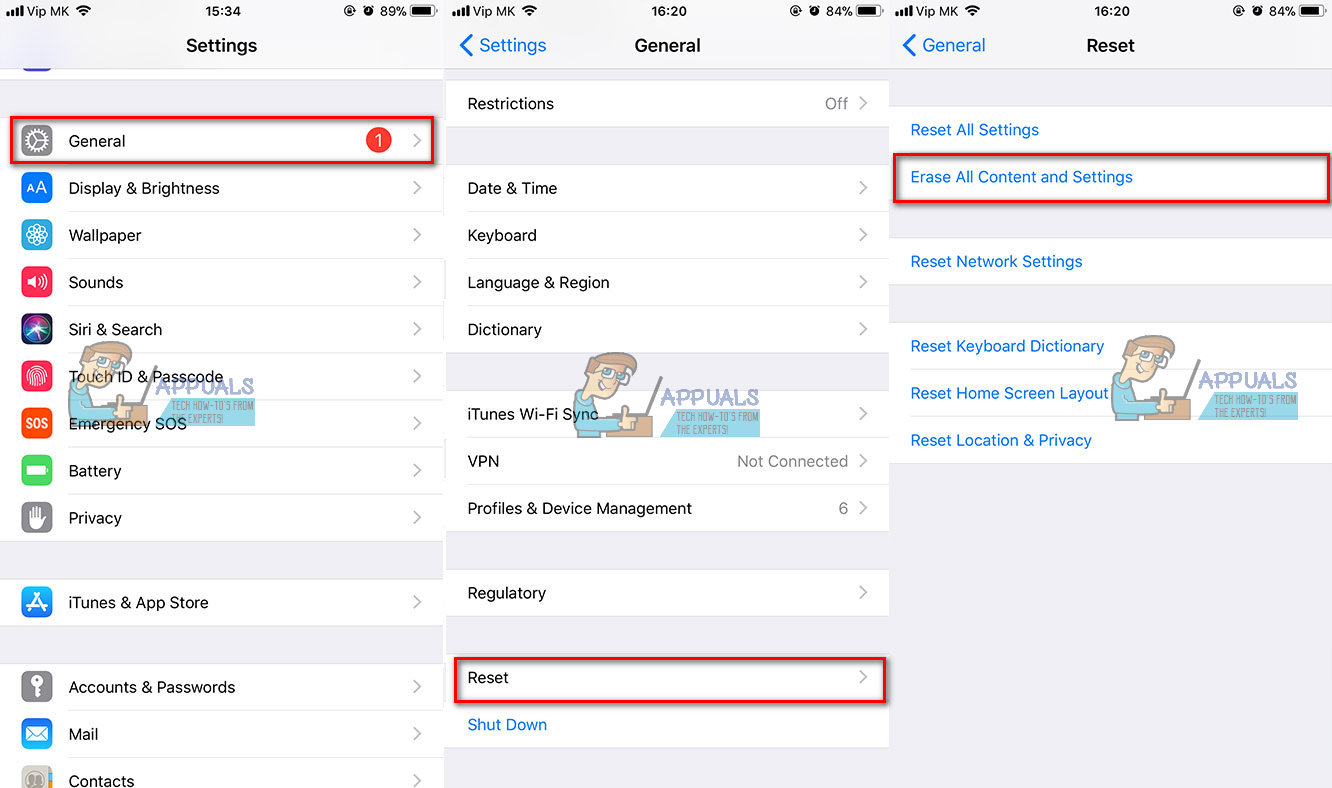
Step 4A: Erase Your iDevice From its Settings
Now it is time to erase your iDevice. Here is the procedure.
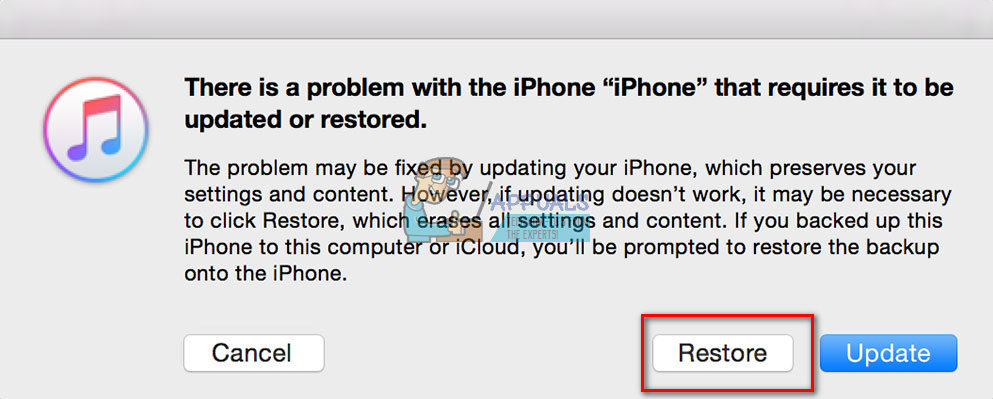
Step 4B: Erase Your Device Using iTunes
Besides the procedure for erasing your iDevice from its Settings, you can do it using iTunes on your computer. Just in case there is anything else lingering around that connects your iDevice to its previous owner, let’s do a couple of steps.
Step 5: Dissasociate Your iPhone or iPad From its Previous Owner’s Apple Account
You do not need to perform this step if you disconnected your iDevice from its previous owner’s account earlier. However, if you didn’t follow the steps above, when turning off Find My iPhone and iCloud, make sure you do it now. Note: You will need to contact the previous owner of your iDevice to perform this procedure. You should also do this process if you are giving your iPhone or iPad to a family member or friend, or selling it.
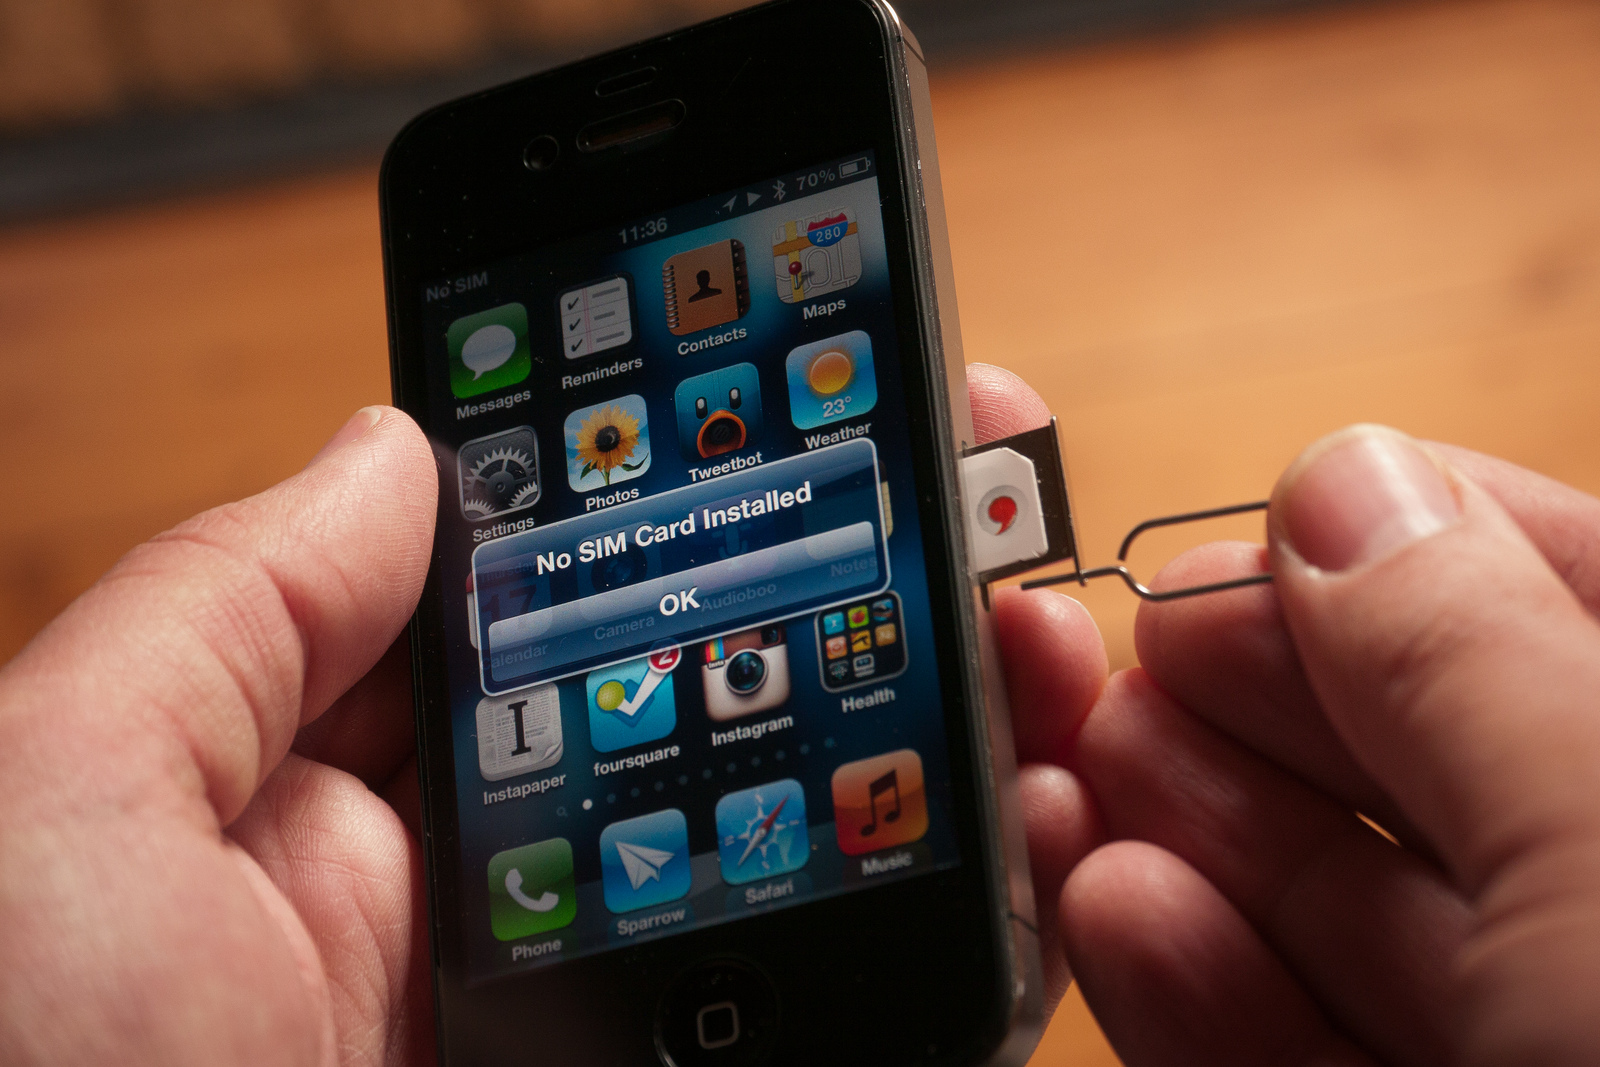
Step 6: Remove the SIM Card From Your iPhone or iPad
SIM cards can also be a place where previous users stored some contacts and messages. So, it is important to remove it to get rid of all that data. Additionally, if you want to use the iPhone as your daily driver smartphone, you would probably want to insert your own SIM card. Here are the steps you need to take to remove the old SIM card and insert the new one. Keep the previous owner’s SIM Card in a safe place (away from magnets and electronic devices that may erase it). You may need it later if you like to use your iPhone as an iPod Touch. Also, the previous owner may need that SIM Card back. So, better play safe than sorry! Now, when you cleared all the old user junk, you are finally ready to make that iPhone or iPad your OWN.
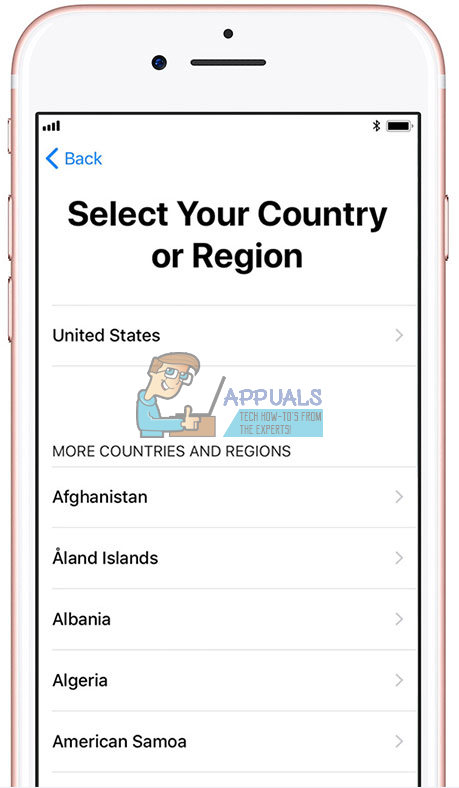
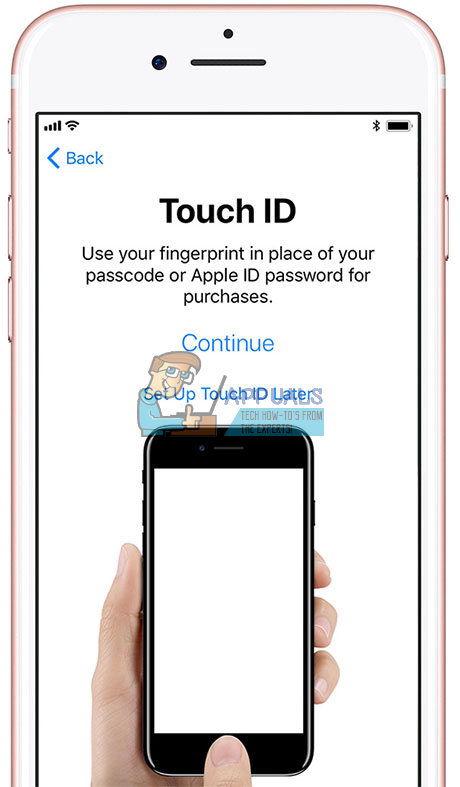
How to Set Up an Used iPhone, iPad, or iPod Touch
After performing all the steps for cleaning the digital junk above, this will be the most interesting part.
Final Words
The iPhone or iPad you’ve got now is ready to be your OWN. Start using it and have some fun with it. Download your favorite apps and games, make phone calls, send messages, and put the music you like on it. Additionally, do not forget to back it up regularly! That’s how you will prevent losing your personal data even if you lost your device. There is nothing else I would like to say except congratulating you for successfully setting up your iPhone or iPad. I wish you wonderful digital adventures with countless happy moments.
Fix: “iTunes could not restore the iPhone or iPad due to corrupt or…What is ‘Modern Setup Host’ and How to Fix High Disk Usage by Modern Setup Host?Leaks iPad 10.8-inch Schematic Claims iPad Pro-like Design, Thinner Bezels and…Most Used Android Messaging Apps in 2020