Enable RDP & Allow Access To Your Computer (Professional Versions)
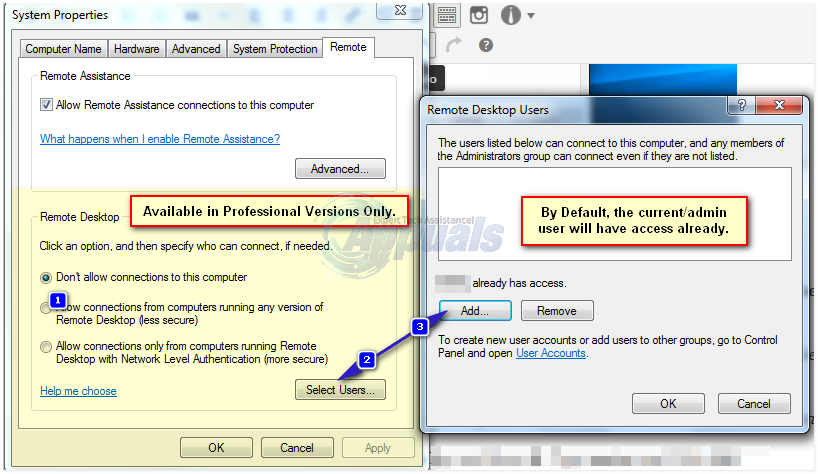
Press Windows key to open Start/Search menu, type Allow remote access to your computer. In the search results, click on Allow remote access to your computer. System Properties window will open. Place a check next to Allow Remote Connections to this computer in the Remote Assistance section.
Also select Allow remote connections to this computer option in the Remote Desktop section. Optionally, you can select Network Level Authentication under it for added security. Remote Desktop section will be unavailable if you have Windows 10 Home edition as mentioned above. To give permission to users to allow them to access your system through Remote Desktop, click on Select Users in the Remote Desktop section. Click Add in the Remote Desktop Users window. Now type the user’s account name to give him the required rights and click OK > OK.
RDP will now be enabled on your system. All appropriate changes to the firewall will also be made automatically. To start a Remote Desktop Connection, Hold Windows key and Press R. Type mstsc and Click OK. Type the computer name or IP address of the system you are going to access and click Connect. Make sure the account through which you are going to access a system remotely has a password as accounts with no passwords cannot access a computer through RDP.
Enable RDP on Windows 10 Home Versions using RDPWrap
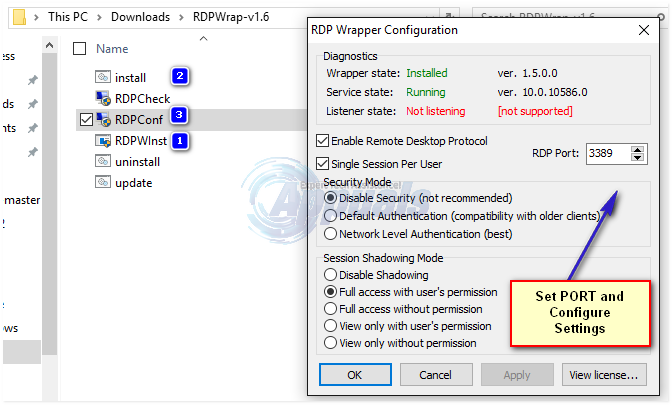
This is pretty easy. Click here and download the RDP Wrapper Library. Extract it to a folder, and open the folder. First, run RDPWInst.exe, then run Install.bat. Once done, Run RDPConf.exe and you will be able to configure RDP on a Windows 10 Home Version.
Microsoft Releases Windows 10 1909 Generic Product Keys For All Supported…How to Move Outlook ‘All Versions’ to a New ComputerHow to Restore Your iPhone (All Versions) Without UpdatingHow to Allow Standard User to RDP/Remote Access on Windows 7 and 10