Many people use the simple ‘Open Broadcast Software’ also known as OBS to stream their games as it is a very optimized software for smooth streaming and is extremely simple to use. OBS allows you to add certain widgets that can be used to interact with viewers, widgets such as a follow notification that would display the follows made during the stream and you can also add a proper HUD to make the stream more eye-catching. Recently a company named ‘Stream Labs’ partnered with OBS and updated the older version of OBS to the newer ones allowing users to download widgets on the spot and select anything without having to go through the trouble of adding specific scenes one by one.
Setting Up
Unlike OBS, Stream labs OBS is much easier to handle as most of the things in it are set by default when applied. It also allows ease of access to almost anything from a background view of the stream chat and the game itself; very useful for those with dual monitors as they can shift the chat layer on to another monitor and game peacefully while reading the chat. This avoids the use of pausing the game every time just to check the chat.
- You need to download Streamlabs OBS from their official website
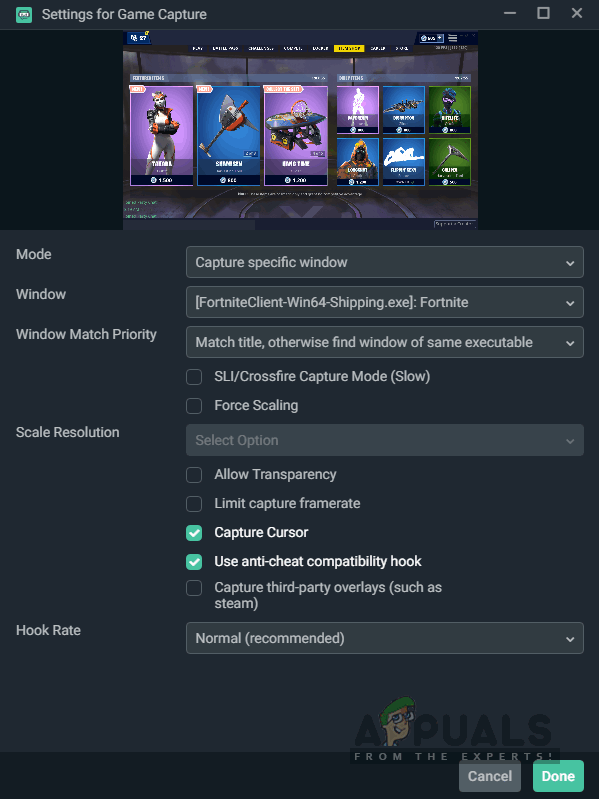
- After the installation of the software, launch it and then click on add a new source. After that select the game capture or the game capture option and then click add source. You will be taken to another window which will have a ‘Mode’ tab. Select capture any fullscreen application then select done. Now, whenever you will launch a game and the software is opened it will automatically pick up the game. Should it not work, you can always switch the mode to capture specific windows and then select the game you are playing manually.
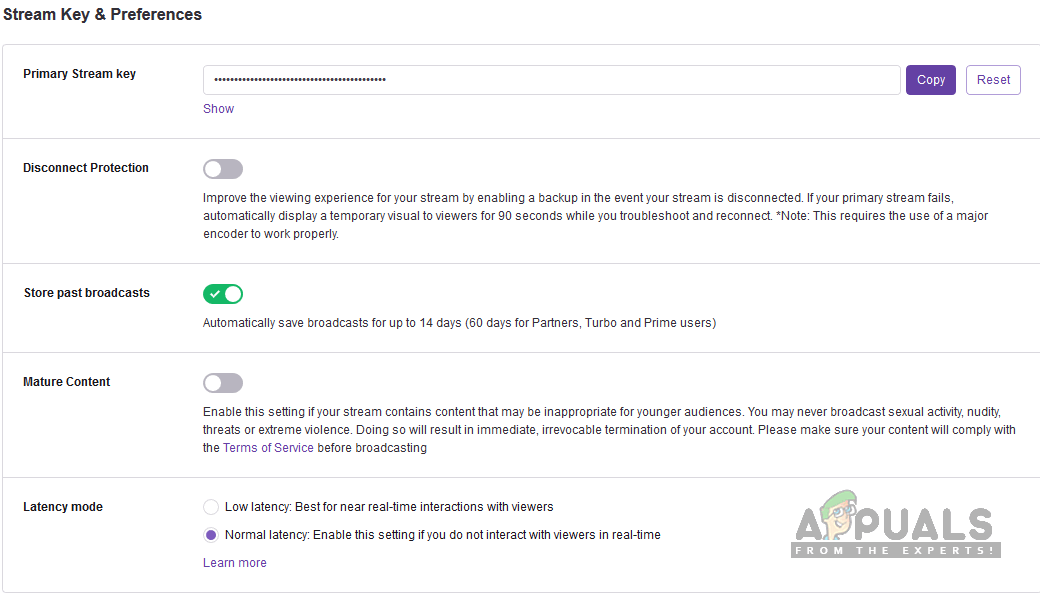
- Now comes the main part as this will be needed in order for you to stream. Open the Settings window by clicking on the gear icon located on the top right-hand side of the software. Once there, click on ‘Stream‘. Here you will add your stream key depending on if you stream on twitch or youtube. What is the stream key? Stream keys are an essential part of your stream, it will take your stream to your channel as it is unique to only your channel. Never ever give out your key to someone else as they can stream in your place if you do so.
Obtaining Stream key in Twitch
To get the stream key on Twitch you need to have a Twitch account. Head to Twitch and create a new account or login if you already have one. After that proceed to click on your profile name and select dashboard, you can find this on the upper right. Once in the dashboard click on the channel tab and you will find your primary stream key. Copy it and then paste it into the stream labs OBS settings.
Obtaining Stream key in Youtube
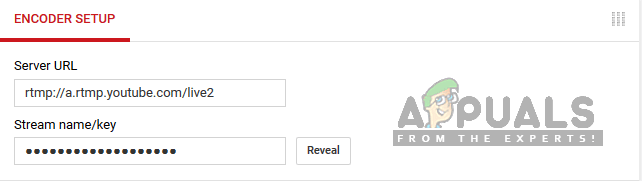
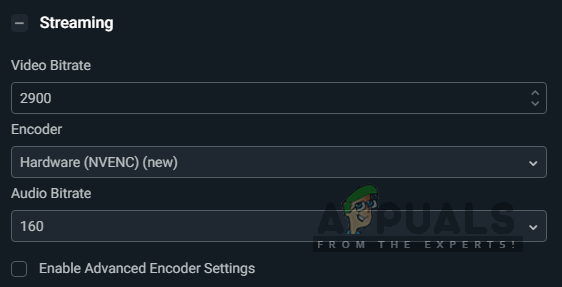
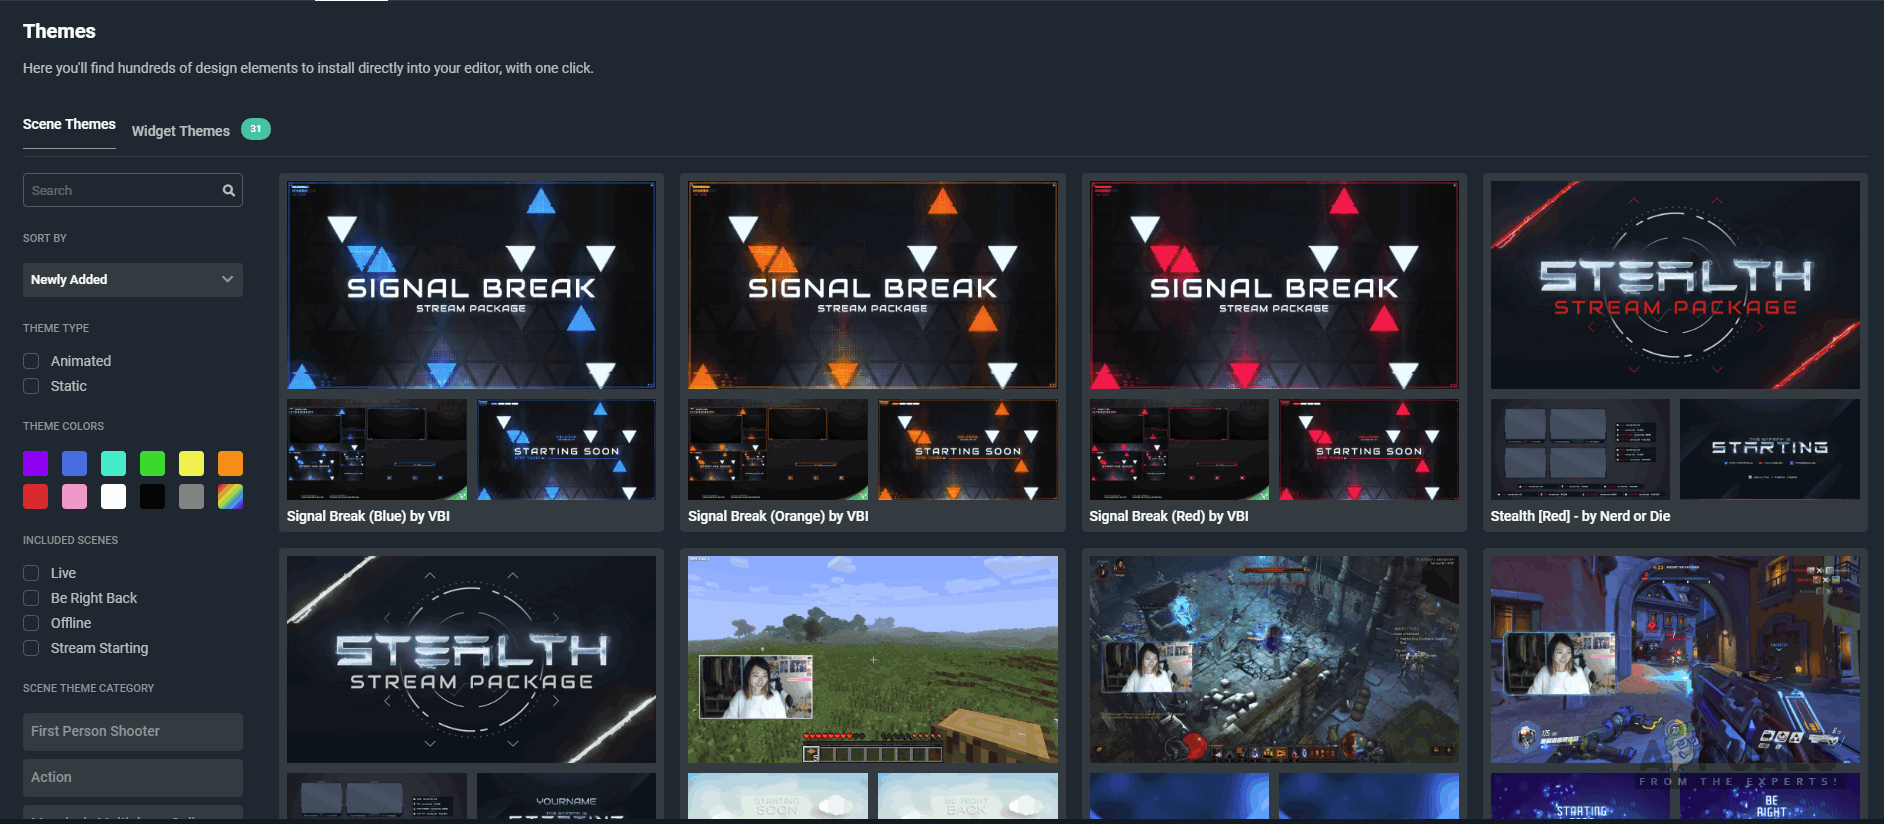
To get the stream key on Youtube, you need to have a Youtube account. Head to Youtube and create a new account or login if you already have one. After that click on your Profile Picture then click on the Creator Studio. The Creator Studio is a little bit difficult to use and lacks some important stuff. In order to find the stream key, you will need to go to the Creator Studio Classic. Once in the classic mode, click on Live Streaming, and then scroll down to find a tab named ‘Encoder Setup‘. Under it, you will find the stream key. Apply it the same way as you apply the Twitch key. 4. When this step is done head back to Stream Labs settings and then select the ‘Output‘ tab here. Here you will select your Encoder and Bit Rate. An Encoder is a way you will render you stream; you can either use your CPU or your GPU depending on which one is the most powerful and beneficial to you. Bitrate depends on your network speed. If you have a decent network speed then you should have no problem streaming in 1080p at 60 FPS. If you are using Hardware (NVENC), this means your GPU will be utilized while streaming. If you are using software x264 that means your CPU is being utilized while streaming. While setting the bitrate you must know that 10000 Bitrate is equal to 1MB/s network speed; meaning 10 Megabits of the internet will give 1 MegaByte per second speed. Therefore, if you have a decent network connection then 3000 Bitrate should be more than enough for a 1080p stream with no lag. The rest would depend on your encoder. When that’s done you are basically up to stream now. However, if you choose to lighten some things up then you can add themes that carry a proper hud display. This can be done by visiting the themes tab. 5. Click on a theme pack and download it by clicking the install overlay button. The overlay will be automatically be applied and the options would be shown on the bottom left section of the scenes. There you can select any scene which is included in the package such as the game capture scene or the intermission scene which you can use if you have to leave the stream temporarily.
Xbox’s November Update Adds Discord and Streamlabs IntegrationHow To Fix ‘Error Fetching Your Channel Information’ in StreamLabsUsing Go Live and Screen Sharing to Stream on Discord (Explained)Record Discord Audio in High Quality using OBS and Craig