While Mozilla Firefox is capable of providing the digital rights management algorithm that Netflix needs in order to run, Netflix is not yet configured to handle the browser reporting itself as Firefox under Linux. A user agent overrider is needed in order to prompt the service to transmit movies safely. This is provided at no charge to users of Mozilla Firefox, which is also free of charge itself and included with most modern Linux distributions. Algorithm updates have to be downloaded separately for legal reasons, as these aren’t packaged with the actual Firefox software in order to ensure complete compliance with open-source standards. Installing the Widevine plugin that enables native Netflix support will technically introduce closed-source code into your Linux installation, so avoid this if that is at all a problem.
How to Run Netflix on Firefox Under Linux
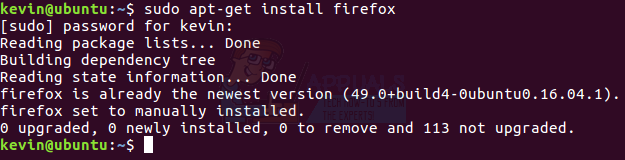
How you start the Firefox browser depends on what distribution of Linux you have installed. If you use Fedora Desktop Edition, then you can select Mozilla Firefox by clicking or tapping Applications, then Internet and then Firefox Web Browser. Users of Fedora KDE should go to KMenu, select Applications, tap Internet and then select Firefox Web Browser. Users of Canonical’s Ubuntu operating system or any of its spin-offs like Lubuntu, Kubuntu or Xubuntu should click on the application menu, then go to Internet and click on Mozilla Firefox. It’s likely to be the only browser installed. Some users of Debian, especially lighter weight versions of it, might have Iceweasel or IceCat installed instead. In this case open a terminal window by holding CTRL, ALT and T and then type sudo apt-get install firefox in order to rush the latest version.
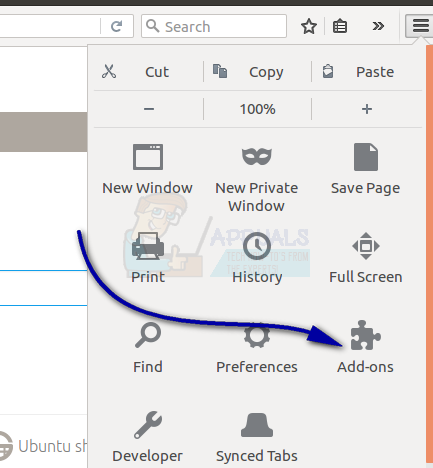
Native Netflix support requires at least Firefox 49, so once you have the browser open click on Help and tap on About. Make sure that the version number is at least 49.0, but if you’re a *buntu user you can ignore any message that reads something like “Mozilla Firefox for Ubuntu canonical – 1.0” as this doesn’t refer to the browser build. More than likely your package manager will ensure you’re running the latest version, but if it reads a number below 49 and it’s not an ESR-version there will be an Update button on the about page. Click it and then wait a moment. Now that you’re set, click on Tools and select Add-ons Manager.
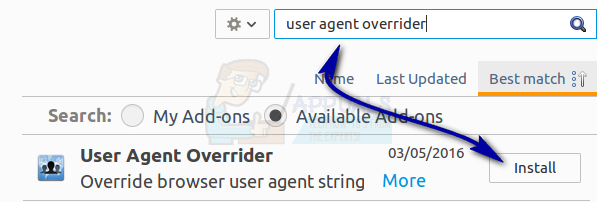
You’ll need to search for an extension called User Agent Overrider. There are several similarly named extensions, but you need the one that literally has that exact name as well as a blue icon with three silhouettes on it. Click on the Install button and give the installer a moment to process it. It may or may not tell you to restart Firefox, but once it’s done and restarted if necessary select the Add-ons Manager again and make sure that it’s visible in the extensions area.
Select the Preferences button and a dialog box will come up.
Click inside of the area that reads User-Agent entries, hold CTRL and then press A then press Backspace. Finally copy and paste this single line into the box:
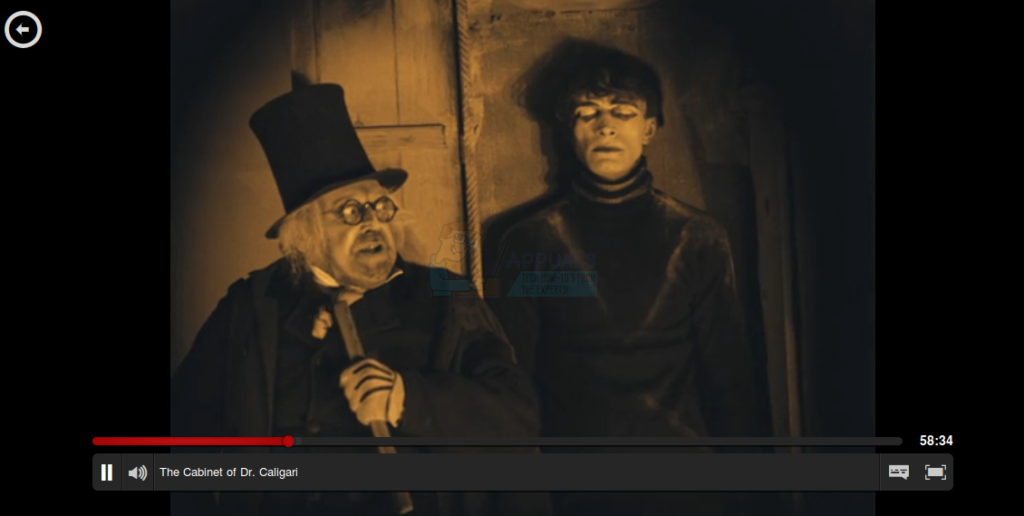
Click the close button once you’re done. Many of these boxes will be large if not full-screen on netbooks, tablets and other modern mobile Linux devices, but they should work in the same way regardless of the actual resolution of them. Once you’re done with this look for a new button near to the search bar in Firefox. It should be right next to the Downloads control, and have a monochrome version of the User Agent Overrider icon you saw in the previous steps. Select this new control and select Linux / Chrome 53 from the menu that pops out of it. The icon should turn blue to indicate that it’s changed the user agent string your browser is reporting. Type netflix.com in the URL bar and press enter. You will need to be an active Netflix customer with a paid account to be able to log in. Above the Sign In button Firefox might display a sign about needing to install DRM updates. Click on Install, wait a few moments and then refresh the screen. This might take some time to activate. When it’s finished click back on Tools, then select Add-ons and finally click on Plugins. A new section should be included called “Widevine Content Decryption Module provided by Google Inc.” Make sure that Always Activate is selected. Close the Add-ons Manager tab to bring Netflix back up. Click on Sign In, and then put your valid email and Netflix password in. Signing in after installing Widevine might take a few more moments than usual the first time, but this is a one-time delay. Once you’re in click inside of the Netflix search box, type in the name of the movie then tap on the tile that matches your search. Tap on the red triangle that comes up and wait a moment if a red circle spins in the middle of where the film’s picture would be. You may have to reset if it doesn’t stop spinning, but once you do you’ll finally be able to watch Netflix uninterrupted. Feel free to switch off the User Agent Overrider anytime that you’re not streaming protected content from Netflix. Select the blue icon and return it to the default setting in order to turn it off.
5 Methods to Unpair Apple Watch [Without or Without iPhone]Firefox App For Android Latest Update Can Stream DRM-Protected Content At 720p…How to Stream Audio From Youtube Videos on Google ChromeApple only Allows Macs with a T2 Chip to Stream 4K Netflix on The new macOS Big…