What is Grab and What You Can Use it For
Grab is a native Apple app available on macOS and Mac OS X that allows you take screenshots of your screen. This handy little utility provides capturing the entire screen, the separate window, or only a part of your screen. Though, many similar apps and utilities do similar things, Grab is one of the best choices and comes preinstalled on every Mac computer. Macs also have built-in screenshot key combination (Command+Shift+3 and Command+Shift+4), but Grab is excellent. So why choose just good when you can have excellent.
What Can You Do Using Grab?
How to Use Grab for Taking Screenshots
First and most obvious you need to launch the Grab app. And, here is how can you do it.
How to Take Screenshot of a Part of Your Screen
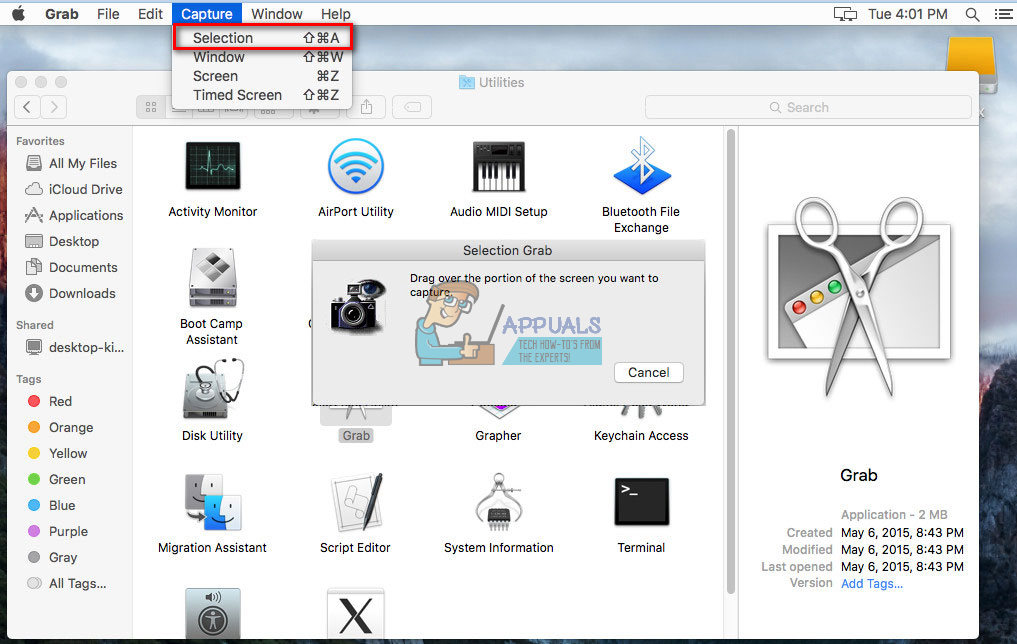
Grab offers you an option to capture a specific region of your screen that you select. You can do it by clicking Capture on Mac’s menu bar and choosing Selection. You can also use the dedicated keyboard shortcut Command+Shift+A. After you launch the feature, click and drag to select the desired capturing area. When you release the click, a screenshot will open in a new window where you choose the name and format, as well as the saving location for the captured image.
How to Take a Screenshot of a Window
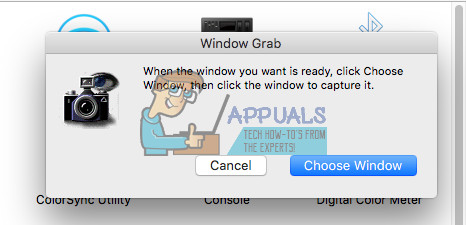
To take a screenshot of a window that you select, Click on Capture on Mac’s menu bar and choose Window. You can use the keyboard shortcut as well Command+Shift+W. A prompt will appear with instructions to choose the window you want to capture. Click on Choose Window and next click on the window you want to capture.
How to Take a Screenshot of an Entire Screen
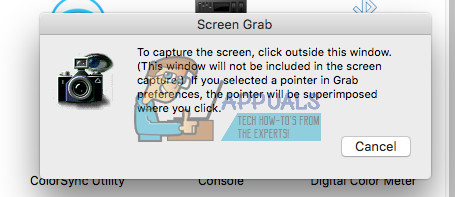
To take a screenshot of the entire screen, Click on Capture on Mac’s menu bar and choose Screen. You can also do it using the keyboard shortcut Command+Z. A message will pop up informing you to click the screen whenever you are ready to capture the whole screen.
How to Take a Screenshot Using Timer
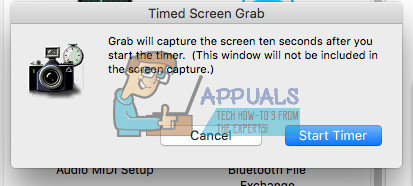
This is by far the best feature that Grab offers. It allows you to take a screenshot after a short period of time (10 seconds), and here is how to use it. Click on Capture on Mac’s menu bar and choose Timed Screen or use the keyboard shortcut Command+Shift+Z. Now click Start Timer and Grab will take a screenshot of the entire screen 10 seconds later. You have enough time to start any action and open any window you want to capture. People usually use Timed Screen to take pictures of their Mac’s menu and menu options. After taking the screenshot, you can see information about it by clicking Edit on Mac’s menu bar and choosing Inspector. This also have a dedicated keyboard shortcut – Command+1. Here you can see your image’s view depth and size. By default, Grab saves all the images in TIFF format. However, you also have JPEG and PNG as variants when saving the image. Lastly, you can use the Preview app to make any changes to your screenshots like cropping, resizing, etc.
Screenshots Quality
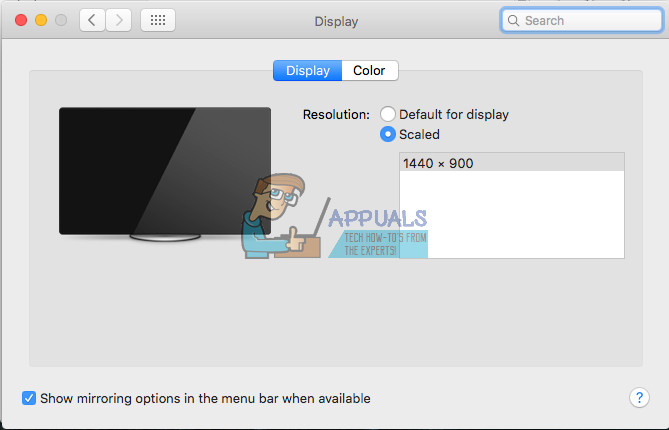
Many of us have specific requirements when it comes to screenshots quality, like using particular file formats or some resolution standards. As the native format for Grab screenshots is TIFF, the images are fairly high-resolution. However, Grab is making screenshots of your screen, and if the resolution of your screen is 1080p, you cannot expect 4K images from it. That means your display resolution limits the Grab possibilities. If this confuses you, let’s take a different approach at the situation. Grab captures the actual pixels on your screen. So, if the resolution of your screen is 2880×1800, all the full-screen-capture images will be with the same resolution. To make sure you get the best results of your display, go to System Preferences open Displays and check if you are getting the highest resolution available for your monitor.
Screenshots Image Format
The default and most used image format on Macs is usually PNG. However, you can quickly change that in whatever supported format you want, using Terminal. Macs support most of the popular image formats out there like JPG, PNG, GIF, TIFF, and PDF. So, you have a wide variety of options here. Here is how to set a default image format using Terminal.
Grab Does Not Work After Updating Your macOS or OS X?
If your Grab app does not work after an OS update, the preferences file of this app might have gotten corrupted. However, here is how can you check and fix this issue. If this procedure for updating the preference file did not work for you, reinstall the Grab app using macOS Recovery and then reinstall macOS or OS X.
Additional Screen Capture Option on macOS and OS X
If for any reason you don’t want to use Grab, try using your standard keyboard shortcuts for screenshots. To capture entire Mac’s screen press Command+Shift+3. For capturing a specific area of the screen using crosshairs, press Command+Shift+4. The screenshots are automatically saved as image files on your desktop. If you don’t want to save them to your desktop, just press the control button, and the images will save to your clipboard. After that, you can easily paste into other applications using the Paste option (Edit and Paste, OR Command+C). If you cannot make screenshots using the keyboard shortcuts, make sure they are enabled in your Mac’s default keyboard shortcut menu. Go to Preferences, choose Keyboard, and tap on the Shortcuts tab. Look at the left panel for the Screenshot option. On the right-side panel, make sure you have enabled the boxes next to the options for screen captures.
Final Words
These are the 2 native options for taking screenshots on your Mac. Both variants are built in your macOS or OS X, and you do not need to install any additional apps to use them. However, if you prefer capturing screenshots using some third-party app feel free to tell us which app do you use in the comment section below.
How to Take Screenshots on Lubuntu 16.04 or HigherHow to Take Screenshots from the Linux Command LineNintendo Switch Voucher Deal: Grab Two $60 Games For $84Fix: Disk Utility Wont Load on MacOS