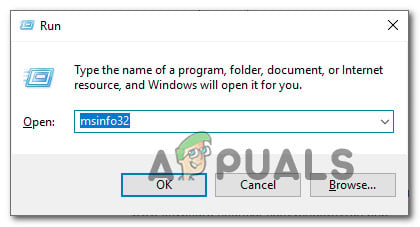
Like drivers and software, updates for BIOS are also released occasionally, but you should have a very good reason for updating your BIOS, also called flashing your BIOS. Unless you are having a specific issue like compatibility while installing new hardware that is resolvable through BIOS update, only then you should update your BIOS. First, you’ll have to know the version of the current BIOS installed on your system. To update your BIOS on your Lenovo computer/laptop, you will first have to check which version of BIOS is currently running on your system.
Method 1: Updating BIOS Through Windows
Go to support.lenovo.com. Click on Detect My Product. An agreement will appear, click I Agree. Lenovo Service Bridge will start downloading. Install the downloaded file. You will get a warning about installing the application. Click “Install”. It will start downloading and get installed automatically. The web page will automatically redirect to your products page. If for some reason you can’t get the above method to work, simply type your laptop’s or desktop’s model under “Search Products”. Search results will appear in a drop-down below. Now select your exact system model in the results. The support page for your model will be opened. Scroll down a little. In the search results below, executable and/or bootable cd (not available for all models) of the latest BIOS will be available. If the Version and Date of BIOS available for download is newer than the one you have currently, then click the download icon next to the BIOS update utility. Run the downloaded file. Follow the on-screen instructions. Click yes for any all User Account Control warning that appears from now on till you are done with this guide. After extraction, make sure the check is placed for the “Install BIOS Utility now.” option. Click Finish. The update utility will now start.
Method 2: Thorough Bootable USB
If some reason you can’t boot into Windows and still want to update your system, then worry not, as you can do it by booting from the USB. To check the version of BIOS, power on the target system and tap repeatedly F1 or F2 for some models to go into BIOS setup. Once in BIOS setup, search for “BIOS Revision” and value against it would be your BIOS version. If you want to update bios for a laptop, you’ll have to press the Lenovo key to access the BIOS menu while your laptop is powered off, which is usually beside the power button on the front. A menu will open, and select BIOS setup from it Connect the USB to the target system, power it on and keeping tapping F12 until you see the Boot menu. If F12 doesn’t’ works, it may be different for your model, you’ll have to check the way to boot from USB from Lenovo’s website. If you have a modern laptop, you’ll have to press the Lenovo key to access the BIOS menu while your laptop is powered off, which is usually beside the power button on the front. A menu will open, and select the boot menu from it. Connect the USB to the target system, power it on and keeping tapping F12 until you see the Boot menu. If F12 doesn’t’ works, it may be different for your model, you’ll have to check it from Lenovo’s website. If you have a modern laptop, you’ll have to press the Lenovo key to access the BIOS menu while your laptop is powered off, which is usually beside the power button on the front. A menu will open, and select the boot menu from it Follow the on-screen instructions. Do not turn off your computer or laptop in any case during the updating process. In the case of the laptop, make sure the battery is present in the laptop and the AC adapter is connected with it the whole time. If this guide didn’t work out for your model, do let us know and we will guide for your specific model.
How to Fix Lenovo K8 Plus Baseband Unknown and IMEI InvalidThe Future Of Displays is 16:10 Aspect Ratios and Low-Power Screens According To…Fix: Lenovo Touchscreen not WorkingHow to Flash CyanogenMod 13 for Lenovo ZUK Z1

