Value
If you are new to overclocking the place you certainly don’t want to start is with your $300+ i7 unless you just have money to burn. Literally, you will probably overheat or overdo the voltage on your first attempt and cook your CPU.
Bios Configuration
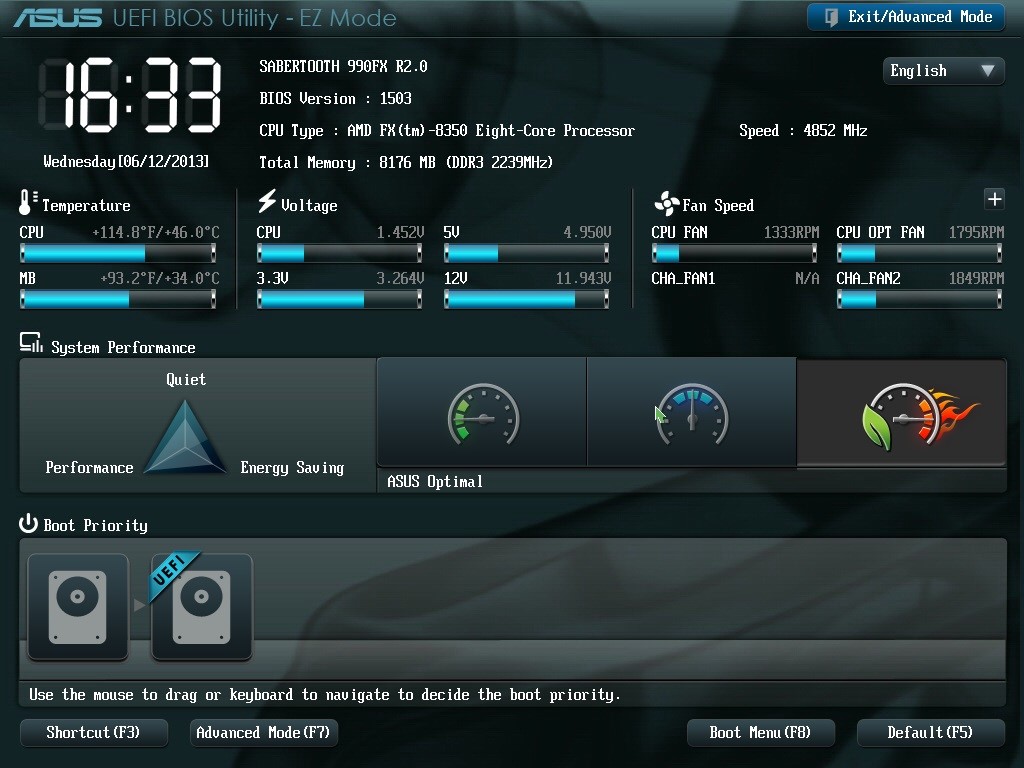
Here’s where life can get a little scary and somewhat intimidating. We’ll assume you already know how to boot into the BIOS setup on your device. If not please consult the user manual that came with your motherboard. The button you press to enter into the BIOS will vary based on your motherboard manufacturer. However, the general idea is the same on all Windows based devices. With my Fx-8350 I originally started off with a Gigabyte GA-990FXA-UD3 however I was not very fond of the overclocking configuration and moved to the Asus Sabertooth 990FX. They both worked great for overclocking so a lot of it will just be your personal preference. Do not, however, pick a board based just on its overclocking abilities. There are many other important aspects of the board you need to consider. Again, research is key. The general setup for most BIOS configurations is similar. This is what a Sabertooth 990FX BIOS looks like: From here you would go into Advanced Mode which will allow you to fine tune most minute details. All you’re looking for initially is changing the CPU clock speed and voltage. Again, these will vary by motherboard so really do read the manual. The CPU frequency I would recommend taking up by about .2-.3 GHZ initially then going in .1 GHZ increments after you achieve initial stability. The voltage I would be much more careful increasing. The ASUS board has a nice feature where the +/- keys would increase and decrease the voltage by .005V. The key idea is to use the lowest voltage while maintaining stability and not frying your CPU. I would take voltage up in one increment for each time you fail a stability test.
Stability Testing and the Great Nemesis
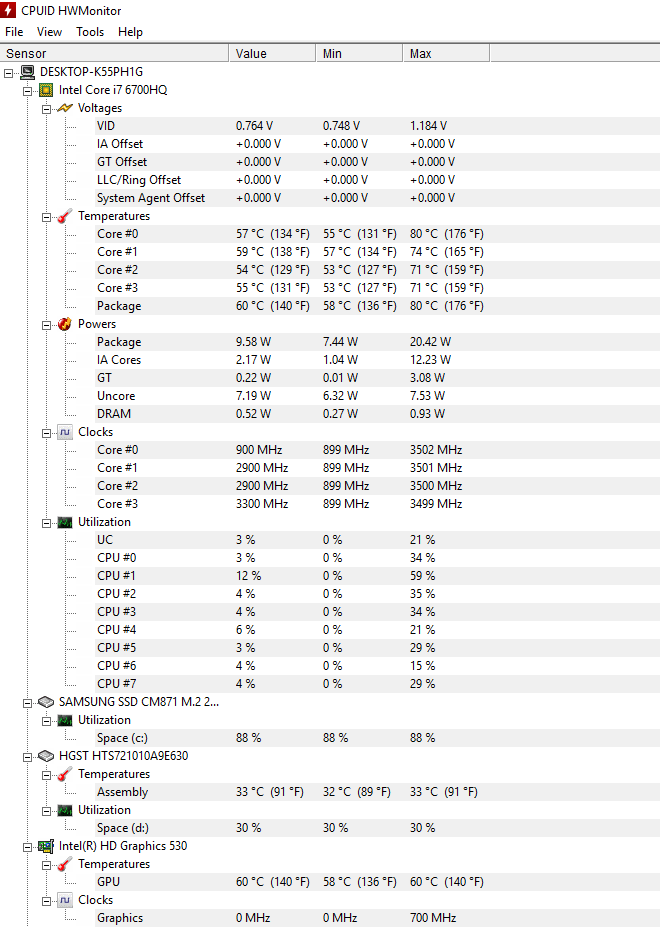
After having set your initial voltage you will want to start running some stability tests on your system. These normally use some variation of a CPU Burn test or a benchmark test. There are many free options available that all work very well. But, before you even begin you must prepare for the Great Evil. Temperature of course is your main concern when overclocking (along with over doing the voltage). Your first priority should be to find a hardware monitoring application that shows you temperatures for your CPU. My personal favorite is CPUID HWMonitor. First of all, its free. Second, it shows you a lot of useful information in a very simple to understand format. You are primarily concerned with the core temperatures for whichever processor you have. If you are running a benchmark that also involves graphics then you may also want to monitor your GPU temperature, although you should not need to be worried about that for these tests. Next, you simply run whichever test you have chosen. For a straight CPU test, I enjoy Prime95. It allows you to run a torture test and will show you when a core fails without stressing your entire build. Only downside is that it can take a very long time to run the test and it is generally not recommended to use your computer for other things while the test is running. If a core fails you restart your system, boot back into the BIOS, and up the voltage one increment and run the test again. You would continue this cycle until you achieve stability while maintaining a comfortable level of temperature and voltage. With my FX-8350 I clocked it up to 4.7Ghz but that was pushing the threshold of what I considered safe so I bumped it down to 4.5Ghz while maintaining around 60-70 degrees Celsius under load. This was with a water cooler so if you’re using an air cooler you should be even more careful. I generally don’t want my system getting anywhere past around 75 and most people would tell you that is too high. I would research around for what other overclocking users are maintaining as a safe operating temperature for your specific processor. Of course, be aware that depending on your cooler, fans, case size and ambient room temperature your temperature can vary within a few degrees. Also, changing out those parts (especially a liquid cooler for an air cooler) could allow you to push your system even further.
Was it worth it?
Now that you have overclocked and made your system stable you will want to run some performance benchmarks to see if you actually had an increase in performance. Hopefully, you ran some before you did the overclocking to have a comparison. Depending on which benchmark you use you may also see different results. I used 3DMark which is available on Steam. However, 3DMark is a more graphically centered benchmark and I saw very little increase in the CPU performance. In the future, I would most likely use a compression test benchmark. What benchmark you choose to use is completely up to you and why you are overclocking. I initially chose a graphically intense one because I was overclocking hoping to improve gaming performance. Assuming you used a cheap processor for the this initial run now you can move onto a more expensive processor if you need too.
Fortnite Building Guide For BeginnersThe Cheat Engine (Complete Guide) for BeginnersHow to Get Started with ReShade and SweetFX for Beginners[FIX] Overclocking Failed Error Message During Boot